A Deeper Look Into the WordPress Text Editor
- WordPress
- 3,965 views
- Barton S.
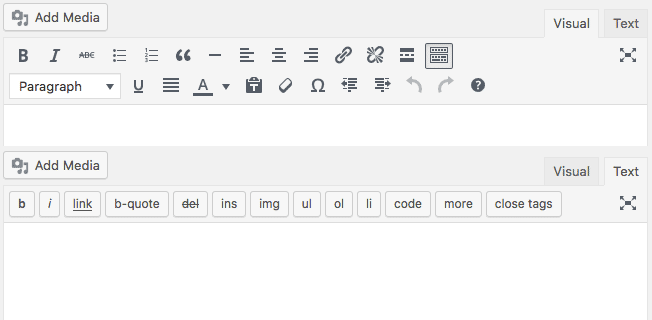
When we create or edit a post in WordPress we have two content editors to choose from: the TinyMCE visual editor, and WordPress text editor which consists of a text area element enhanced by a set of buttons providing a quick way to inject HTML code into post content.
Users can easily switch from visual to text mode just clicking on the upper right labels. WordPress will preserve the post content, but TinyMCE would convert special characters into the corresponding HTML entities. For this reason, you may prefer
Recommended reading:
Diving Into the New Gutenberg WordPress Editor (Pros and Cons)
What’s New in WordPress 5.0 (How to Prepare for Gutenberg)
The text editor shows exactly the HTML structure of the post content, and it grants the complete control over user input, so this post is all about WordPress text editor. First, we will dive into the topic from a developer perspective: we’ll look at the Quicktags JS API, the quicktags_settings filter and the wp_editor() function.
The final section of this post is dedicated to non-developers. I will present you a plugin that allows users to configure the text editor quickly and easily from WordPress admin panel.
WordPress Text Editor
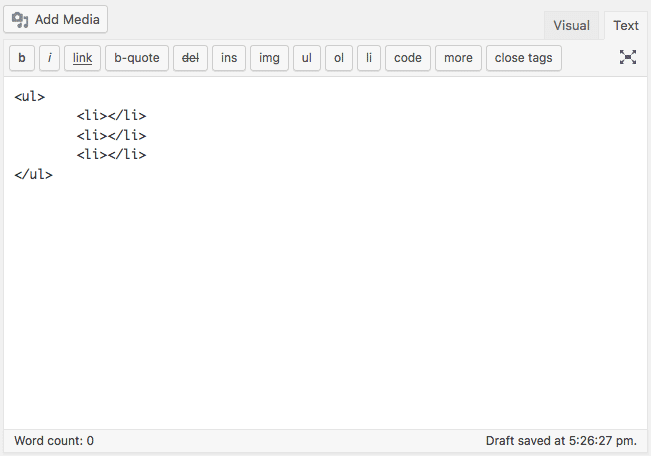
Either if you’re used to add a lot of code into your posts, or you just like to preview the exact HTML structure of your content, you may prefer the barebones text editor to the easy of use of the advanced visual editor.
However, the text editor is not just a form element. The editor toolbar provides a set of buttons (called quicktags) that allow users to quickly inject a good number of tags into the HTML post structure.
By default, WordPress provides the following quicktags:
- a
- strong
- code
- del
- em
- ol
- ul
- li
- img
- blockquote
- ins
- fullscreen
- lookup
- close
Default settings can be overridden thanks to the Quicktags API. It is a JavaScript API which provides an easy way to add custom buttons and inject code and content into the editor textarea.
The QTags.addButton method adds a button to the toolbar and is defined as follows:
QTags.addButton(
	id,
	display,
	arg1,
	arg2,
	access_key,
	title,
	priority,
	instance );
This method keeps the following parameters:
- id (string) (required) is the HTML id for the button;
- display (string) (required) is the HTML value;
- arg1 (string) (required) is the opening tag to be included or a custom callback function to be run when the button is clicked;
- arg2 (string) (optional) is the closing tag;
- access_key (string) (optional) is a shortcut key for the button;
- title (string) (optional) is the HTML title;
- priority (int) (optional) is a number representing the position of the button in the toolbar;
- instance (string) (optional) limits the button to a specific instance of Quicktags.
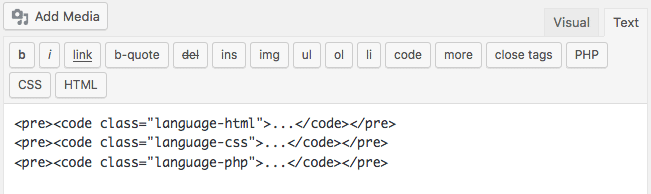
Now let’s suppose we’d want to add the tags required by a syntax highlighter like Prism, and we’d like to provide the editor toolbar with buttons that prints the following markup:
<pre><code class="language-php"></code></pre>
<pre><code class="language-css"></code></pre>
<pre><code class="language-html"></code></pre>
To accomplish this task we need to add the following code to the main file of a plugin:
function my_quicktags() {
	if ( wp_script_is( 'quicktags' ) ) {
	?>
	<script type="text/javascript">
	QTags.addButton( 'eg_php', 'PHP', '<pre><code class=\"language-php\">', '</code></pre>', 'p', 'PHP Code', 100 );
	QTags.addButton( 'eg_css', 'CSS', '<pre><code class=\"language-css\">', '</code></pre>', 'q', 'CSS Code', 100 );
	QTags.addButton( 'eg_html', 'HTML', '<pre><code class=\"language-html\">', '</code></pre>', 'r', 'HTML Code', 100 );
</script>
<?php
}
}
add_action( 'admin_print_footer_scripts', 'my_quicktags' );
admin_print_footer_scripts is an action hook used to print scripts in admin pages footer. The callback function checks whether the quicktags script is in use, then prints the JS code.
This script adds three more buttons to any instance of the Quicktags in the admin panel, as shown in the image below.
Adding buttons to the editor toolbar is quite straightforward, but we can do much more with the Quicktags API. As an example, we can pass to the QTags.addButtonmethod a callback function to run when the user clicks on the corresponding button. Consider the following code:
function custom_quicktags() {
if ( wp_script_is( 'quicktags' ) ) {
?>
<script type="text/javascript">
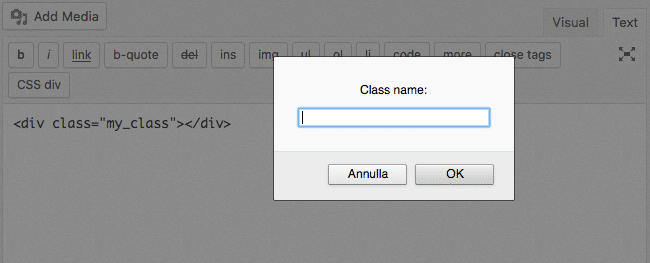
QTags.addButton( 'eg_callback', 'CSS div', css_callback );
function css_callback(){
var css_class = prompt( 'Class name:', '' );
if ( css_class && css_class !== '' ) {
QTags.insertContent('<div class="' + css_class +'"></div>');
}
}
</script>
<?php
}
}
add_action( 'admin_print_footer_scripts', 'custom_quicktags' );
css_callback is a custom JS function to run when the user clicks on the custom button. In our example, the function prompts an input box to allow users to set a class name for a div element.
The QTags.insertContent method will print the specified string into the editor textarea.
So far we’ve been adding quicktags to the WordPress editor in admin pages thanks to the admin_print_footer_scripts action. If you’d have any instances of the editor in the site front-end, you should hook the callback function to the wp_print_footer_scripts action, instead.
Anyway, in production you should consider to enqueue your JavaScript files to WordPress registered scripts, as well explained in How to Enqueue your Assets in WordPress. A useful tool to build custom quicktags is the Quicktags Generator by GenerateWP.
Overriding Quicktags Settings
The Quicktags API provides a method to add new buttons to the toolbar. WordPress allows us to remove buttons as well, thanks to the quicktags_settings filter.
function my_quicktags( $qtInit, $editor_id = 'content' ) {
$qtInit['buttons'] = 'strong,em,link,block,del,ins,img,ul,ol,li,code,more,close';
return $qtInit;
}
add_filter( 'quicktags_settings', 'my_quicktags', 10, 2 );
The callback function keeps two arguments: $qtInit is an array of settings, and $editor_id is the editor unique ID. In our example, $editor_id defaults to ‘content’, which is the ID of the editor textarea in editing post pages.
Note that tag names in the quicktag list are separated by commas not followed by blank spaces.
This function will override default settings and can be used to remove all buttons from the toolbar as well:
function my_quicktags( $qtInit, $editor_id = 'content' ) {
$qtInit['buttons'] = ',';
return $qtInit;
}
add_filter( 'quicktags_settings', 'my_quicktags', 10, 2 );
We’ve assigned a comma as value for the ‘buttons’ element of $qtInit array. An empty string won’t work as expected and default settings won’t be overridden.
Including the WordPress Editor Into Front Pages
Available from version 3.3, the wp_editor function provides an easy way to include the WordPress editors anywhere into the site.
The function is defined in wp-includes/general-template.php file as follows:
wp_editor( $content, $editor_id, $settings = array() );- $content (string) (required) sets the initial content of the editor;
- $editor_id (string) (required) sets the id attribute for the textarea and TinyMCE editor (can only contain lowercase letters and underscores);
- $settings (array) (optional) an array of arguments.
The array of arguments allows to set a lot of configuration parameters for both editors, and a specific argument can be used to pass settings directly to Quicktags (see the full list of arguments in the Codex).
As an example, you may want to include the editor in a page template. Consider the following example:
$content = '';
$editor_id = 'mycustomeditor';
$settings = array(
		'wpautop' => false,
		'media_buttons' => false,
		'quicktags' => array(
'buttons' => 'strong,em,del,ul,ol,li,block,close'
),
);
wp_editor( $content, $editor_id, $settings );
This few lines of code print an empty editor with id of ‘myeditor’ and the specified buttons into the text editor’s toolbar.
- The wpautop argument is set to false, so that the p elements will be used to wrap paragraphs into the editor,
- the media_buttons argument is set to false, so that the user won’t be able to upload media files,
- the quicktags array determines the buttons to show in the text editor toolbar.
For what concerns the WordPress text editor, the main difference between the wp_editor() function and the quicktags_settings filter is that the function applies to a specific instance of the editor, and can be used to include new editors anywhere into the site (like page templates), while quicktags_settings filter hook filters all existing instances and can’t be used to generate new instances of the editor.
The full code of the examples above are available on Gist.
Enhancing WordPress Text Editor With AddQuicktag Plugin
If you need a tool to quikly add buttons to the WordPress text editor, AddQuicktag is the plugin for you.
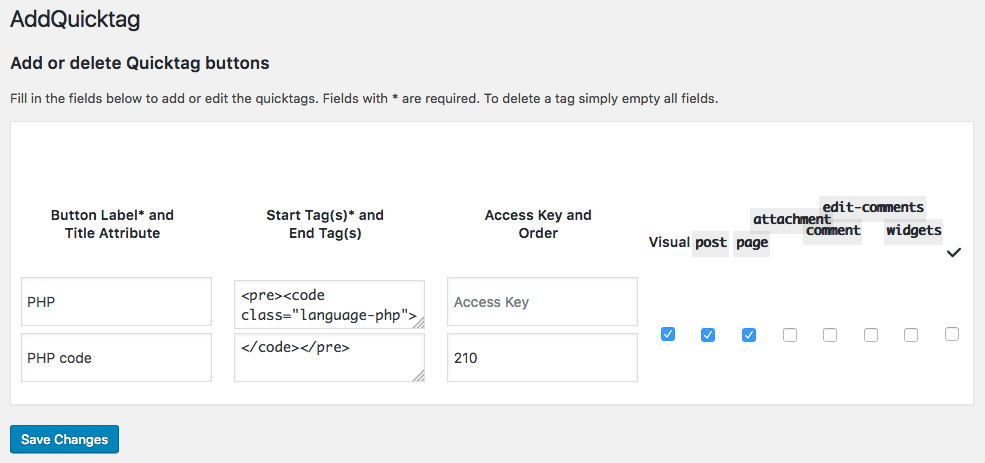
The plugin provides an option page accessible from Settings menu. In this page the admin user can add custom buttons and remove existing buttons.
AddQuicktag allows configuring the editor specifically for posts, pages and other editor enabled textareas, in available (comments, text widgets, and so on).
The plugin adds Quicktags to the visual editor, as well. Just check to »Visual»option, and the visual editor will show a Quicktags pulldown menu with your custom buttons.
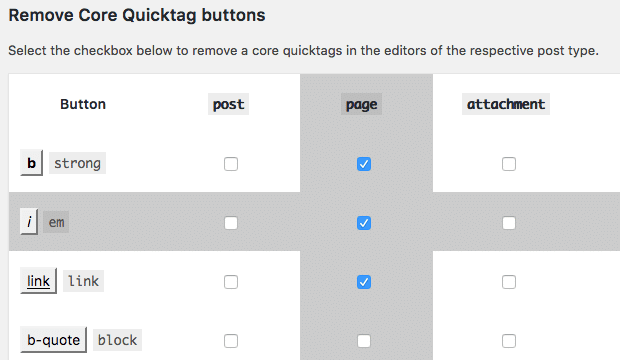
The second section of AddQuicktag option page is dedicated to built-in quicktags configuration. In this section it’s possible to remove buttons in specific textareas.
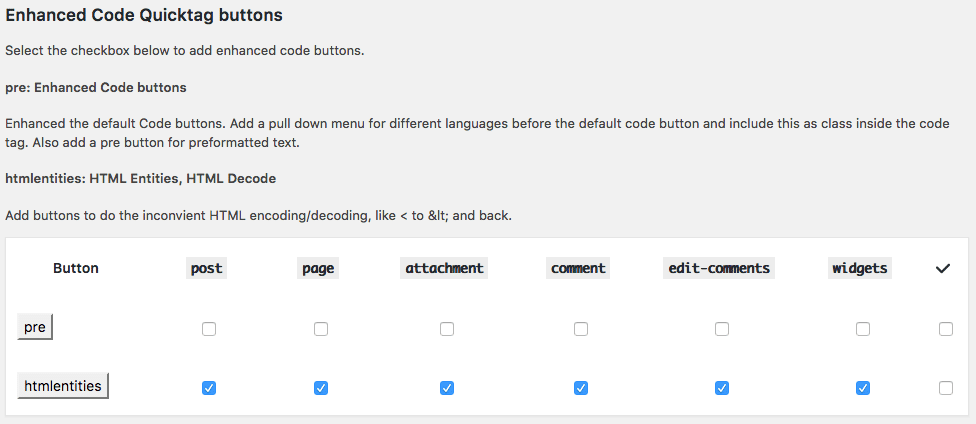
The final section provides additional functionalities to the editor toolbar. The first row of options enhances the default code button, providing a select menu which set a CSS class for the code tag depending on the selected language.
The second row provides two buttons which encode and decode special chars (htmlentities).
Summary
If you are a developer, you may find useful to add a theme or plugin-specific features to WordPress editors. The Quicktags API and a good number of filters and functions provide useful tools allowing us to add value to our products. And if you’re not a developer, you can configure WordPress editors as well, thanks to several plugins available for free in the WordPress Plugin Directory, like the AddQuicktag plugin presented in this post.
Do you have any further ideas about useful features to add to WordPress text editor?