Installing an SSL certificate on IIS 8&10
- SSL Installation
- 4,018 views
- Aelswith E.

Table of contents:
SSL Installation process
Get your SSL files ready
Install the SSL
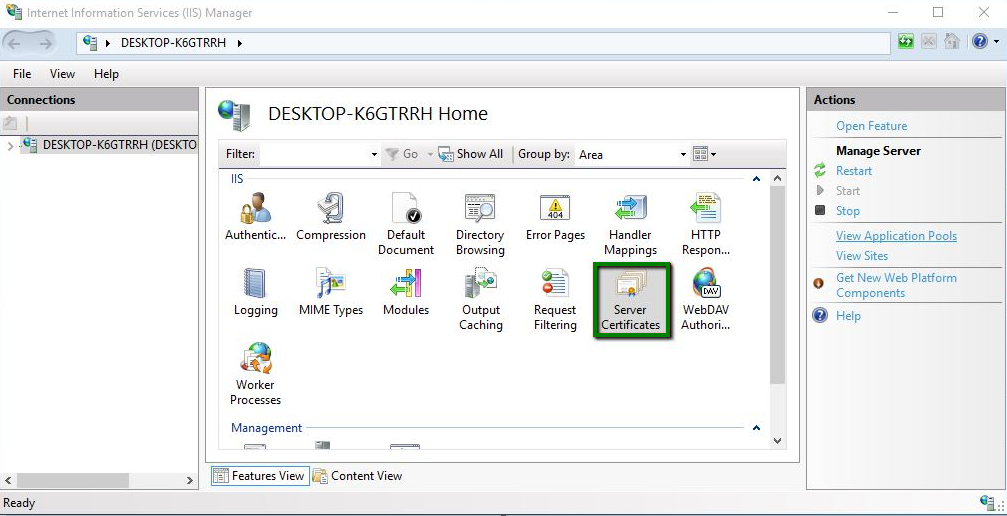
- Start Internet Information Services (IIS) Manager by entering “inetmgr” into the search field located near the Start button or in the Run window, which can be launched by pressing the Win+R hotkey.
- Double-click on the Server Certificates icon in the IIS Manager’s home page.
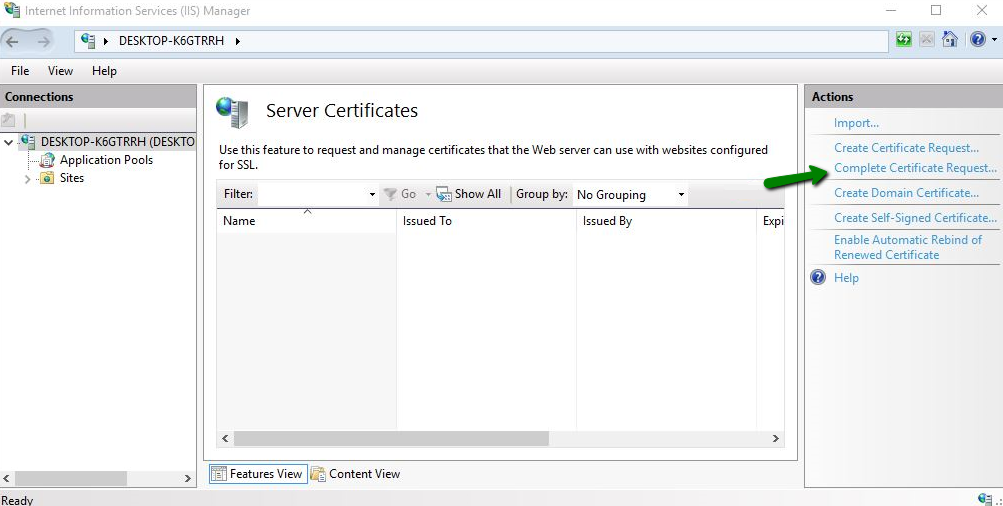
- Hover the mouse over the Actions pane on the right side of the window and click Complete Certificate Request.
- The next screen – Specify Certificate Authority Response – contains 3 fields:
- File name containing the certification authorityâ$™s response – browse the file system to find the .p7b certificate file.
- Friendly name – this field helps the server administrator to easily locate a particular certificate. For example, the domain name of the certificate can be specified in this field.
- Select a certificate store for the new certificate – keep this set to Personal, the default value.
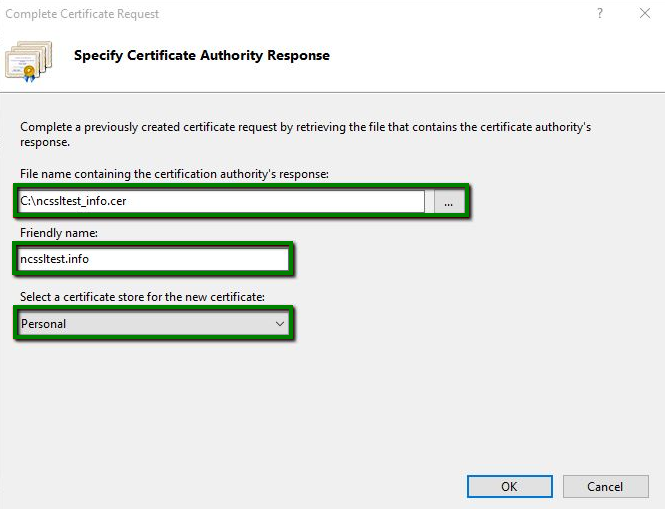
- When you have completed all the fields, click OK to import the certificate to the server storage.
Note: If you receive a “Cannot find the certificate request…” error at this point, please refer to this part of the guide.
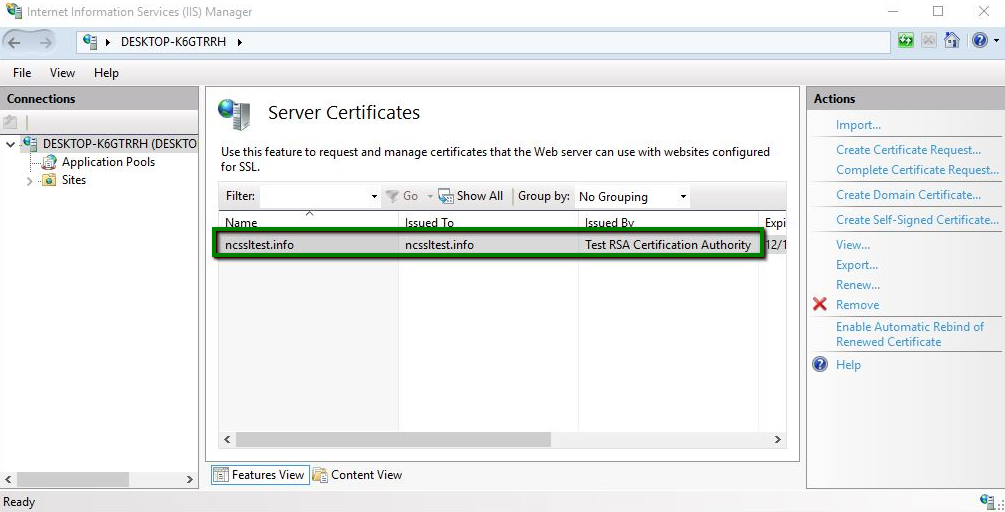
- If installation is successful, a new entry will appear on the Server Certificates page.
Note: If the certificate disappears from the list after importing, please check this part of the guide for a solution.
Bind the SSL to your site
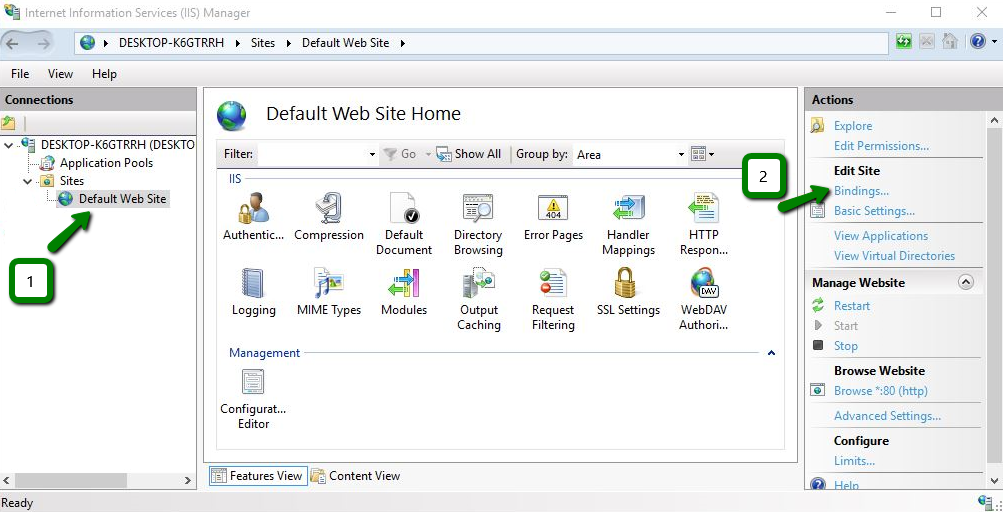
- The installed SSL certificate must now be assigned to a website by binding it to a secure port. To do this, select the Sites folder in the Connections panel on the left side of IIS Manager and click on the corresponding site. Then, in the Actions panel on the right side, select Bindingsâ$¦.
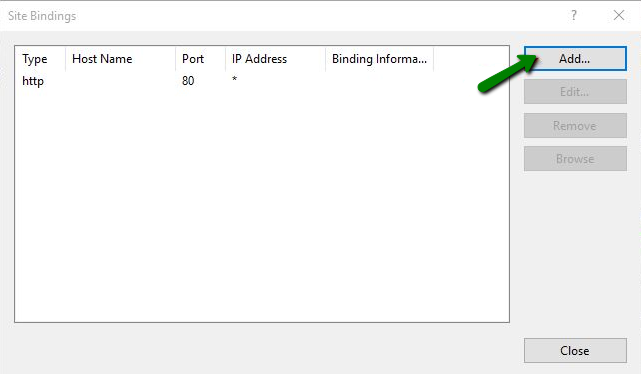
- Click Add… on the right side of the Site Bindings window.
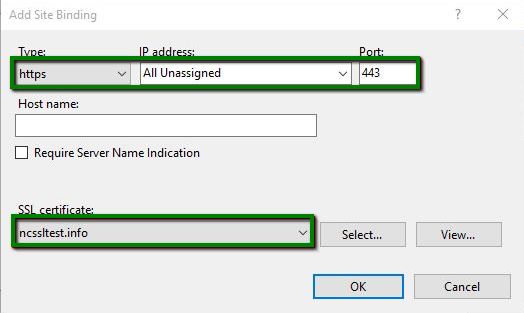
- The next pop-up window will feature several fields that need to be modified:
- Type – select “https” from the drop-down menu;
- IP address – choose the specific IP address or “All Unassigned”;
- Port – specify the port number for a secure connection. The default port number is 443;
- SSL certificate – select the corresponding certificate, identified by the previously specified Friendly name.
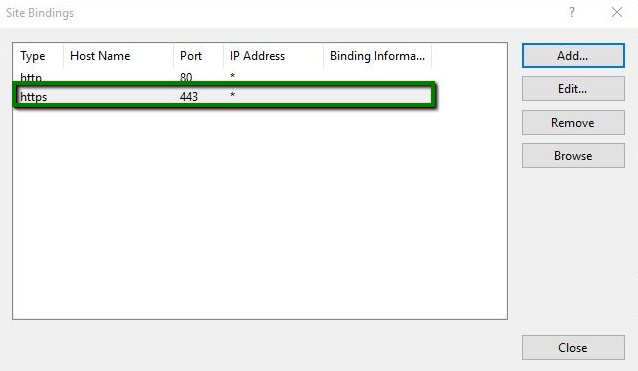
- Click OK to bind the certificate with the site. The new entry should appear in the Site Bindings window.
Note: Usually, there is no need to restart the server, so after the SSL certificate has been installed and the binding created, your site should become accessible via https:// in a browser.
To check if the certificate has been successfully installed, you can use this tool.
HTTPS redirect
Once you have an SSL certificate installed on your domain, you should enable HTTPS redirect to force all HTTP requests to use HTTPS instead. HTTPS is an extension of the HTTP protocol where the data transmission is encrypted using an SSL certificate.
On Windows, the HTTP to HTTPS redirection can be enabled with the help of the URL Rewrite module. To do this, follow our step-by-step guide that features screenshots.
You can use this checker to see if the redirect was successfully enabled.
Possible issues with installation
“Cannot find the certificate request…”
Upon installing an SSL certificate on IIS, you may receive the following error:
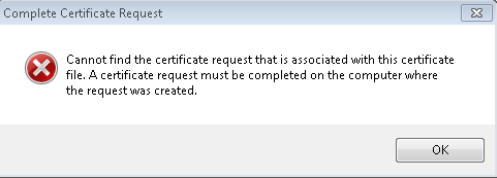
The most common reason for this is that you are trying to import an SSL certificate activated with a Certificate Signing Request (CSR) generated outside of the server. If that is the case, you can:
- Create a PFX using the certificate, CA bundle and private key and import it into IIS. A PFX certificate file can be created in different ways, for example:
- Using OpenSSL, as shown here;
- Using an online converter (PFX is PKCS12 formatted).
- Reissue your certificate with a CSR generated on the server and install it with the .p7b file.
Note: make sure to create or edit the binding after the certificate is imported.
If you are sure the CSR was created on the server and you still receive this error, you can try the following:
- Close the error window and refresh the installation window by pressing F5, and try again. If the certificate appears, finish the SSL installation by creating or editing a binding.
- If the certificate does not appear, you can try to assign a friendly name to it by using MMC or certutil. The issue may be occurring due to the friendly name being left blank, so make sure to set it during installation. Check out the official article from Microsoft on this issue or refer to our detailed step-by-step guide.
If neither of the steps above helped, reissue your certificate using a new CSR created on the server and try to install it again.
SSL disappears from the list
Another common issue is the certificate disappearing from the list upon import. The possible methods of resolving this are similar to the the previous issue:
- If the CSR was created outside of the server, create a PFX and import it into IIS. A PFX certificate file can be created by using OpenSSL as shown here, or by using our online converter (PFX is PKCS12 formatted).
- Reissue and install the certificate with a CSR created on the server.
If the CSR was created on the server but the certificate disappears, you can try to force the link between the certificate and the private key. A detailed guide on the process can be found here.
Incomplete certificate chain
There is another issue that can be spotted on a Windows server. Even if you have an SSL certificate correctly installed, some users still may face security warnings when entering your site. The root cause is a peculiarity of how Windows servers handle the SSL handshake, which causes it to use an incorrect Root certificate from the Certificate Authority (CA) Bundle.
Although this issue is not common, it can happen on old devices. Read our detailed article on the subject to find out more and how you can resolve it.