Why and How to Publish a Plugin to the WordPress Plugin Directory
- Category : WordPress
- Posted on : Jun 15, 2019
- Views : 4,140
- By : Barton S.

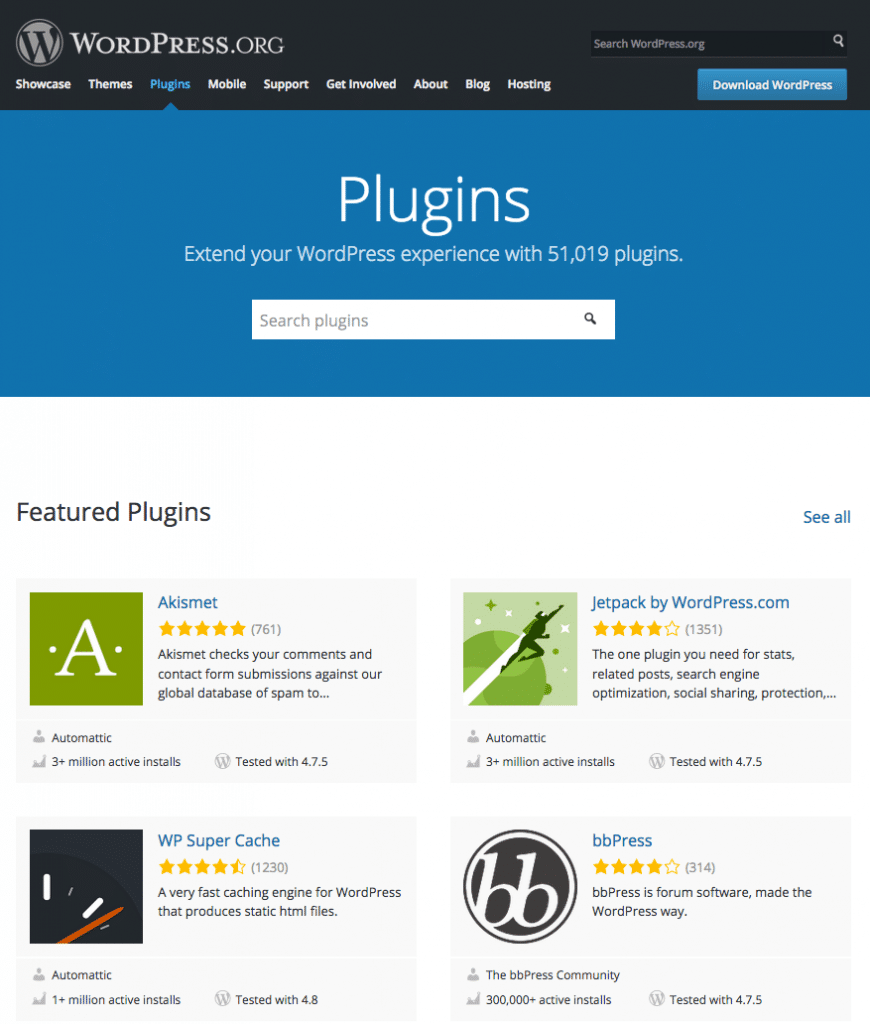
With over 50,000 free plugins, the WordPress Plugin Directory is the city mall for every WordPress user, and where you’ll find plugins covering all features and functionalities for your next website. Nevertheless, chances are that you won’t find a plugin providing that exact feature expressly required by your client. Like it or not, you may have to launch your favorite text editor and start coding. But have you ever considered the possibility to share your plugins with the whole WordPress community?
The main purpose of this post is to explore with you readers the benefits of distributing plugins through the WordPress.org repository. I will quickly summarize recommendations and best practices you are encouraged to follow, then I will drive you through the SVN key concepts you should know when you’re planning to publish a plugin to the WordPress plugin directory.
- Why the WordPress Plugin Directory?
- What You Should Care About
- The Plugin Structure
- Publishing to the WordPress Plugin Directory
Why the WordPress Plugin Directory?
The first reason to publish your plugin to the WordPress plugin directory is to take advantage of a number of great tools and services for free, such as plugin description, statistics, active installs, changelog, support forum, and more. In addition, users are notified anytime a new version is available and can run the upgrade directly from the WordPress Plugins Screen. WordPress.org plugins have greater visibility in search engines, and you can exploit a powerful medium to promote your identity and improve your reputation as a developer.
If you aren’t a great marketer or don’t have time to market, the WordPress plugin directory can be a great way to get free traffic and eyeballs on your plugin.
Another good reason for publishing a plugin is to contribute to the WordPress community. WordPress is free software, with a huge community providing tons of themes and plugins for free. Publishing a WordPress plugin is the best way to give thanks to all these awesome people who give away their work for free.
What You Should Care About
Bear in mind that a greater visibility could ruin your reputation if your plugins are badly coded, if you do not regularly update them, or if you do not provide a quick and efficient support (definitely, if you don’t act as a trusted developer). Here are some key concepts to pin up.
Coding
There is a lot to say about coding, and you’ll find a lot of useful readings out there. But if you’re a WordPress developer, the Codex is your Bible, and you should read the Plugin Guidelines before you start coding. Here is my personal list of key concepts:
- Keep your code human readable. This allows other developers to understand what your plugin does, to possibly help you find bugs, and to develop their own plugins on your code. In order to boost collaboration between developers, the WordPress Codex provides the WordPress Coding Standards, which is a sum of best practices for any WordPress developer.
- Always comment your code. Inline documentation is a great resource you should never underestimate. It allows anyone to quickly understand what a function does, which arguments are accepted, which variable returns, etc. In the comments, you can add links, script versions, and other descriptions that can come in handy anytime your script is going to be edited by you or anyone else.
And I like to say that WordPress people are a learning community, and abiding the Inline Documentation Standards is a great way to let people learn what you already know. - Prefer WordPress functions instead of PHP functions when possible. WordPress functions allow you to build secure and efficient code. Especially when you need to get data from the database, API functions save you from building complex queries, that could most probably be less secure than the built-in WordPress queries. There are a lot of great developers behind the core, and they are doing a fantastic job we can take advantage of.
Features
Even if you won’t get paid for your work, you should consider your plugins like products to sell. You are not required to be a marketing specialist: you just have to know that your plugin should be some way unique and/or distinguishable from similar plugins. Give your plugin a memorable and meaningful name, and unique features that will make people say “I need it!”. And, if your plugin provides features that are already covered by other plugins, focus on accessibility and ease of use to give users a value-added making a clear difference between your product and its competitors.
Support
Each plugin distributed through the Plugin Directory has a specific forum where users will contact you for help. Provide clear answers to user questions, and help them troubleshooting their problems. Quick and appropriate replies will be crucial in building your reputation as a trusted developer. Take into account any topic, and grab any piece of information that could help you improve your plugin.
Updates
Regularly update your plugin, pushing small changes when needed, but do not exceed. Too many updates can disappoint your users.
Licensing
WordPress is released under GNU General Public Licence V2 and most plugins are released under the same GPL license. Actually, it’s not strictly required to release the plugin under the same license, as any compatible license is admitted. Anyway, GPLv2 is recommended (read more about GPL licensing).
In order to provide a working example for this post, the plugin we dissected in 4 Handy WordPress Media Library Hacks has been published to the Directory. Download the EXIF Viewer and open its files in your text editor, then get back to this post and dive into the plugin structure.
The Plugin Structure
Your plugin will be stored in the WordPress.org SVN repository. Anyone will be able to check out a copy, but only the author will have the privileges to check in. Once you’ve published a plugin, you can add new files, and edit or delete existing files on your local machine, then upload these changes to the server. All changes are tracked by the subversion, so that you’ll be able to get back to old versions or revisions later.
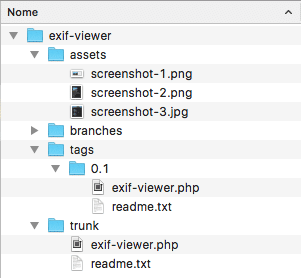
The SVN repositories provide four default folders:
/assets/
/branches/
/tags/
/trunk/- Screenshots, headers and icons go in assets
- trunk is the directory where you’ll put the plugin files
- Divergent branches of code go in branches
- Plugin releases will be stored in tags
Each plugin must be provided of at least two files: the readme.txt file and the main PHP script. Optionally, you can add a number of images (assets) to be displayed on the plugin’s page.
Plugin Assets
Assets are plugin headers, icons and screenshots. Plugin headers are the JPG or PNG images you can see at the top of a plugin page. File names depend on image width and height. Currently, the following name/dimensions are allowed:
- Regular: banner-772×250.(jpg|png)
- Retina: banner-1544×500.(jpg|png)
Icons are squared images with the following names/dimensions:.
- icon-128×128.(jpg|png)
- icon-256×256.(jpg|png)
- icon.svg
You should not specify the SVG dimensions in the file name, as these images can be scaled at any size. If you use SVGs, you must provide a PNG icon as a fallback.
Screenshots are images displayed in the plugin page content. PNG and JPEG formats are allowed, and the file name must be lowercase and respect the following structure:
- screenshot-1.(jpg|png)
- screenshot-2.(jpg|png)
For each screenshot, you should provide a description in the readme file. All these graphics should be added to the assets folder in your plugin’s local directory (more on How Your Plugin Assets Work).
The Readme.txt File
You should provide your plugin with a readme.txt file and appropriate headers in the main script.
First, you need a readme.txt file with the following information:
- Plugin name
- Contributors: (a list of wordpress.org userid’s)
- Donate link: http://example.com/
- Tags: (plugin tags)
- Requires at least: (WordPress version)
- Tested up to: (WordPress version)
- Stable tag: (plugin version)
- License: GPLv2 or later (or compatible)
- License URI: https://www.gnu.org/licenses/gpl-2.0.html
- Description
- Installation
- Screenshots
- Changelog
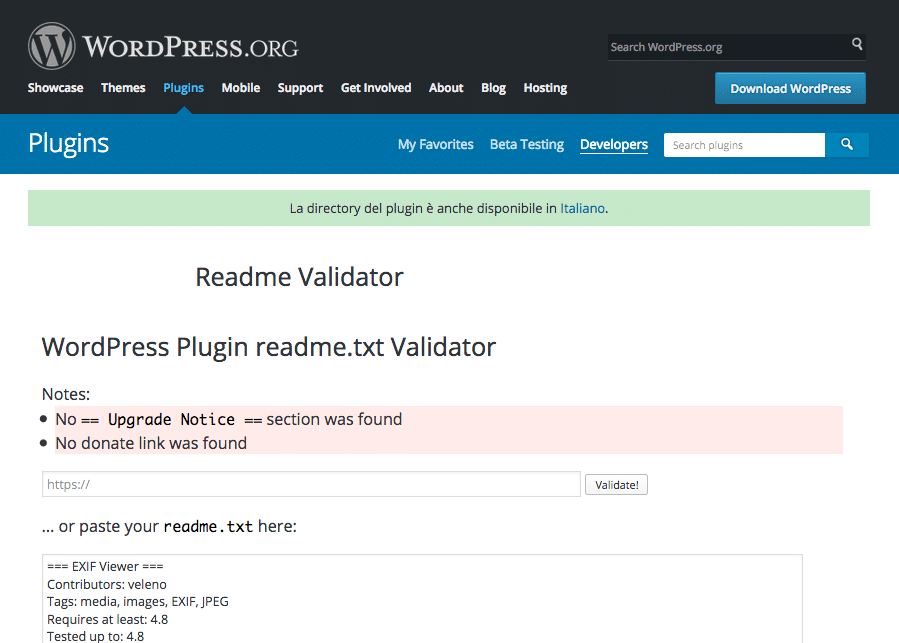
The Screenshots section allows you to add a description for any image you’d want to include to the plugin page. WordPress.org provides the plugin readme file standard template, which will help you build your readme file. Moreover, you can use the Readme Validator to check if your file is correct.
The Plugin Header Comment
The header comment tells WordPress that a file is a plugin.
If you’re not going to publish your plugin, the only required field is the plugin name. Conversely, if you’re planning to publish the plugin, the more information you add, the better. Here is a list of available fields:
- Plugin Name: (required) your plugin’s name must be unique. Before publishing, search the Plugin Directory for plugins with the same name
- Plugin URI: the home page of the plugin
- Description: a one-line plugin description (less than 140 characters)
- Version: the current plugin version (must be higher of the previous version)
- Author: one or more author names, separated by commas
- Author URI: the author’s home page
- License: the slug of the plugin’s licence (i.e. GPL2)
- License URI: the link to the full text of the license (i.e. https://www.gnu.org/licenses/gpl-2.0.html)
- Text Domain: the text domain of the plugin
- Domain Path: where to find the translation files (see How to Internationalize Your Plugin)
Here is the header comment of one of the most popular WordPress plugins:
<?php
/**
 * @package Akismet
 */
/*
Plugin Name: Akismet Anti-Spam
Plugin URI: https://akismet.com/
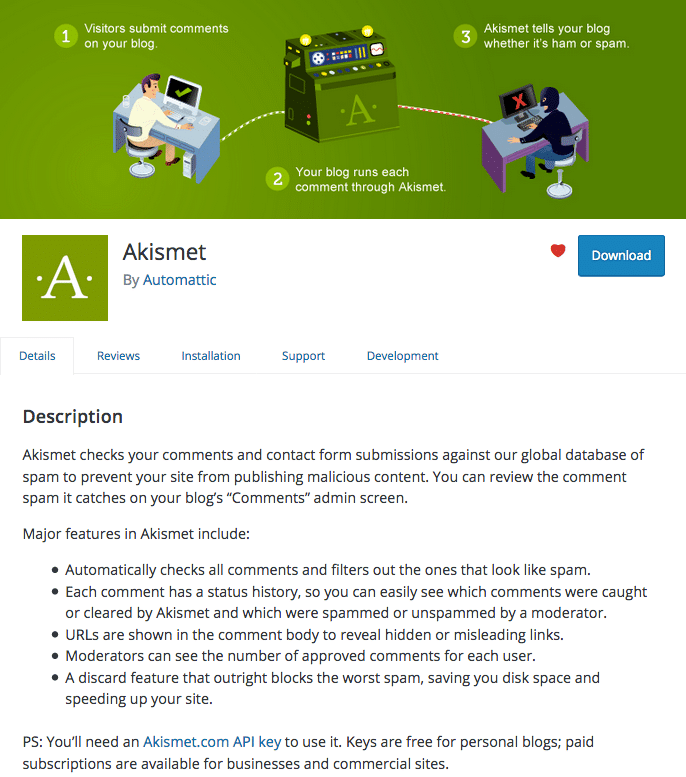
Description: Used by millions, Akismet is quite possibly the best way in the world to <strong>protect your blog from spam</strong>. It keeps your site protected even while you sleep. To get started: activate the Akismet plugin and then go to your Akismet Settings page to set up your API key.
Version: 3.3.2
Author: Automattic
Author URI: https://automattic.com/wordpress-plugins/
License: GPLv2 or later
Text Domain: akismet
*/
Publishing to the WordPress Plugin Directory
When ready, sign-up and submit your plugin.
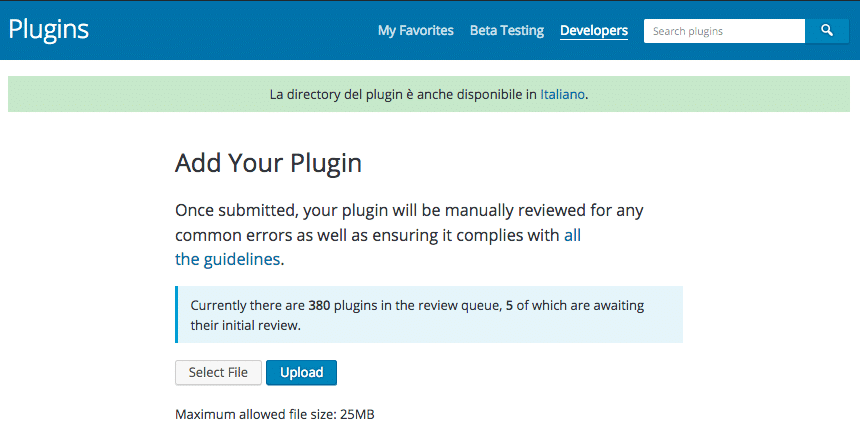
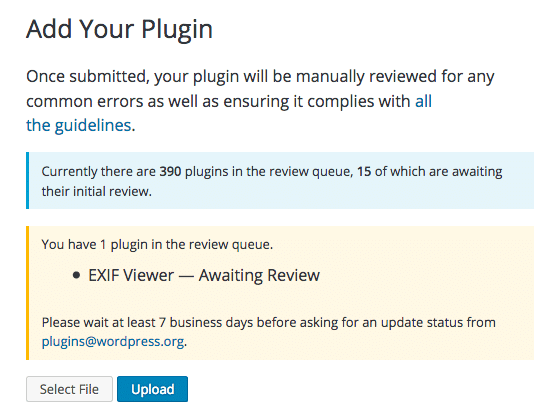
The plugin will be manually reviewed by the WordPress.org staff. This process could take between one and ten days. If any issues are found, you’ll receive an email explaining what’s wrong and what you should do to fix errors.
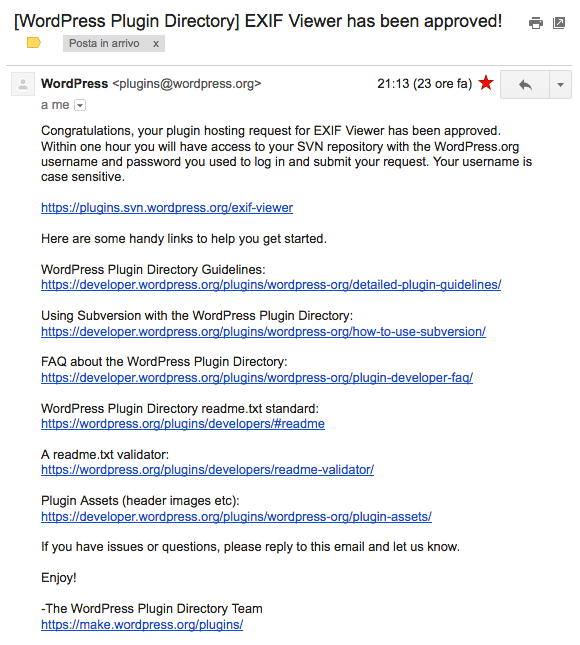
Once the plugin has been approved, you will receive an email letting you know that you have access to the SVN repository.
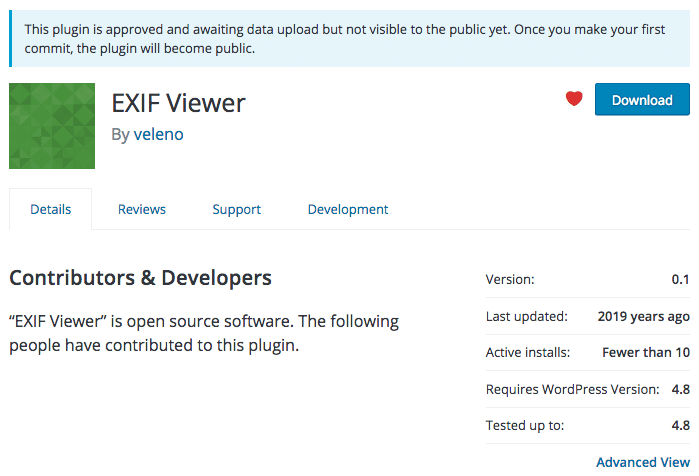
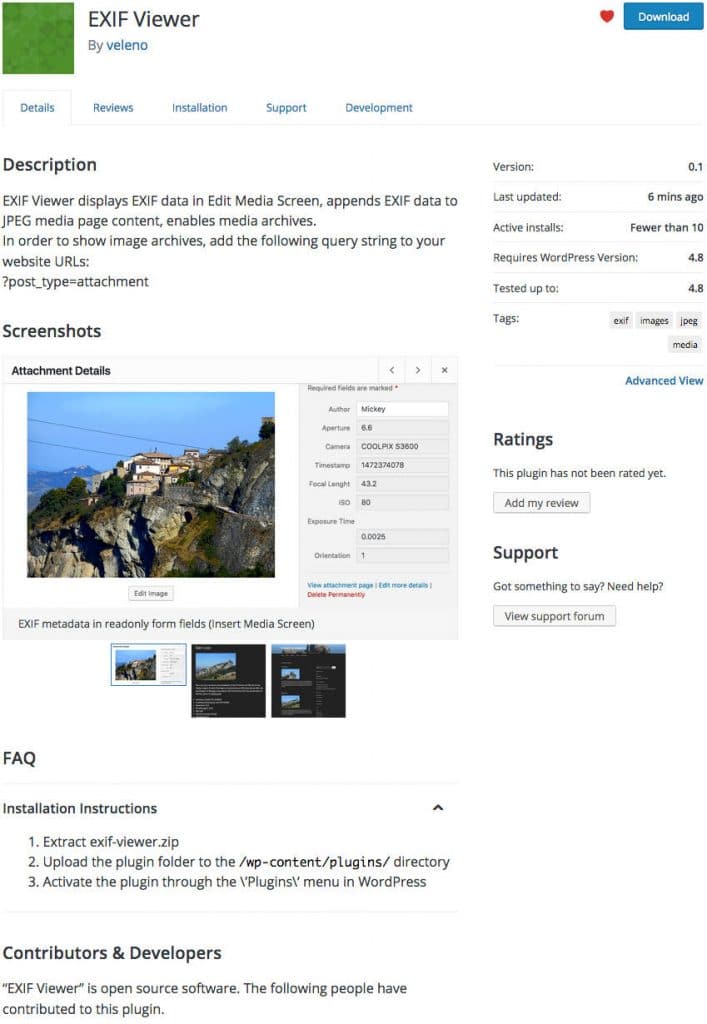
At this moment, the plugin is not available for download, but you can upload, edit and delete files via command line (or any SVN client). The image below shows the current plugin page.
Upload the Plugin
Our first task is to upload the plugin files to the SVN repository, but first we need a local folder where we will store the plugin files:
$ mkdir localdirNow we can check-out the pre-build repository:
$ svn co https://plugins.svn.wordpress.org/plugin-name path/to/localdirWe’ll get the following response:
> A    plugin-name/branches
> A    plugin-name/tags
> A    plugin-name/trunk
> Checked out revision 99999999.
A means that the folders have been added from the central repository to the local folder.
The next step is to add files to the local /trunk folder and upload them to the repository:
localdir/$ svn add trunk/*You’ll be required to authenticate yourself. Once logged in, you’ll get the following response:
> A    trunk/my-plugin.php
> A    trunk/readme.txt
Note: do not put the main plugin file in a subfolder of trunk, because this will break downloads.
Now check in the changes back to the repository:
localdir/$ svn ci -m 'First plugin version'And here is the final response:
> Adding trunk/my-plugin.php
> Adding trunk/readme.txt
> Transmitting file data .
> Committed revision 9999999.
Following, we have to add the plugin assets:
localdir/$ svn add assets/*Then check in the changes again:
localdir/$ svn ci -m 'Assets upload'And that’s it! Jump to your plugin’s page, and start promoting your work!
Publish a new release
Before you publish the next release, you must remember to update the Stable Tagfield in trunk/readme.txt file and the Version number in the plugin header comment. When the new release is ready for publishing, copy your files to a subfolder of /tagsand set the subfolder’s name to the version number (i.e. 1.0.1):
localdir/$ svn cp trunk tags/1.0.1
> A tags/1.0.1
Then check in the changes:
localdir/$ svn ci -m "tagging version 1.0.1"
> Adding         tags/1.0.1
> Adding         tags/1.0.1/my-plugin.php
> Adding         tags/1.0.1/readme.txt
> Committed revision 999999.
And that’s it! The new version is online.
Edit a file
Occasionally, you may need to make minor changes that do not require a new release. First, update the local copy of the repository:
localdir/$ svn up
> At revision 999999.
Then edit the files and check for changes:
localdir$ svn stat
> M       trunk/readme.txt
M means that those files have been modified.
Following, you can see what has changed between the two versions:
localdir$ svn diffFinally, ckeck in the changes to the central repository:
localdir$ svn ci -m "minor changes"
> Sending trunk/readme.txt
> Transmitting file data .
> Committed revision 999999.
Summary
Whether you decide to publish a light version of a commercial plugin, or you publish the plugin to contribute to the community, the WordPress.org Directory is the best place to distribute your work. It gives you a wide exposure and provides a number of professional tools for distributing and promoting your plugins.
Categories
- cPanel Question 47
- cPanel Software Management 29
- cPanel Tutorials 13
- Development 29
- Domain 13
- General 19
- Linux Helpline (Easy Guide) 156
- Marketing 47
- MySQL Question 13
- News 2
- PHP Configuration 14
- SEO 4
- SEO 42
- Server Administration 84
- SSL Installation 54
- Tips and Tricks 24
- VPS 3
- Web Hosting 44
- Website Security 22
- WHM questions 13
- WordPress 148
Subscribe Now
10,000 successful online businessmen like to have our content directly delivered to their inbox. Subscribe to our newsletter!Archive Calendar
| Sat | Sun | Mon | Tue | Wed | Thu | Fri |
|---|---|---|---|---|---|---|
| 1 | 2 | |||||
| 3 | 4 | 5 | 6 | 7 | 8 | 9 |
| 10 | 11 | 12 | 13 | 14 | 15 | 16 |
| 17 | 18 | 19 | 20 | 21 | 22 | 23 |
| 24 | 25 | 26 | 27 | 28 | 29 | 30 |
| 31 | ||||||
Recent Articles
-

Posted on : Sep 17
-

Posted on : Sep 10
-

Posted on : Aug 04
-

Posted on : Apr 01
Tags
- ts
- myisam
- vpn
- sql
- process
- kill
- tweak
- server load
- attack
- ddos mitigation
- Knowledge
- layer 7
- ddos
- webmail
- DMARC
- Development
- nginx
- seo vpn
- Hosting Security
- wireguard
- innodb
- exim
- smtp relay
- smtp
- VPS Hosting
- cpulimit
- Plesk
- Comparison
- cpu
- encryption
- WHM
- xampp
- sysstat
- optimize
- cheap vpn
- php-fpm
- mariadb
- apache
- Small Business
- Error
- Networking
- VPS
- SSD Hosting
- Link Building
- centos
- DNS
- optimization
- ubuntu

