What is Website Builder and How to Use It
- cPanel Software Management
- 1,552 views
- Aelswith E.
Namecheap’s new website builder is a cPanel tool that was developed in cooperation with our partner allows you to easily create an entire
website using a drag-and-drop editor and without knowing any code or installing special software.
Because of its visual design options and ease of navigation, it’s one of the best site builders for cPanel, removing the stress of having to learn a new program or paying someone else to build your new business website. With Website Builder, you simply drag, drop, click, and publish all of your content.
forms, buttons and text to your website. If you’ll be selling products or taking online payments, there are also e-commerce tools to help you add a store, shopping cart or
configure a payment processor.
Website Builder also allows you to add Google Analytics and Maps, develop pages in several
languages simultaneously and integrate .
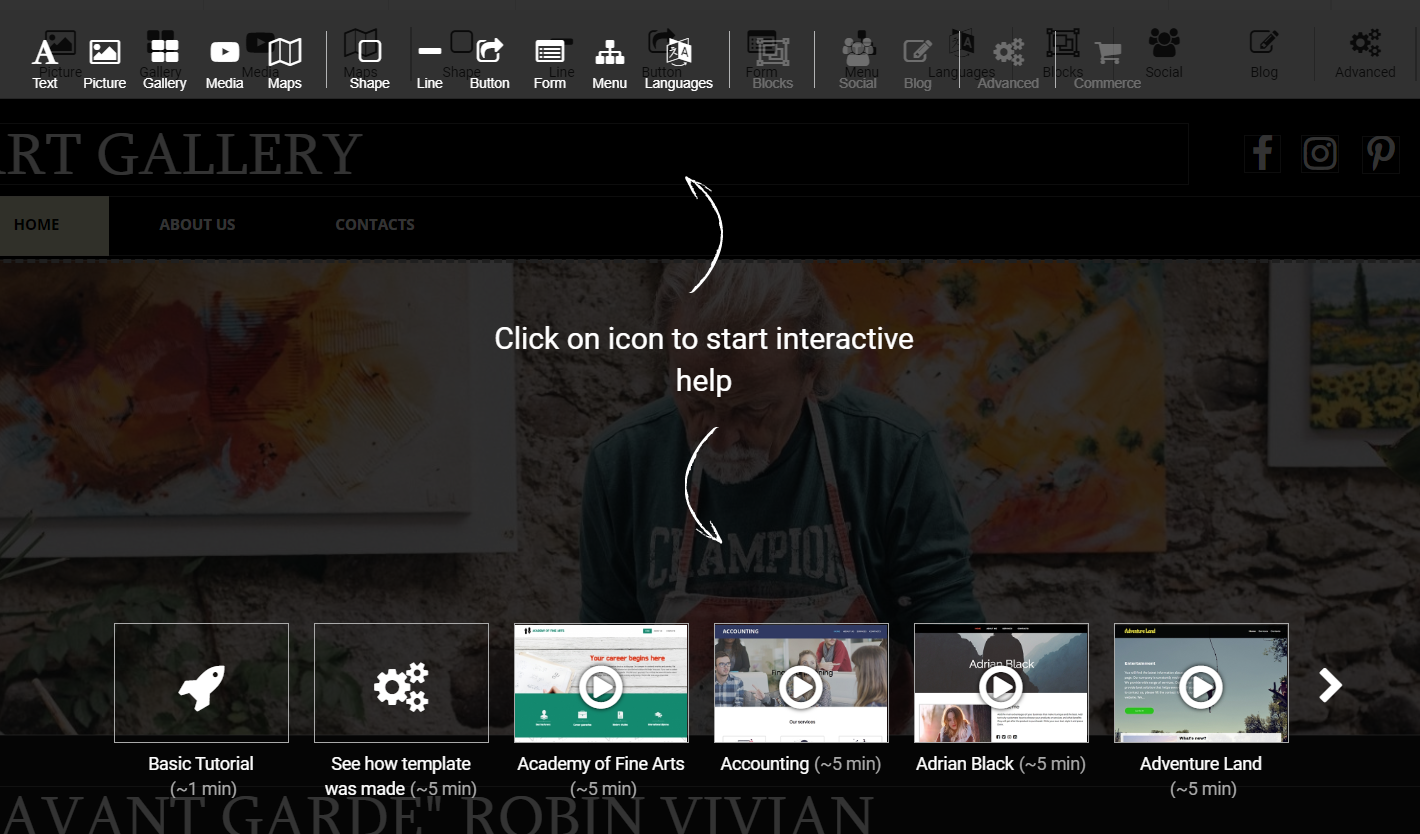
Website Builder includes short built-in interactive video
tutorials for each option and tool.
Have a look at the tutorials by clicking the  icon in bottom
right corner.
On the next page you can watch videos about Website Builderâ$™s basic settings or learn how the current template was created.
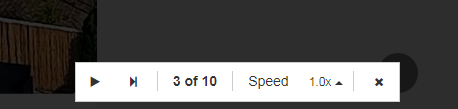
NOTE: You can control the playback using tools at the bottom of the page:
Keep reading to learn more about how to build a website with Website Builder. For another great option from Namecheap, take a look at EasyWP WordPress hosting, which also provides flexibility at a low cost.
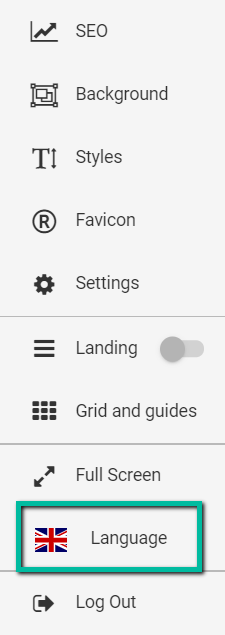
- Add menu items
- SEO
- Change background
- Styles
- Upload Favicon
- Settings
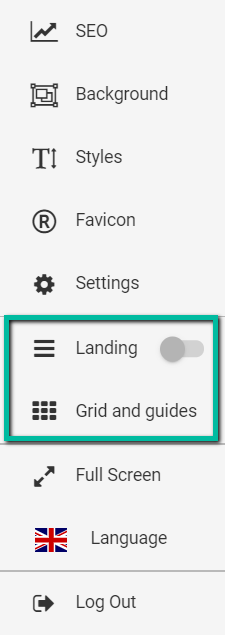
- Landing, Grid and Guides
- Change language of the editor
- Text
- Pictures
- Gallery
- Media
- Maps
- Shape, Line, and Button
- Add a contact form
- Menus and Languages
- Blocks and Social
- Advanced settings
- Commerce
Where Website Builder stores files
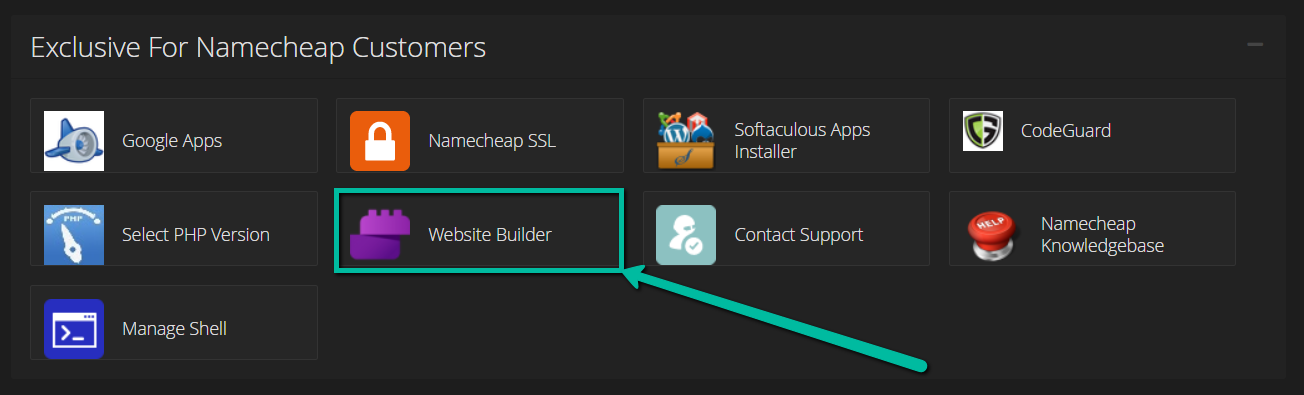
In cPanel, go to Exclusive for Namecheap customers section >> Website Builder menu:
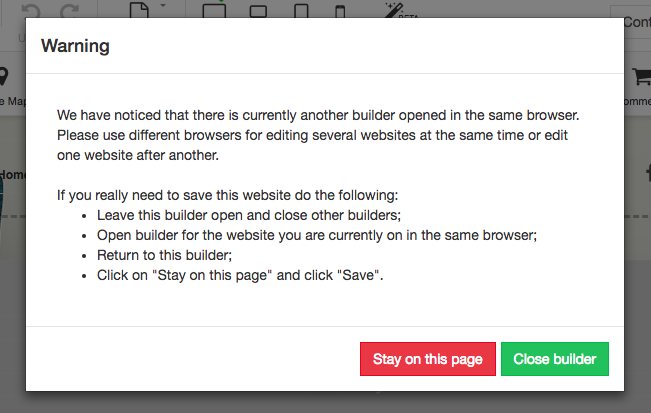
In the next menu simply click on a domain or subdomain for your new website. Then, you will be redirected to http://sitebuilder1.web-hosting.com/ to select a template.
NOTE: As the URL for Website Builder is the same for all domains and subdomains, do not open several windows of Website Builder in the same browser as it will interfere with your settings and the changes you have made may not be saved properly. Because of this, if you open two or more windows with Website Builder within the same browser and try to publish your website, you will see the following warning:
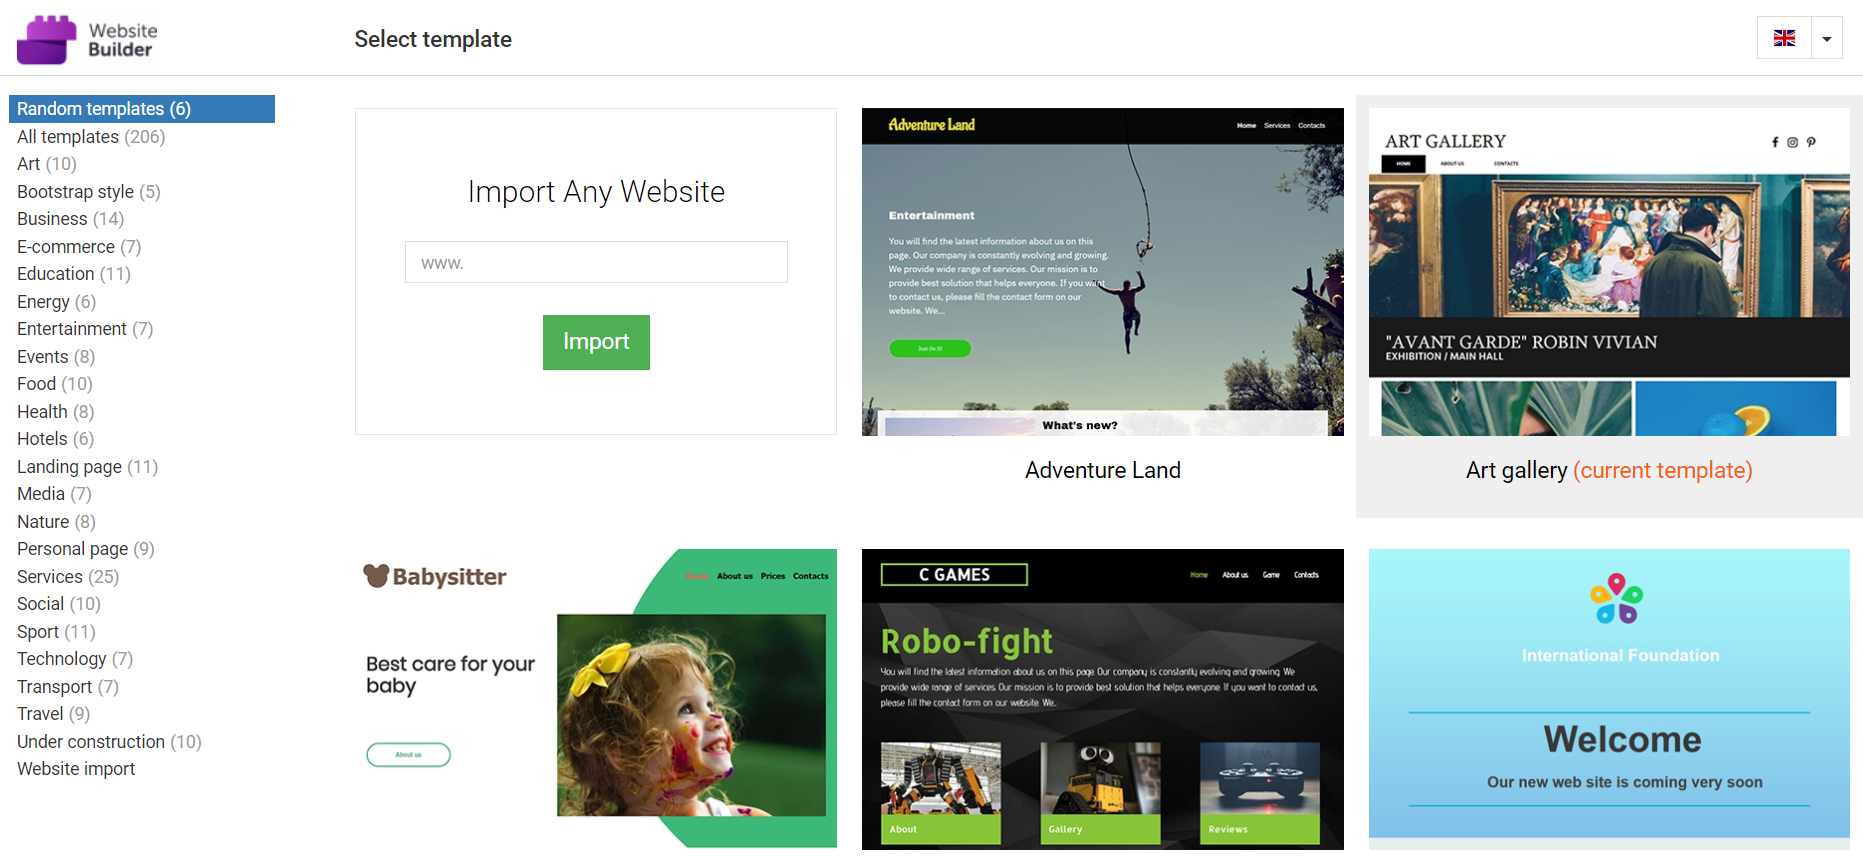
All templates are divided into different topics and can be found on the left-side menu:
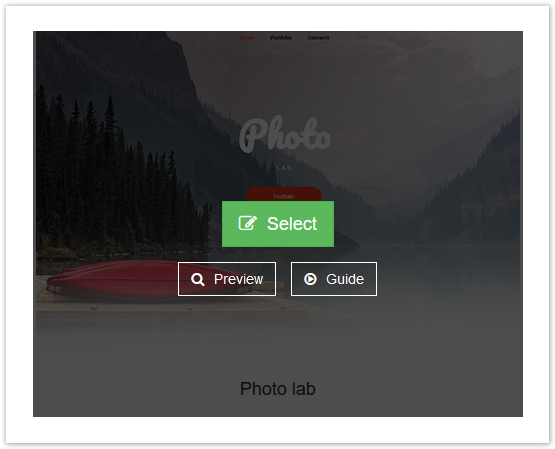
Simply hover over it and you will see the following options:
- Select – allows you to choose the template you wish to use to start creating your website
- Preview – redirects you to a preview version of your website with the selected template assigned. Here, you can see the look of your website with the selected template, before you make your website live
- Guide – redirects you to a video guide to give handy tips on how to use different options to create your site in the template. You can pause the video at any time or fast forward and even slow down the speed so you don’t miss anything! While this tool ‘creates’ the template in real time, you can change speed and stop this process at any moment and continue editing the website from the point where that tool stopped.
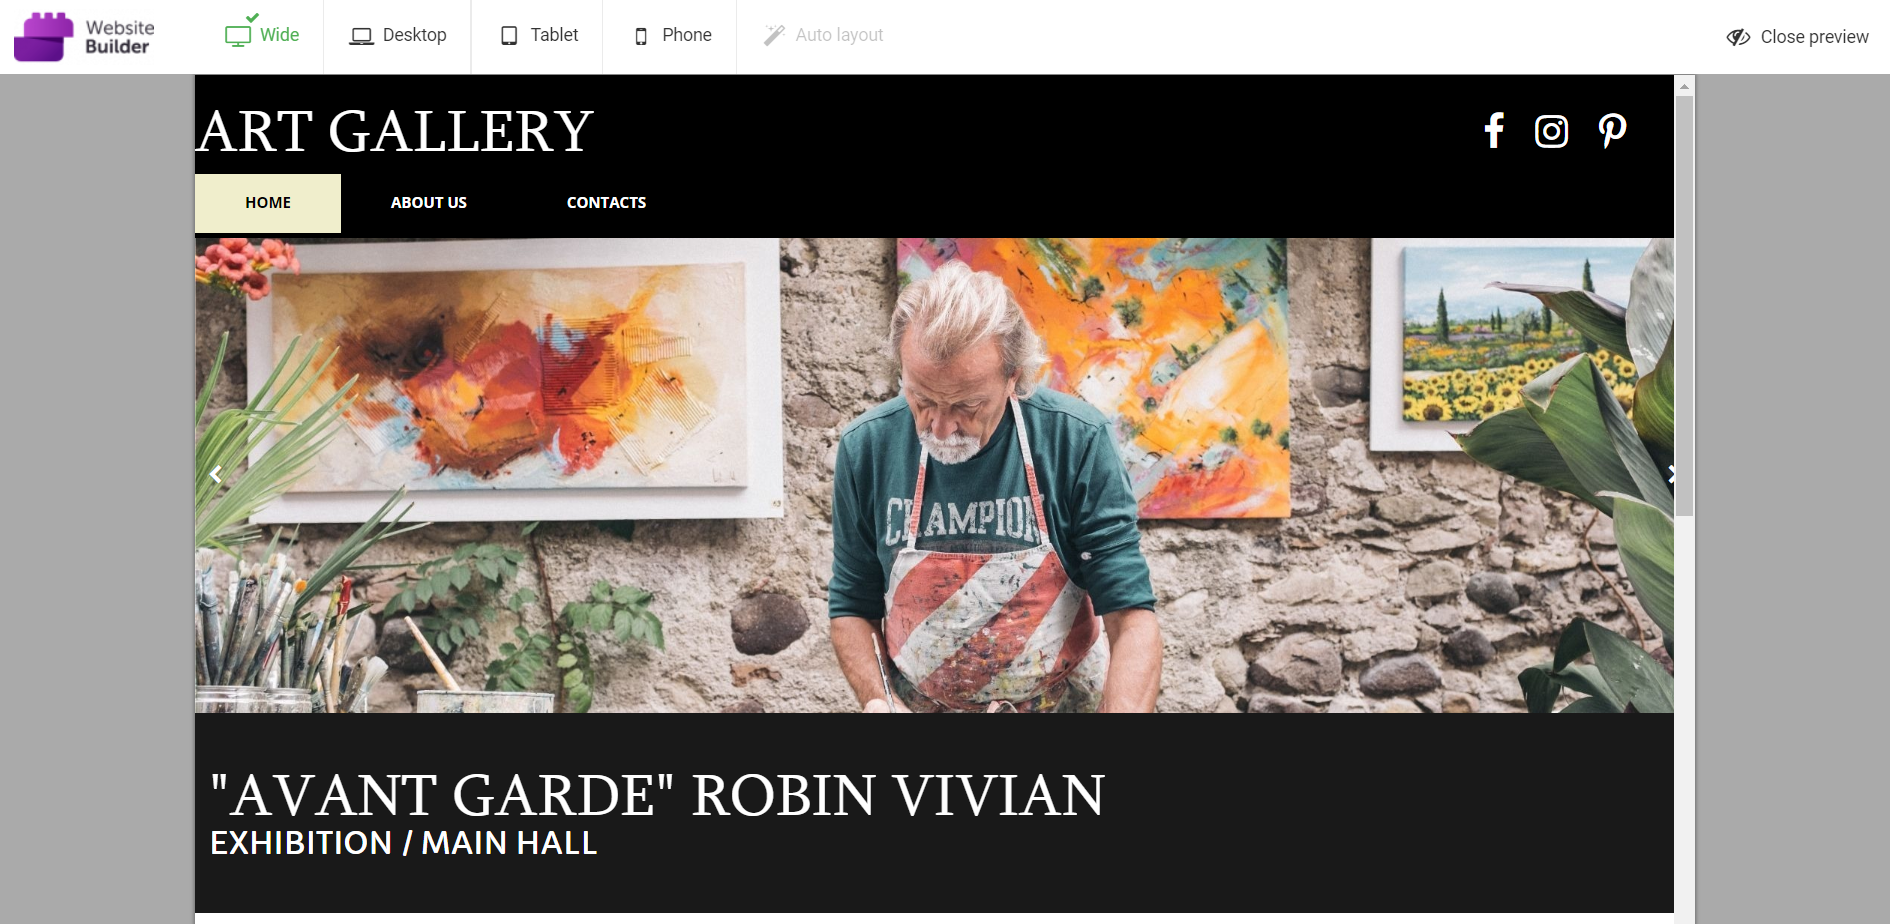
After you select a template, you will be redirected to the dashboard with the template applied. It will appear similar to the following:
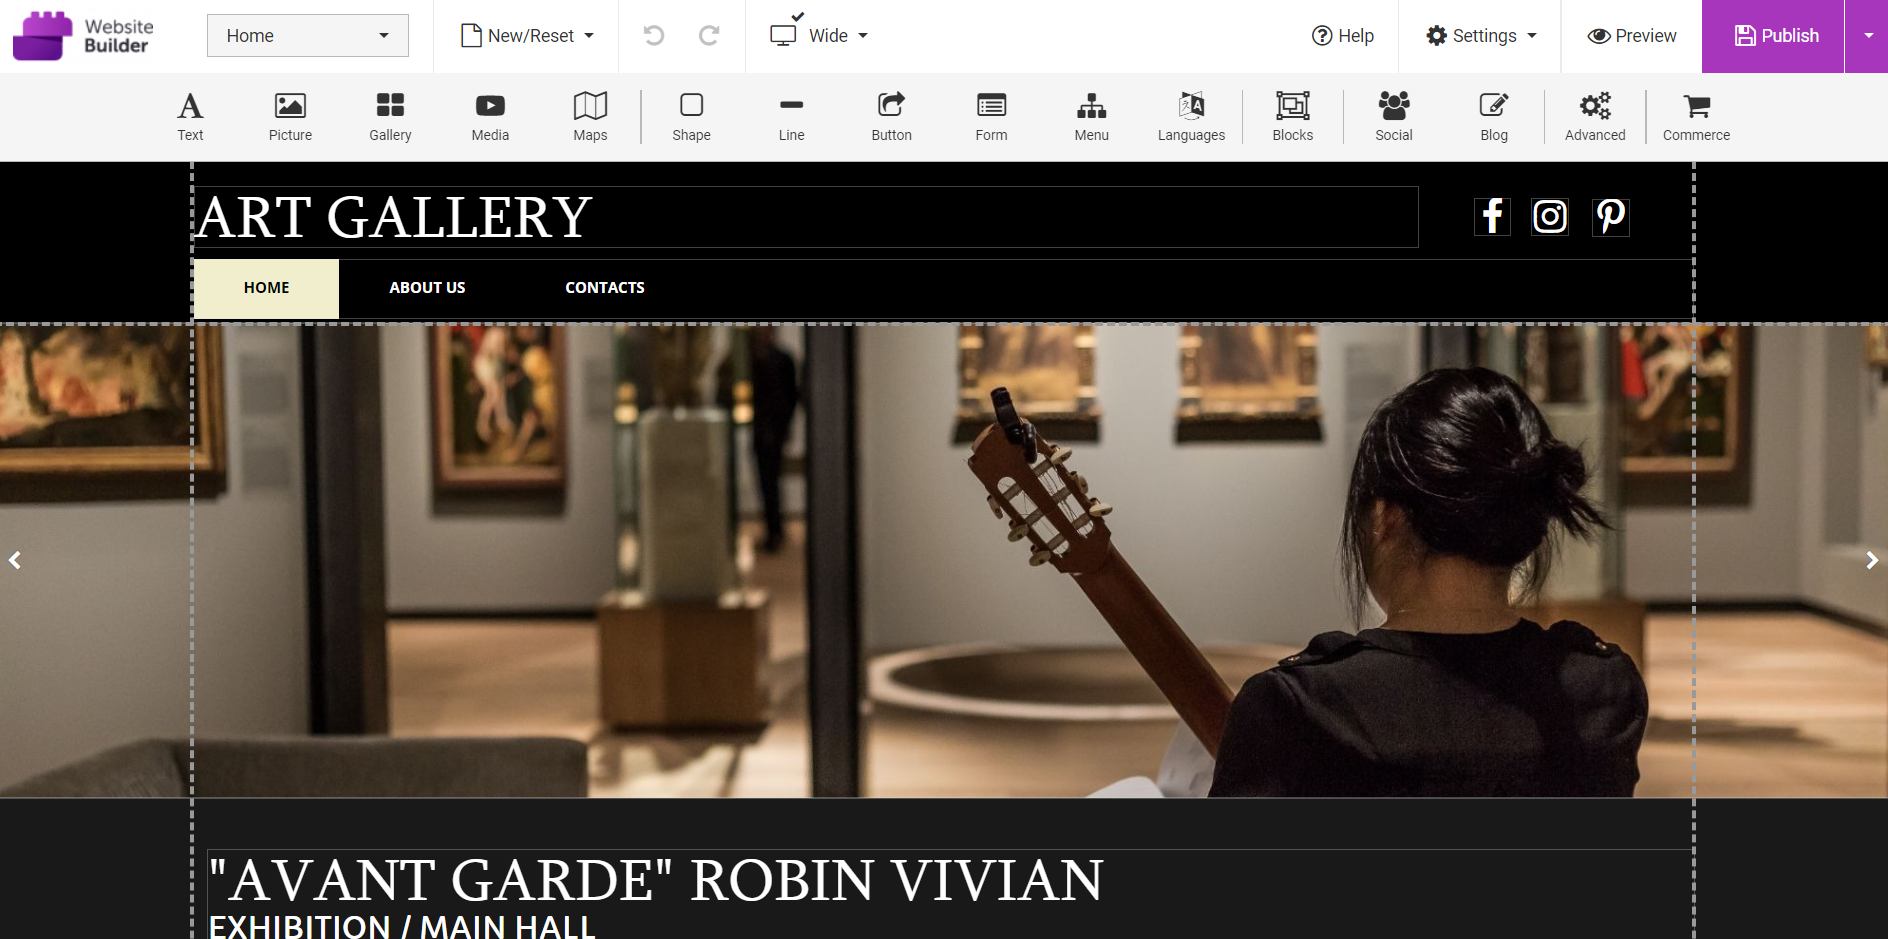
At the top of the page you can see different menus that allow you to edit the template to customize your site:

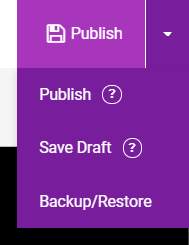
The Publish menu has several options. You can save the site and publish it to the Internet, save a draft of your site without publishing it, or backup/restore the site:
An automatic backup is created every 10 minutes. Please note, only the two most recent backups will be available if you need to restore your site.
If you’d like to create a backup of your website on your local device, you can choose the backup/restore option and download the backup:
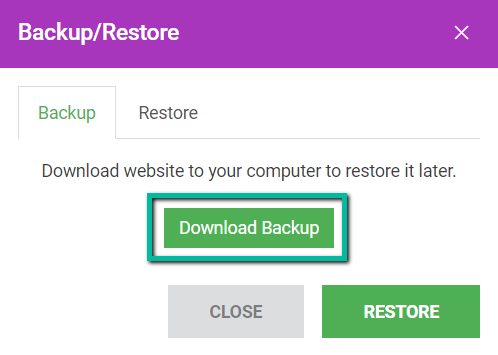
The backup file will be downloaded in the special Website Builder file format.
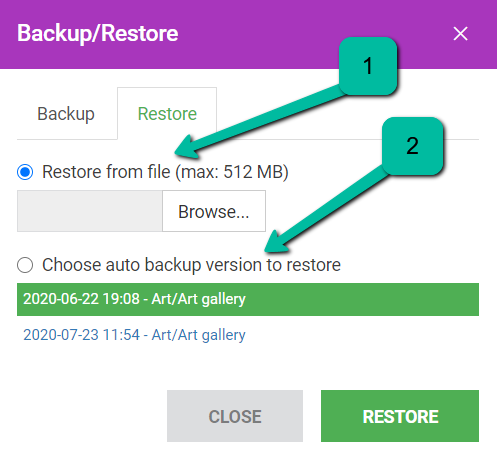
Similar steps should be taken to restore the website if necessary. Restore option allows you to go back to the previous saved version of your website.
You can either choose an auto-backup version or a local file:
The Preview option will redirect you to a view where you will be able to check how the website will look like on desktop and mobile devices at different screen resolutions:
The Undo/Redo buttons  can be used to undo the most recent changes or restore them.
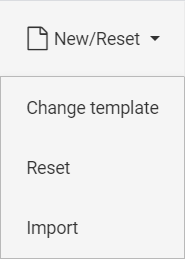
The New/Reset menu allows you to change the template or reset the current template to the original settings:
The next menu option allows creating special variants of the website for the Wide, Desktop, Tablet, and Phone versions. To start working on the particular variant, you need to choose from the top menu and click on the slider to enable it:
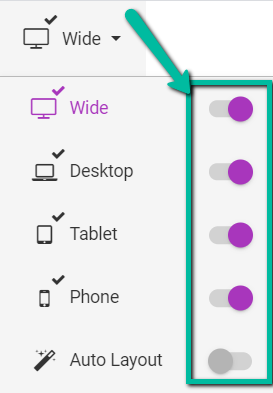
Then, click on the needed version and you can start designing the website according to the chosen device resolution.
Keep in mind that if the website is not designed for a certain resolution, it is still possible to load it on the needed device but the way website resolves will get affected by the resolution. For example, if only the ‘Wide’ version is enabled and you designed website specifically for it, accessing your website from other devices will load the ‘Wide’ version. However, due to resolution differences, it will display the website differently too.
You can use Preview settings to optimize design for different devices.
Keep in mind that enabling Auto Layout will disable the ability to manually edit each of the layout options
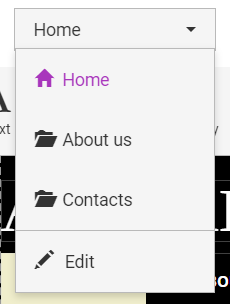
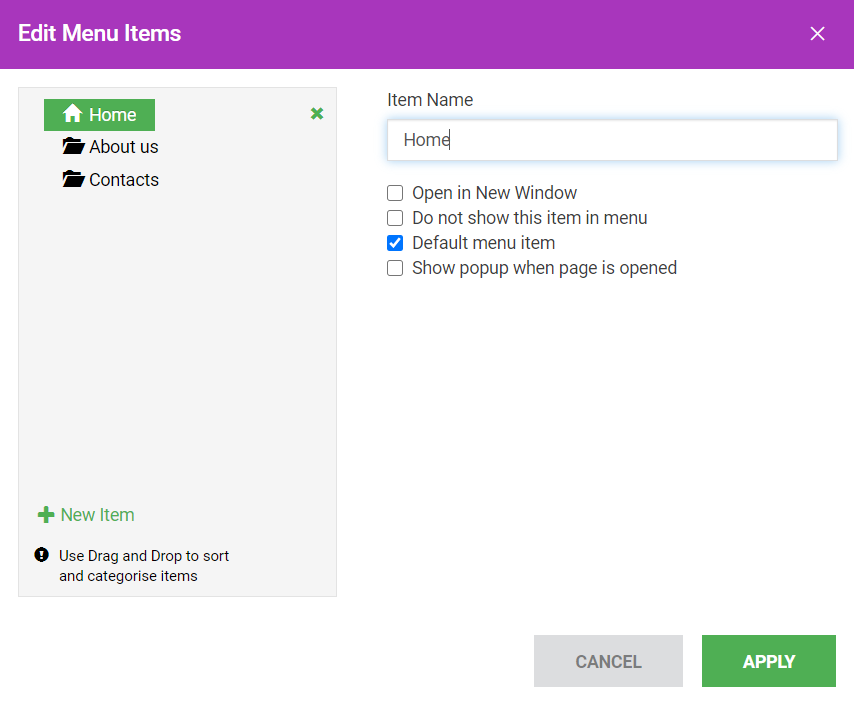
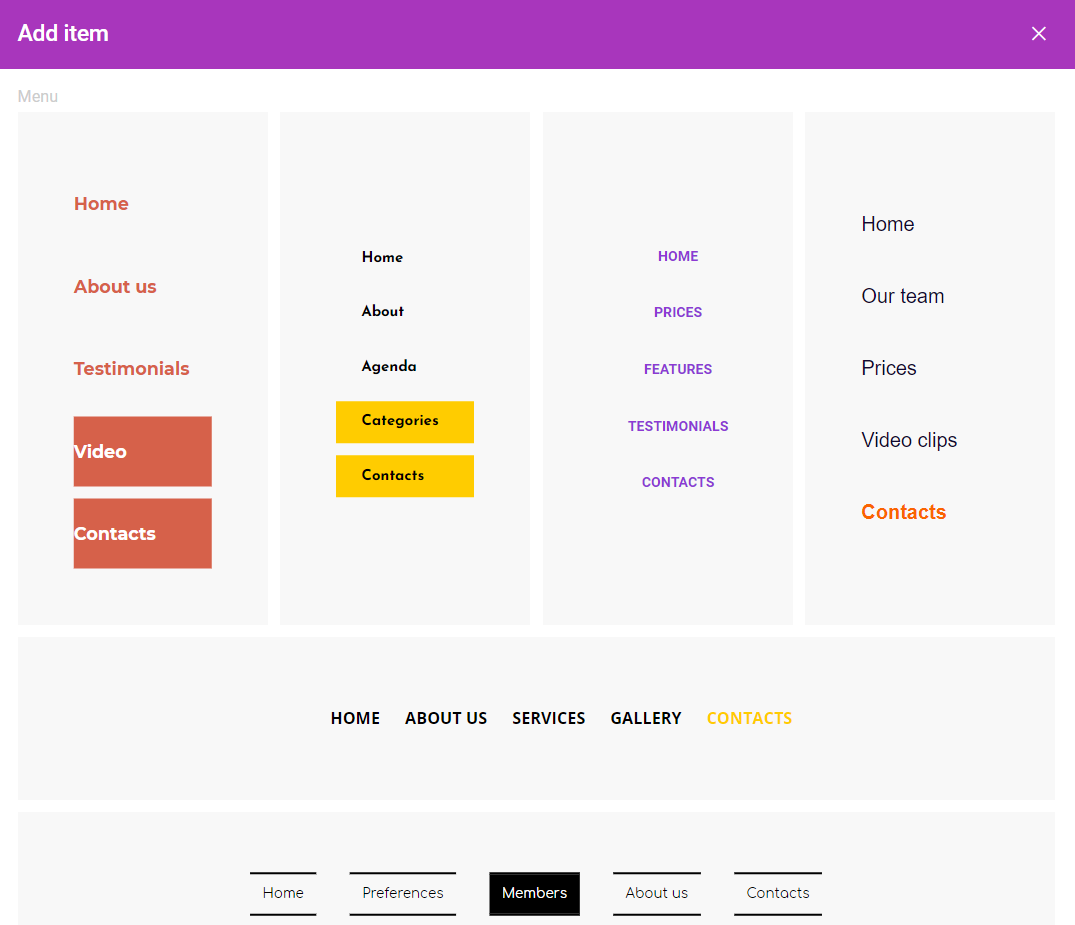
Using the Home drop-down menu, you can edit the menu items on your website. You can create new pages via the New Item option, remove them by clicking on the cross next to needed items, and manage their settings:
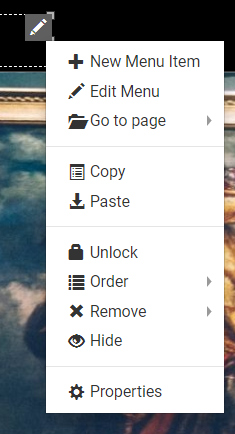
You can add a new menu by right-clicking on the menu block and choosing the New Menu Item option:
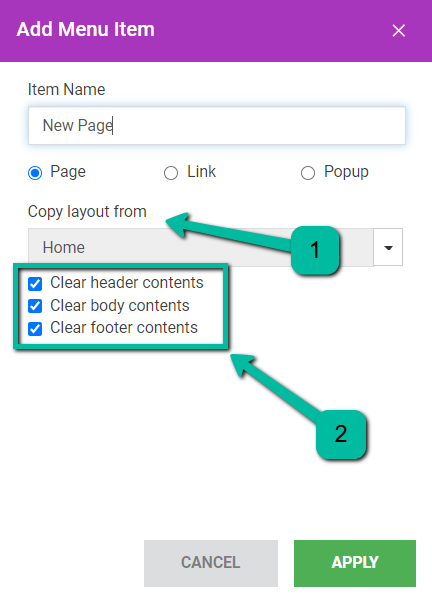
When you are adding a new page, you can either copy one of the existing pages as a template (1) or check-mark all the ‘Clear’ options to create a blank page (2):
NOTE: You can remove the whole menu block by right-clicking on its section >> Remove >> click on From all pages. However, removing the whole block will consequently delete all the pages created within it. We suggest you either remove the unnecessary pages through the Home drop-down menu by clicking on the cross or hide them by check-marking Do not show this item in menu to hide them from viewers.
You can also create a new menu or separate from already existing one by using the Menu feature.
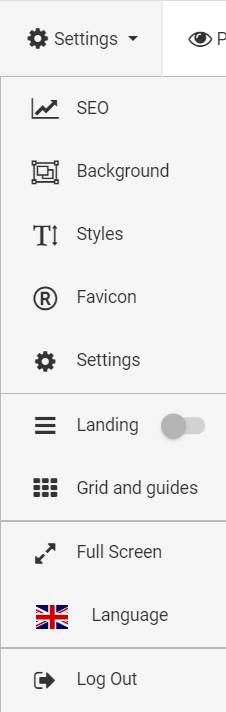
The menu to the right helps you navigate through the pages of the website, configure general settings and choose the language of the interface:
The SEO menu has General and Analytics tabs. This is where you can get your website out there so people can find it when they type in key words in the search bar:
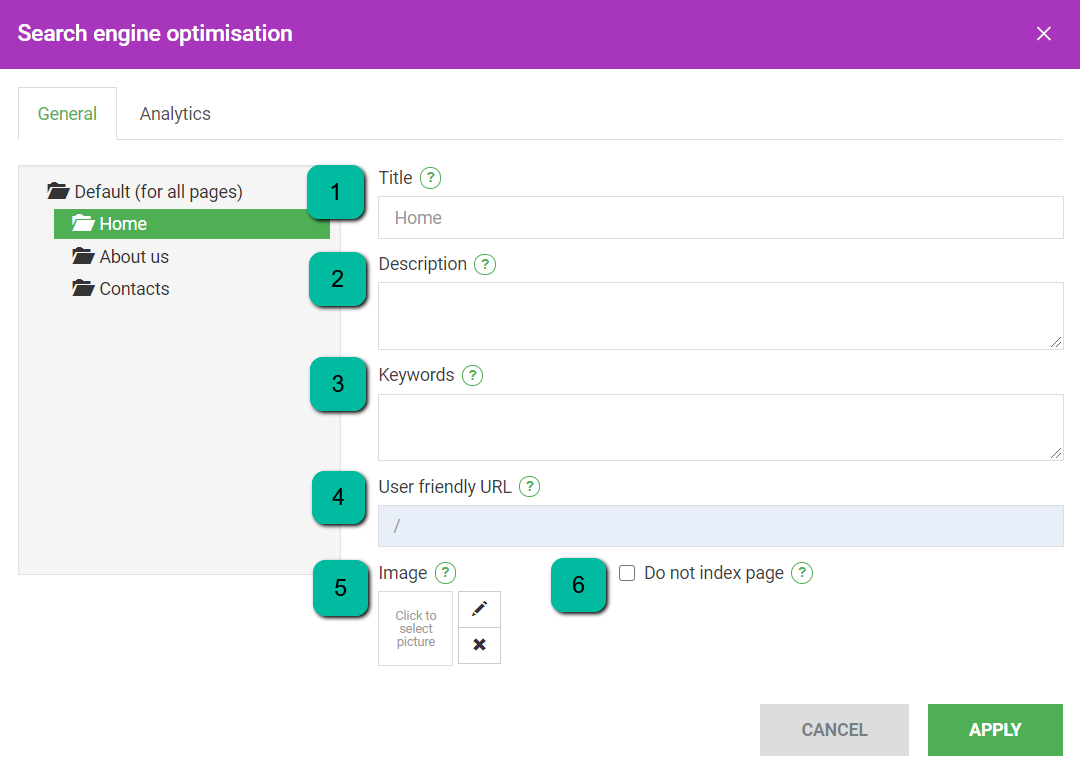
- The General tab allows you to configure your website’s Title, Description, Keywords, User friendly URL, and Image:
- The title is critical to giving users a quick insight into the page content and why it’s relevant to what they are looking for.
- The description is a shortsummary of the web page’s content. Search engines show this description in search results under your headline.

- Keywords are words or phrases people would type during online search when looking for the subject of the web page, so your website appears in the relevant searches.
- If you would like to change the default URL generated for the page, you can use the User friendly URL option.
- You can set an image that will be used by social media such as Facebook Open Graph and Twitter Cards when the page is liked or shared. For example, if you have a share Facebook button on the webpage and someone clicks it, a post is generated and posted on the feed of that person. With an image more people are likely to like/share the post further.
- If you do not wish your current page to be indexed by search engine bots, you can disable indexing by enabling the Do not index page option. Please note that if your website was already indexed before this option was enabled, continuously prevent bots from indexing may negatively affect your website’s SEO ranking.
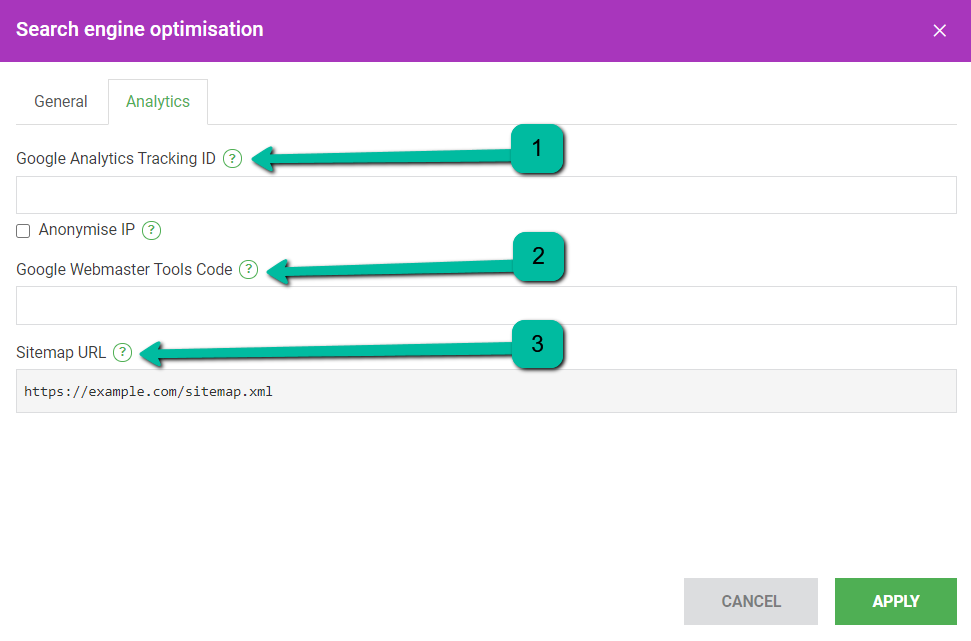
- The Analytics tab allows you to add a Google Analytics Tracking ID (1) and Google Webmaster Tools Code (2) to verify your site with Google. The link for Sitemap URL (3) is also located here.
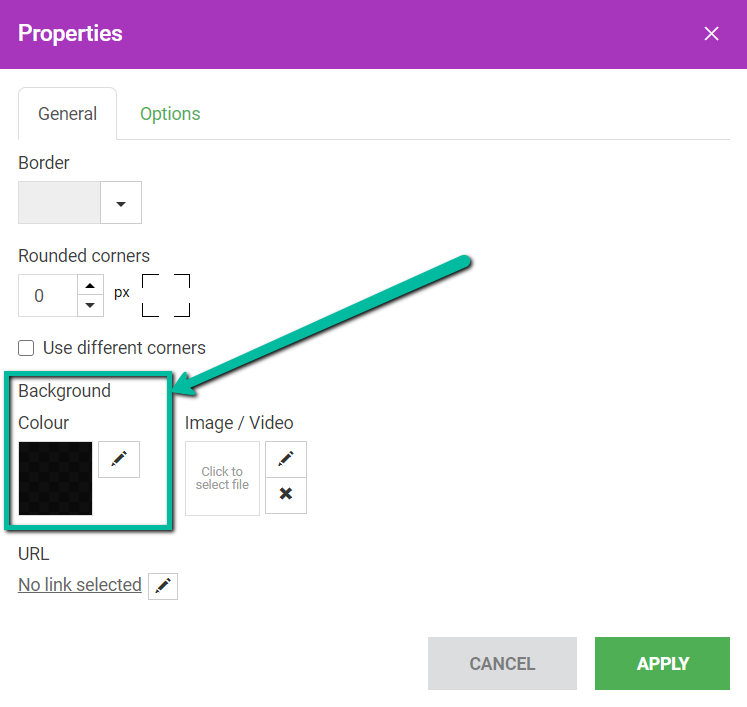
The Background menu has different options to modify your website’s background color or image. You can choose one option to be displayed on all pages, or have different backgrounds on different pages:
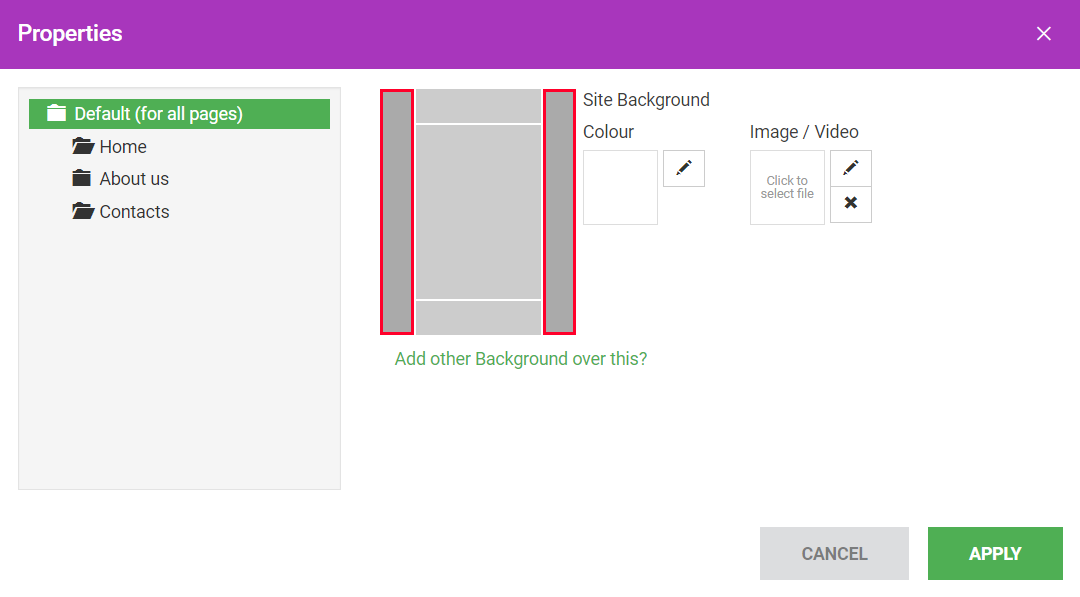
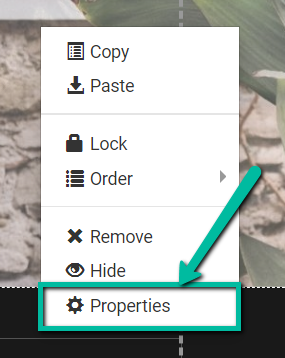
The Background option can be found clicking the right mouse button >> Properties menu too:
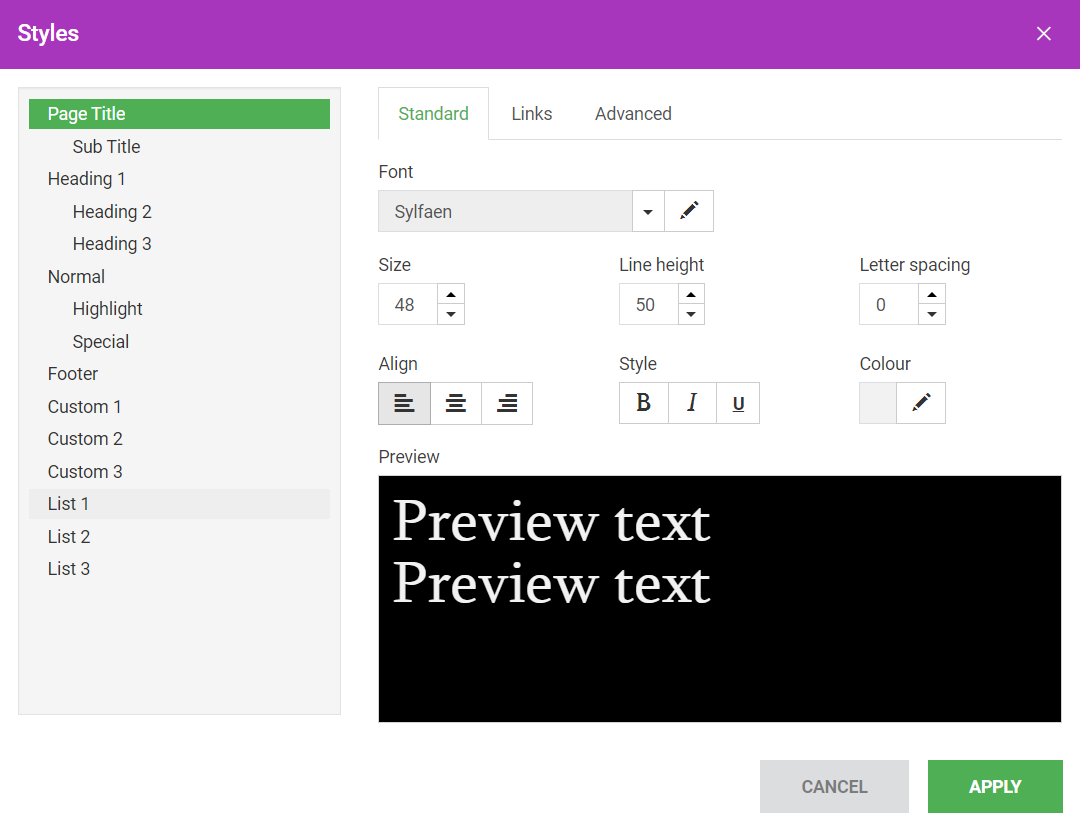
The Styles menu provides an option to modify existing headers and create custom ones. There are tabs for the Standard, Links and Advanced settings:
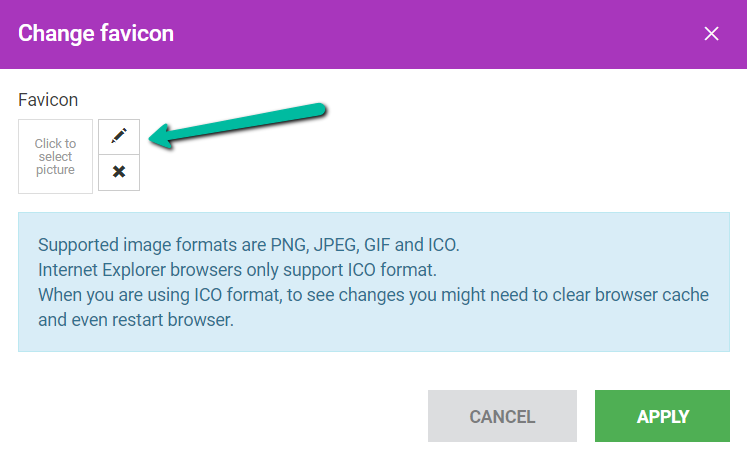
You can assign a favicon (the small image that appears in the tab or menu bar) for the website using the Favicon menu. You can upload your own image or choose an existing image from the gallery using the pencil icon:
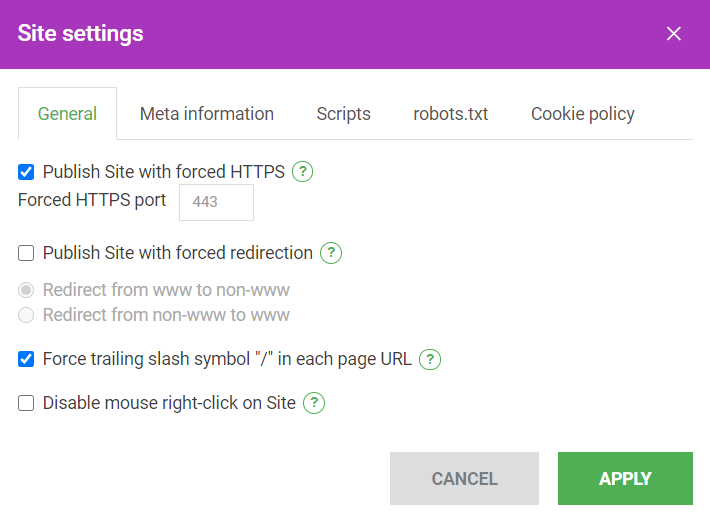
The Settings menu allows you to do the following:
- General:
- publish site with forced https (this option is enabled by default). SSL certificate should be installed to use this option. We offer free year of Positive SSL for all new Shared Hosting accounts and newly added domain names.
- choose forced https port
- force trailing slash symbol “/” in each page URL
- General:
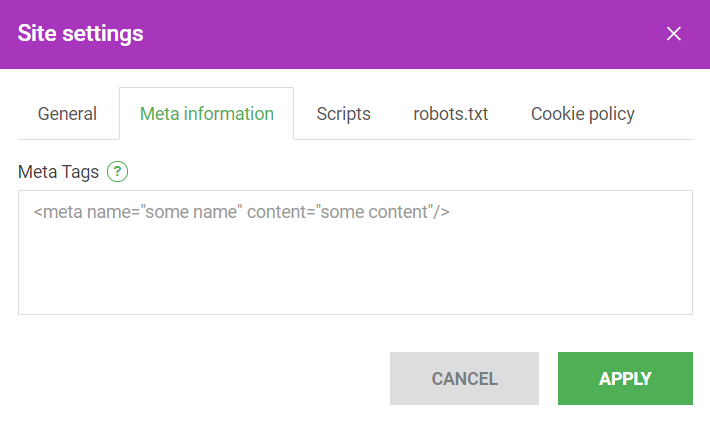
- Meta information. Here you can add Meta Tags.
- Scripts. Here you can specify scripts that will be added as plain HTML to every page of the website.
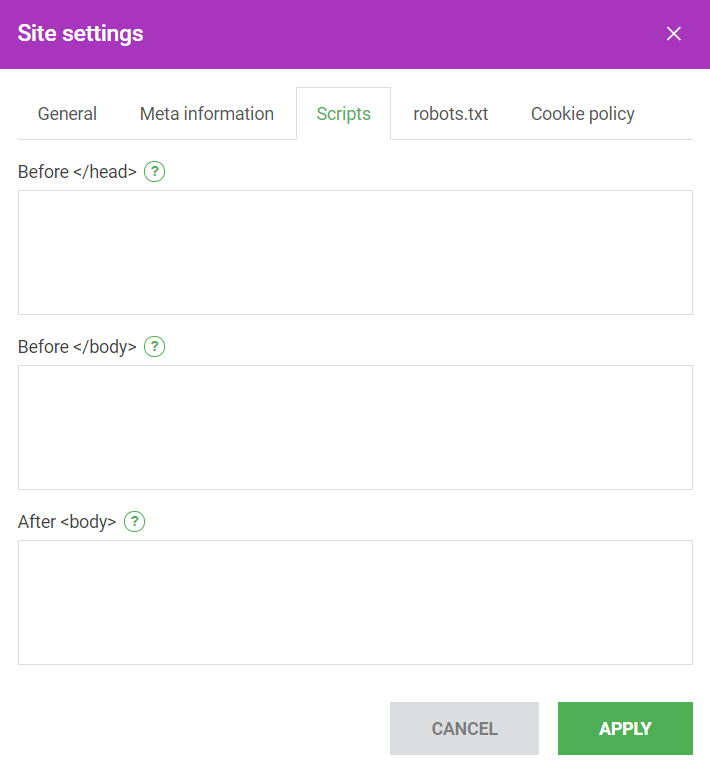
NOTE: It is important to use these options for adding scripts to the website instead of manually adding them through the files located in the File Manager menu. If you add scripts directly to the files, they will be overwritten by the Scripts menu settings once any changes made to the website will be published.
NOTE 2: Scripts added through this option would be applied to the whole website. If you would like to apply certain scripts to a single page only, you need to use Advanced >> the Custom HTML widget.
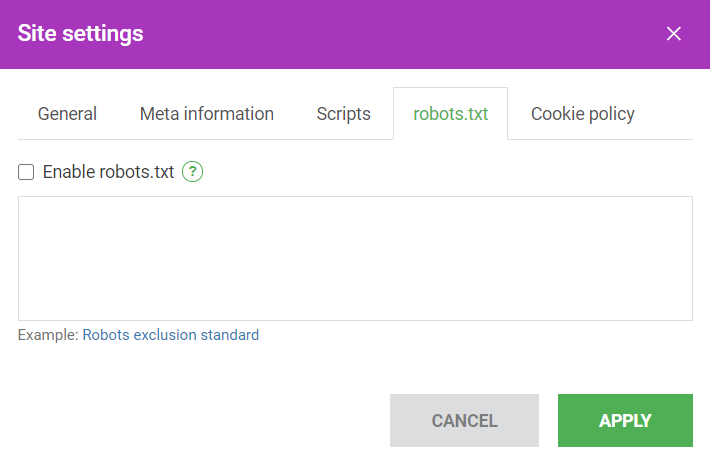
- robots.txt will help you to create and enable robots.txt.
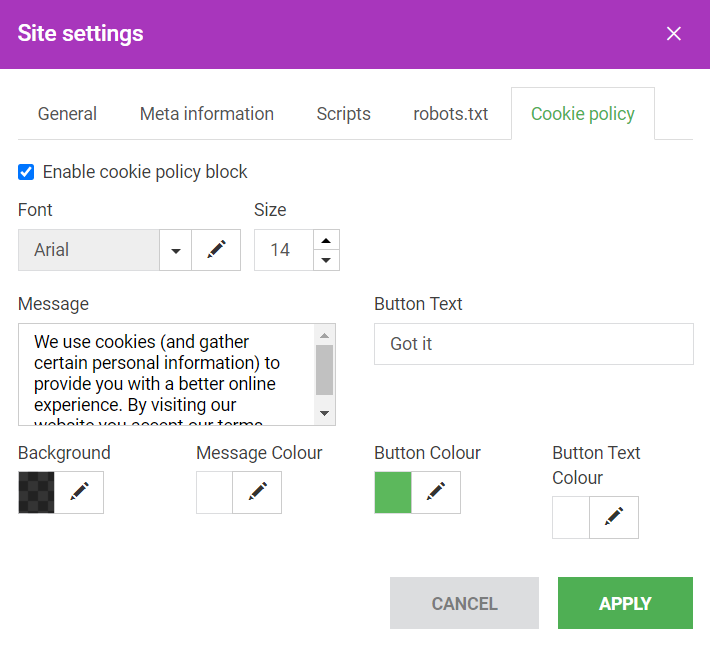
- The Cookie policy tab allows to enable cookie policy block and manage a warning message.
The next section of the settings allows enabling Landing, Grid, Snap and Layout for your website:
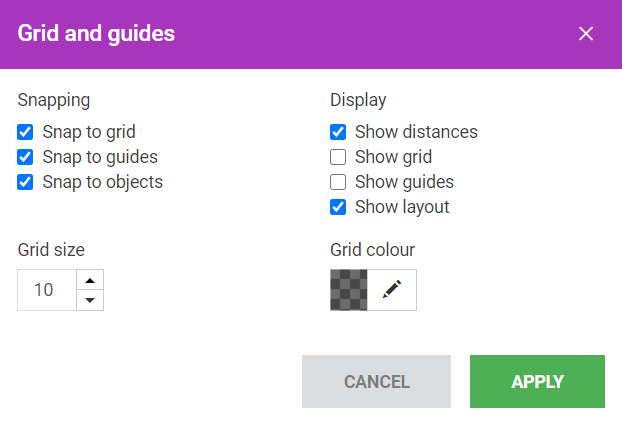
gridlines/guides/objects. When you get close to the gridline/guide/object, your object will jump to
align with the line and you donâ$™t have to do it by eye.
Enabling the Show grid function will add cells to the editing area of the website:

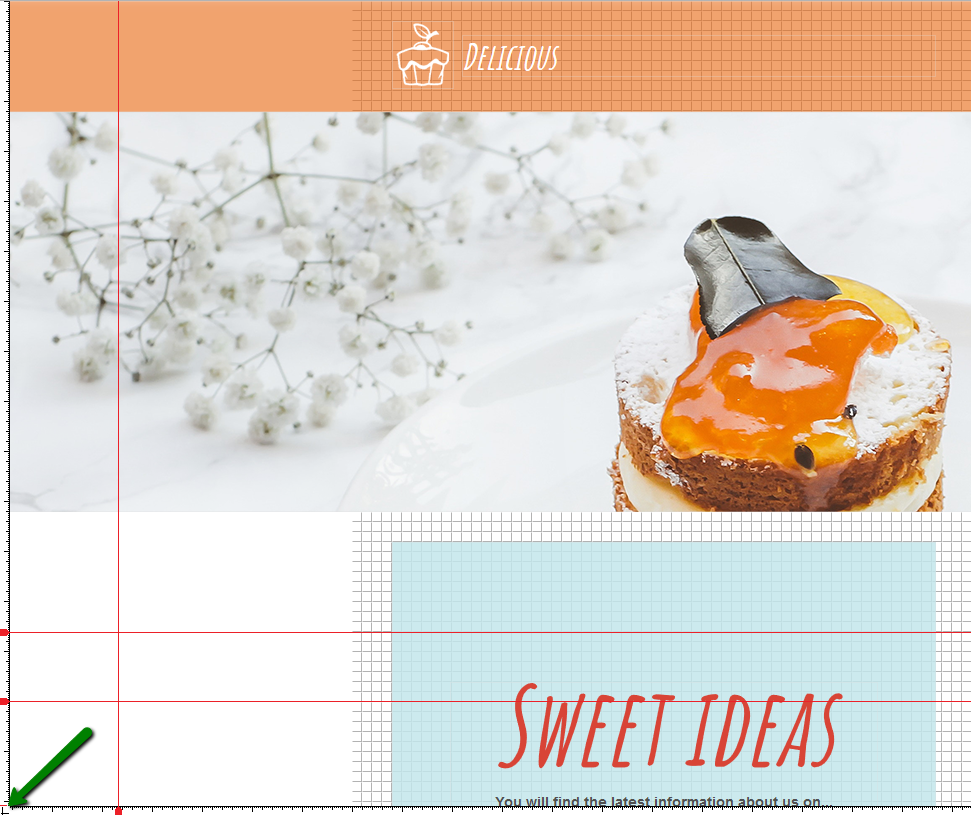
The Show layout feature will separate the header, the main content and the footer of the page to avoid poor allocation of the page. It will look the following way:
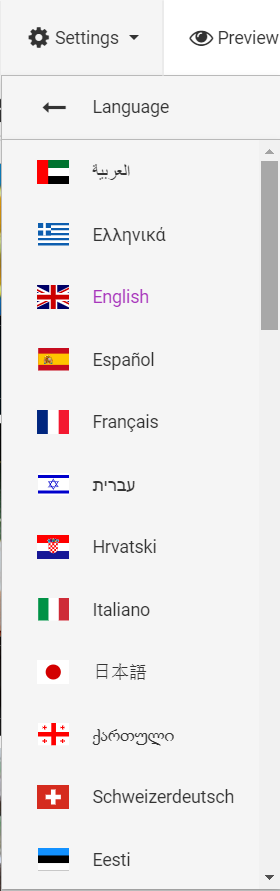
If you would like to change the language of the Website Builder interface, you can use the Languages menu:
The next set of menu options provides a wide range of tools you can use to add website content and make changes to the template:

 To use some of the options you need to click on it or ‘drag and drop’. Then, select the style of the chosen option. If you wish to use some another style, click on the pencil icon or double-click on the item to open the editing menu.
More details on each option below.
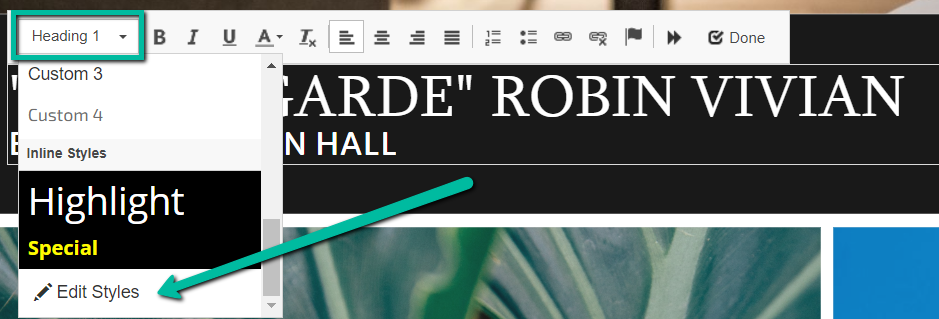
You can drag and drop the Text option or just click on it to add some text to the page and choose the style of the text:
If you would like to change the font and size of the text, you will find that under the Styles drop-down menu >> Edit Styles:
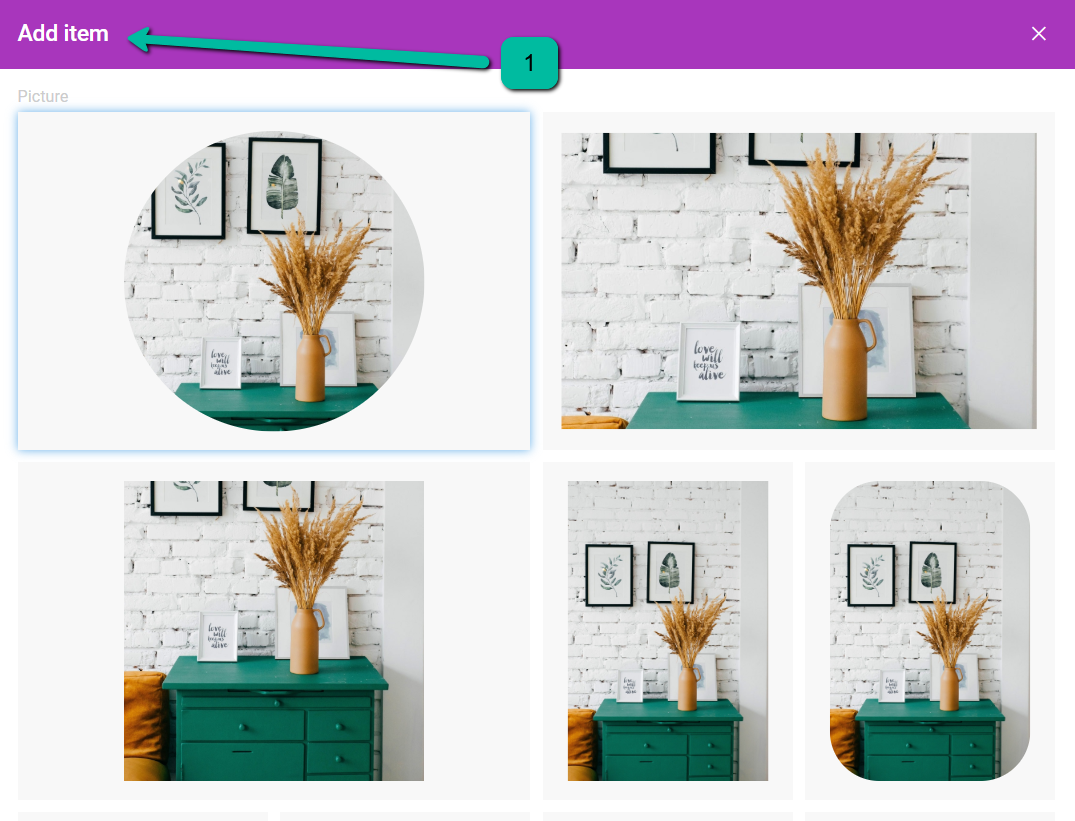
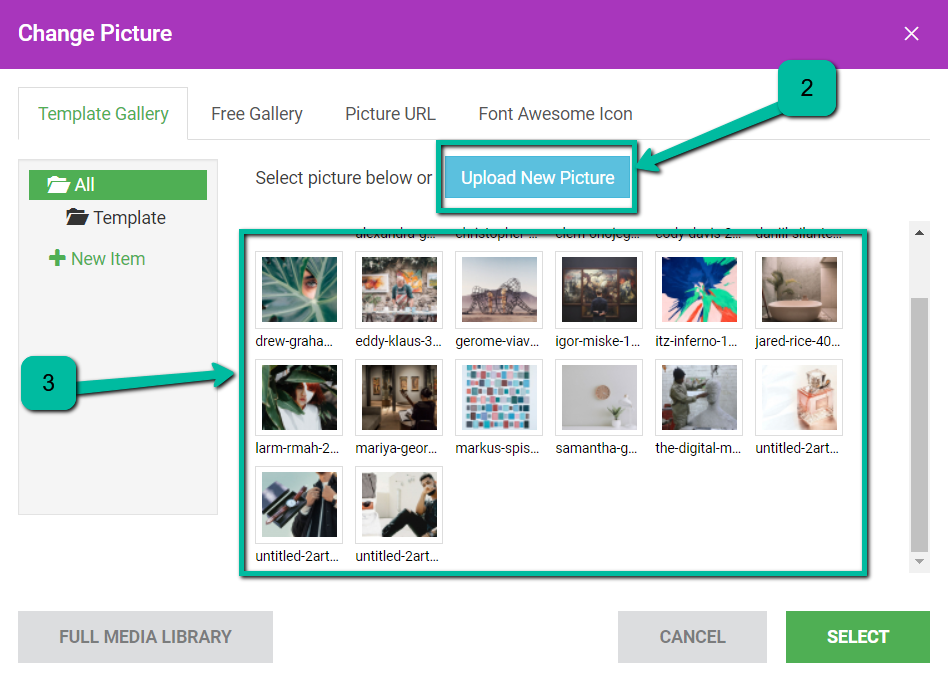
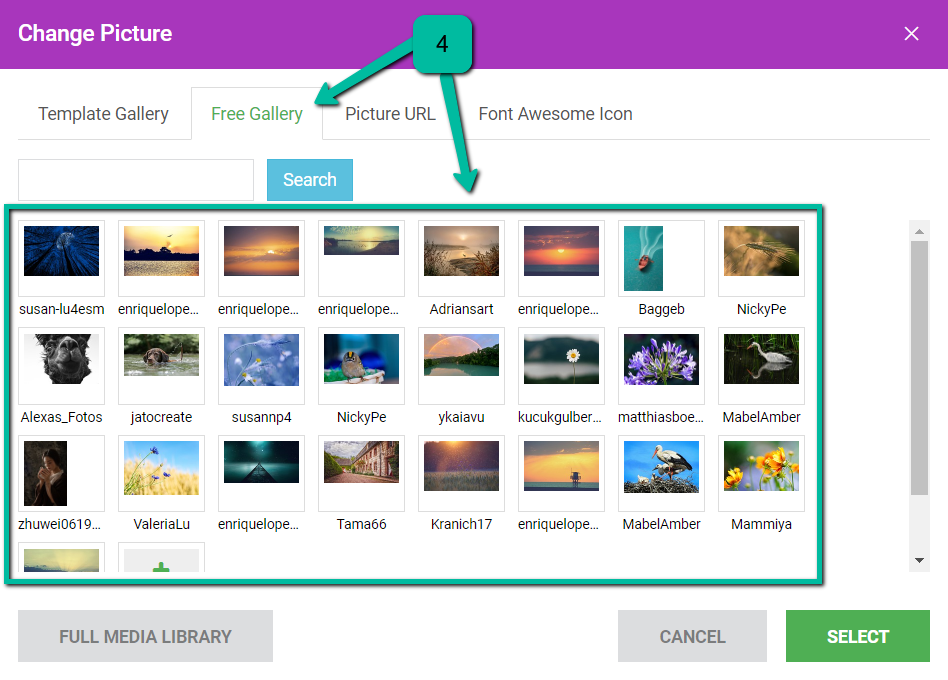
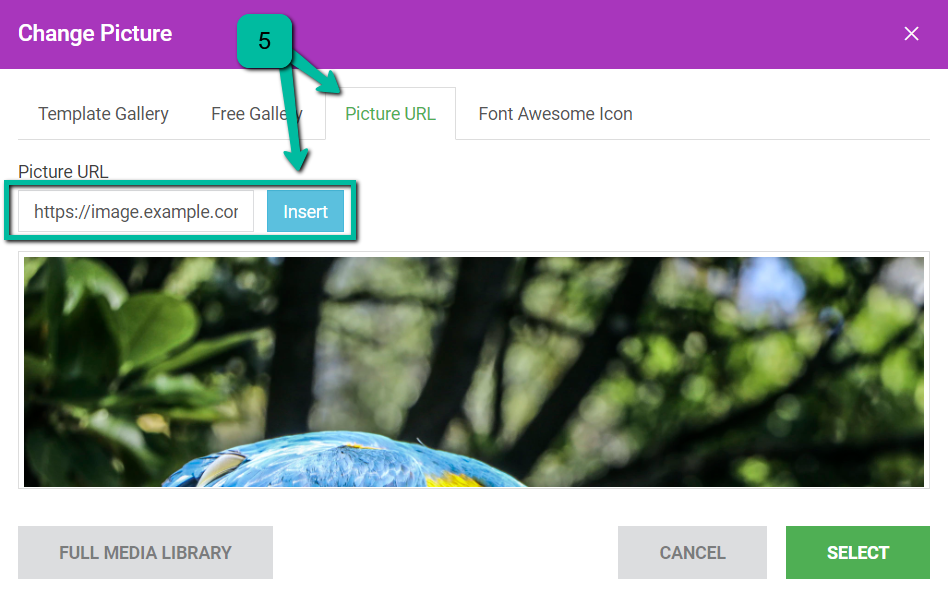
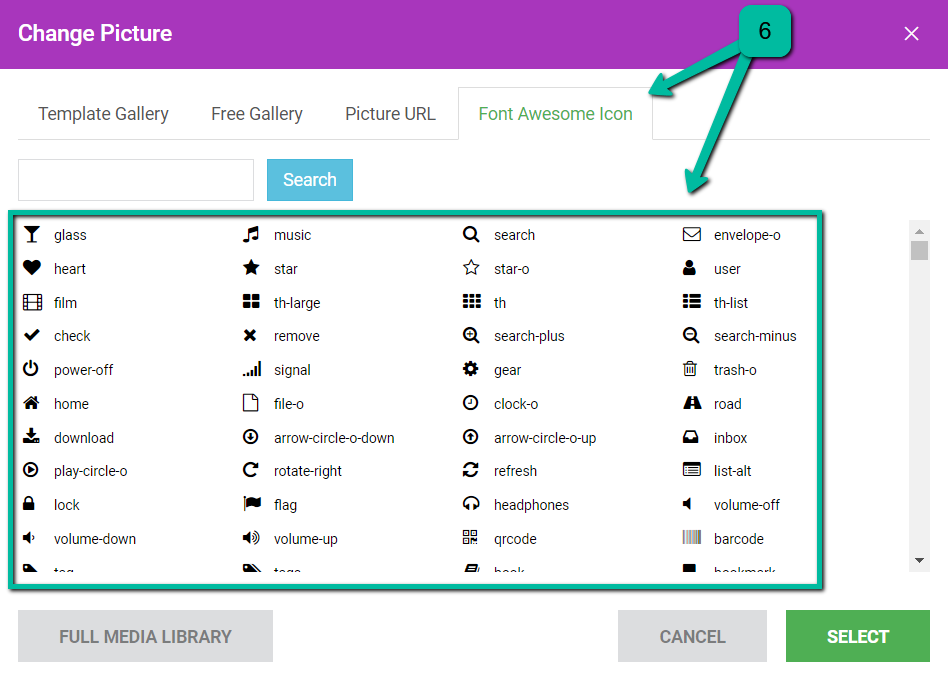
With the help of the Picture menu option, you can choose how the picture will look like (1) and then Upload New Picture (2). Choose a picture from the Template (3) or Free Gallery (4), paste a picture from the web using Picture URL (5), or use one of the Font Awesome Icon (6) option. You can also create your own folders and upload pictures there:
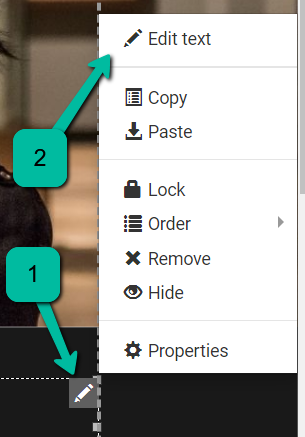
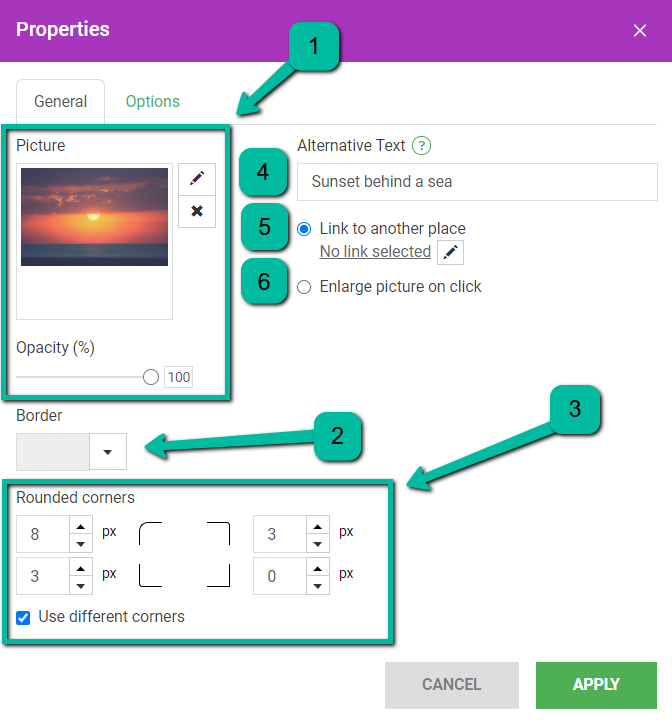
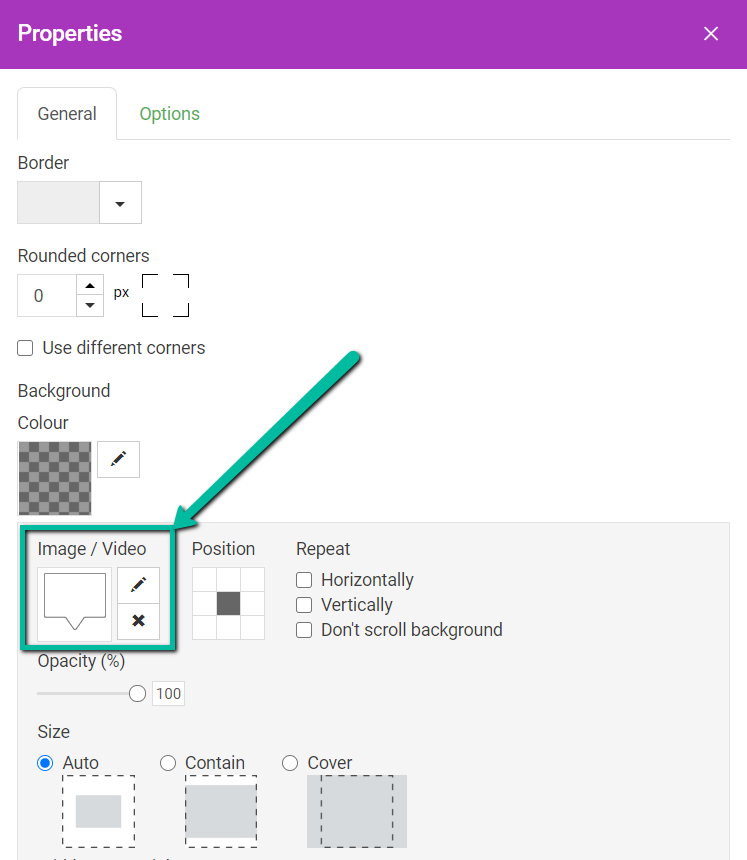
After the image is added, you can further configure it through right-clicking >> the Properties menu, like editing image and its opasity (1), adding borders (2), rounding corners (3), including an image description for visually impaired users (4), embedding a link to another page (5), or enabling the option to expand an image by clicking on it (6):
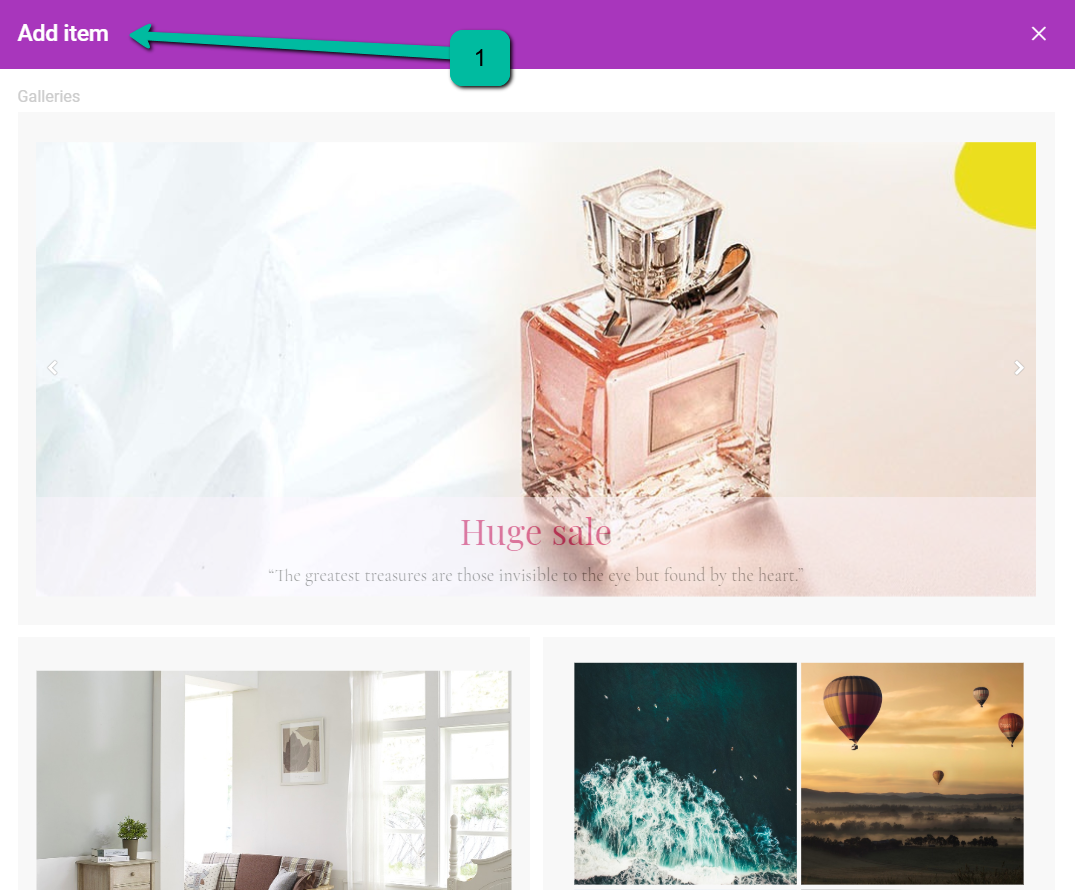
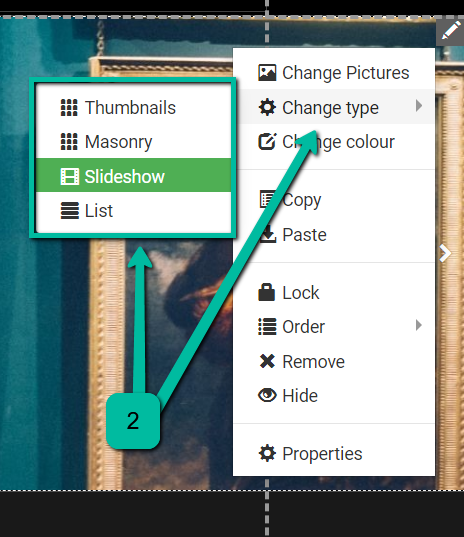
When using the Gallery menu, it is required to select the layout of the pictures (1) that will be shown and then, choose multiple pictures. It is possible to display them as Thumbnails, a Masonry, a Slideshow or a List with the help of the Change type (2) option:
NOTE: the default maximum file size is 100 MB, but you can increase it within the PHP Selector or php.ini.
All the uploaded images will be compressed to 3MB.
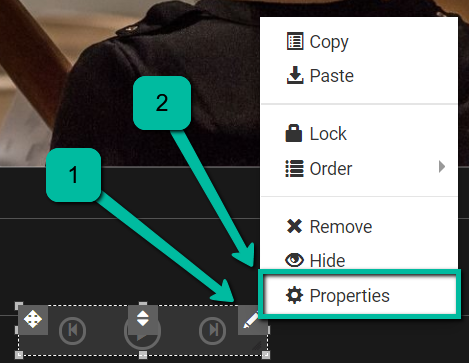
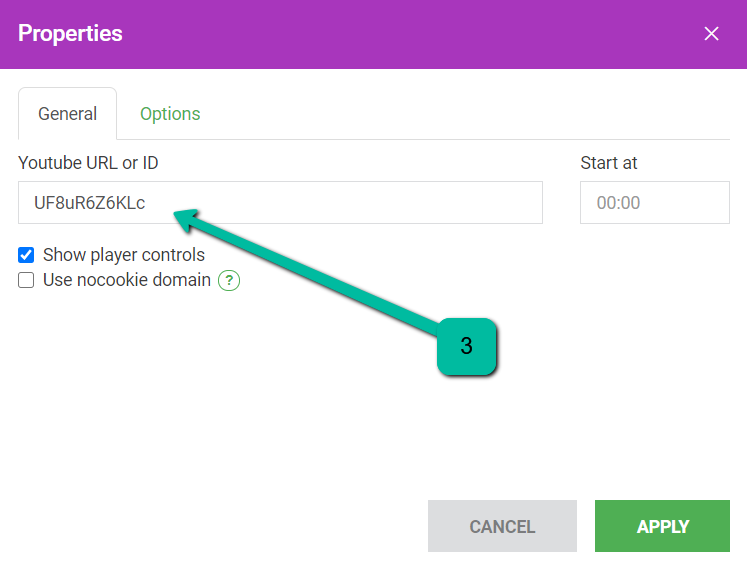
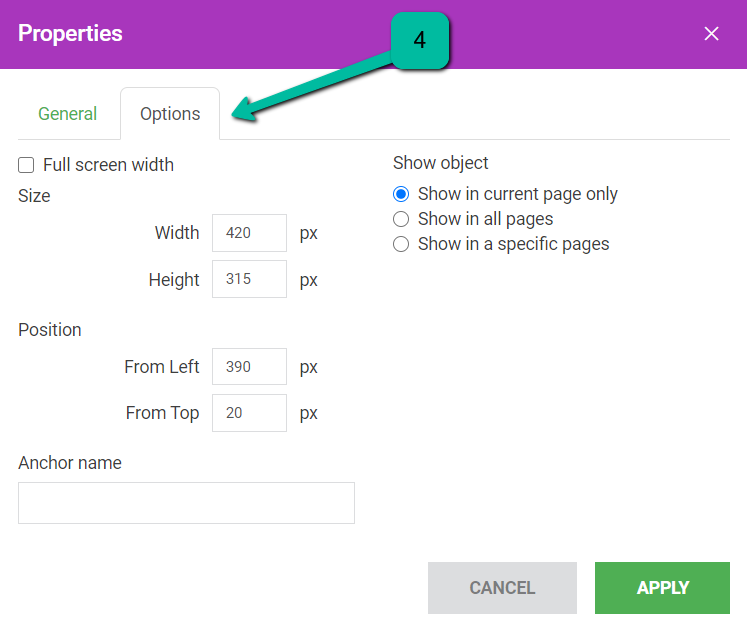
The Media button allows you to embed a YouTube video, Vimeo video or use a Music Player. Choose the type of the player and click on it to add on the page:

It is possible to add Google Maps, Yandex, Bing Maps. You can specify coordinates or a physical address to be shown on the map. Select Zoom level and drag marker to set your location.
If you would like to use Bing Maps, you will need to get an API Key from Bing.
In case you wish to add some basic graphics, you can use the Shape and Line menus and select the available options:
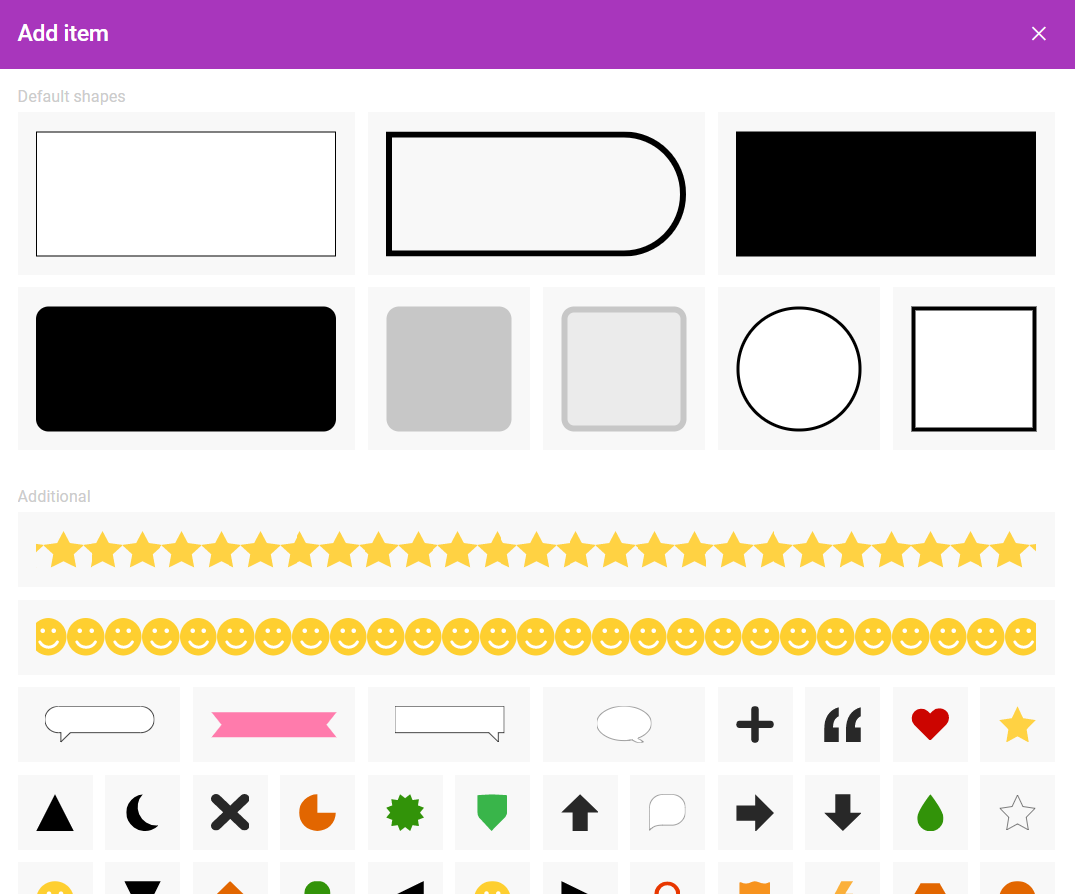
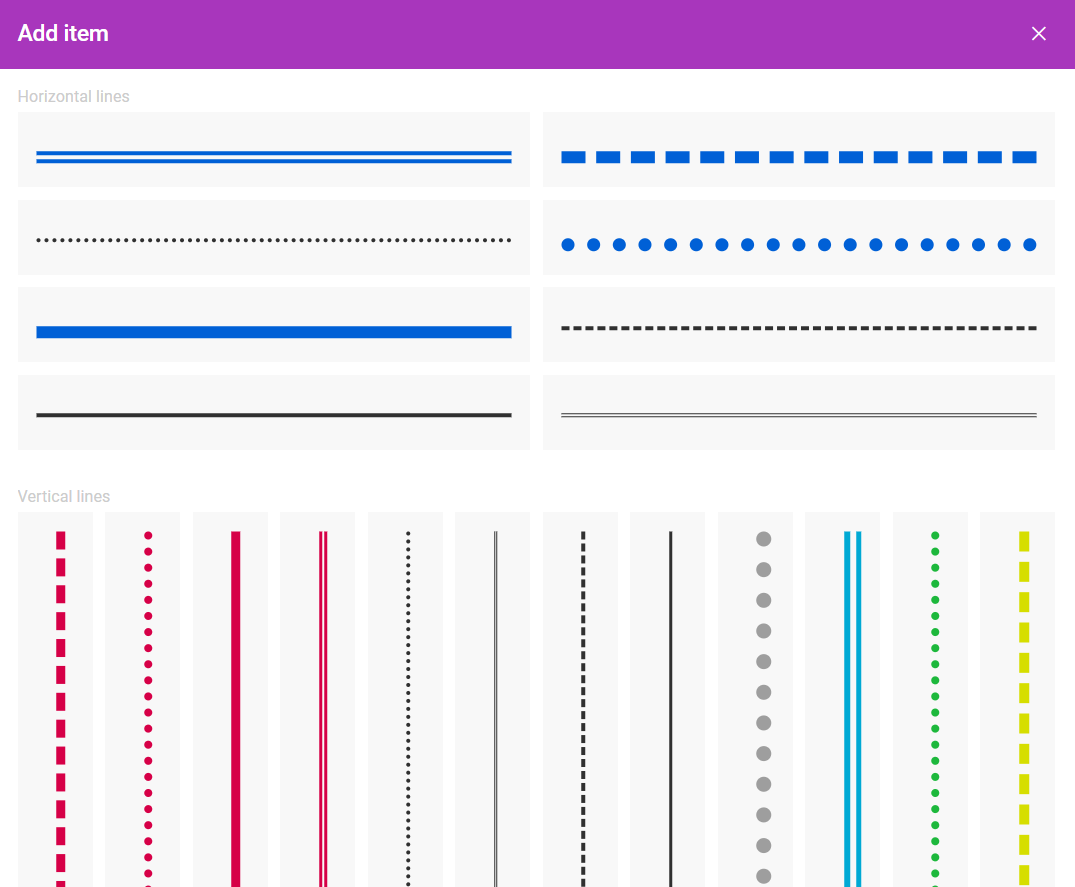
Alternatively, add your own shape using the Pencil icon:
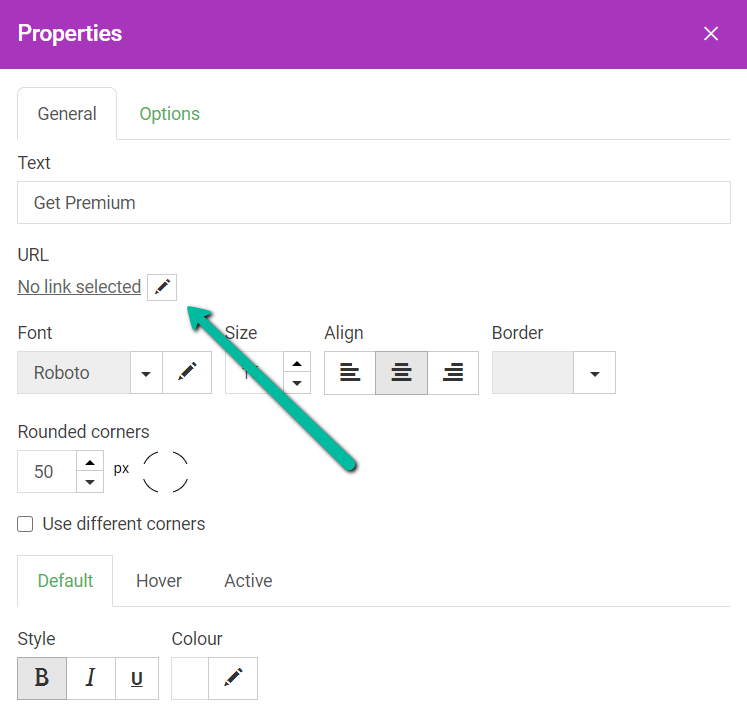
You can also create different buttons for the website using the Button feature and trying items created previously:
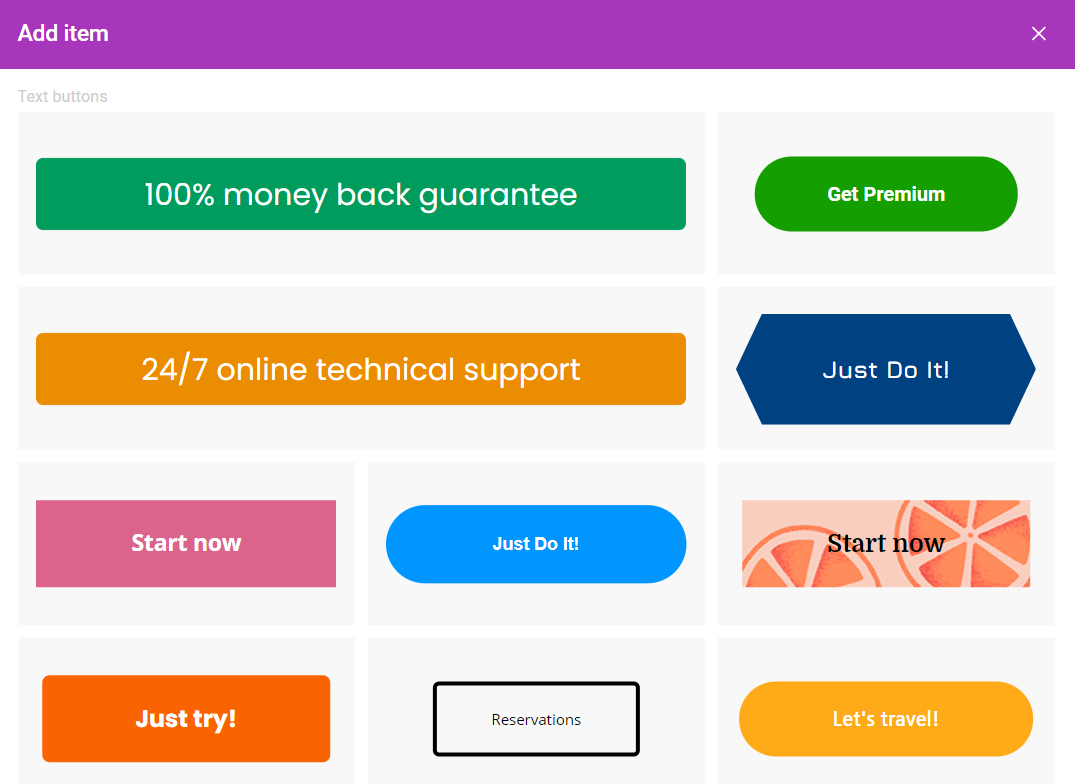
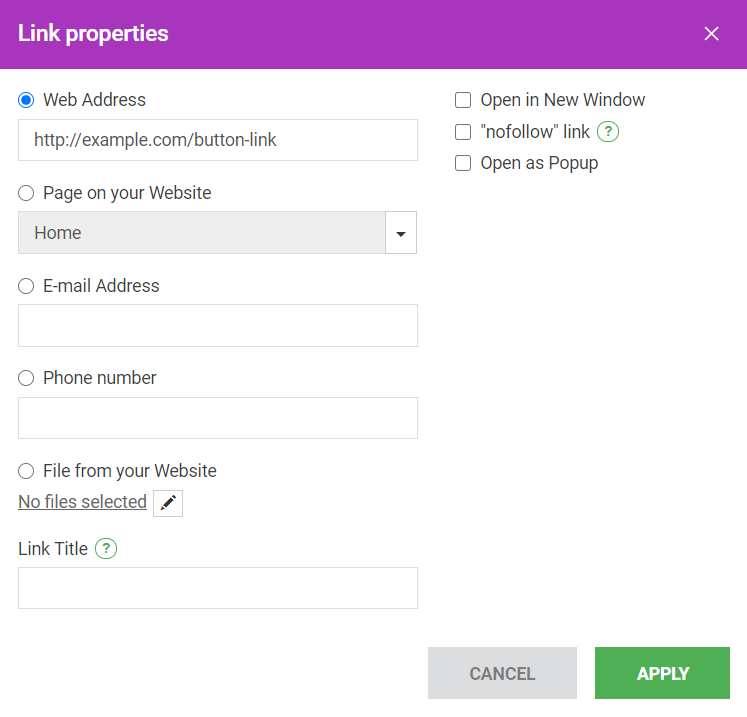
If you wish to change the button text, URL, and format, double-click on it. Locate the URL options >> click on the pencil to connect the button to an outside URL, a separate page on your website, an email address, or a downloadable file from your website:
With the help of it, you can create a contact form with a built-in PHP mailer as well as SMTP authentication.

In Simple fields you can choose default fields or set your own. It’s also possible to mark lines as Required. The Options section creates questions with drop-down menus. You can also use the Checkboxes option to get the submitter’s consent for a specific condition.
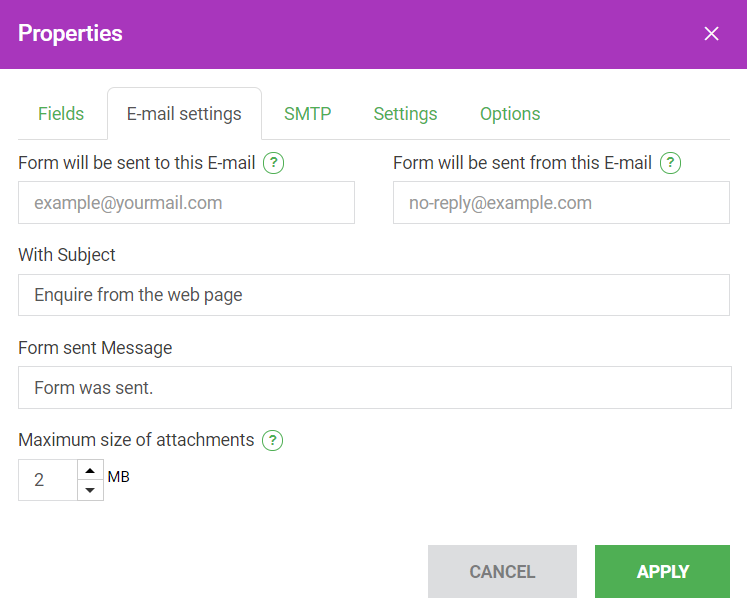
The E-mail settings section contains various configurable fields to ensure the contact form sends the email correctly:
Specifically:
1. Form will be sent to this E-mail – You must specify the email address that will receive emails from the contact form. It is possible to enter several emails separated by semicolons.
2. Form will be sent from this Email – You need to use the email address listed for your account in the cPanel or a third-party email address.
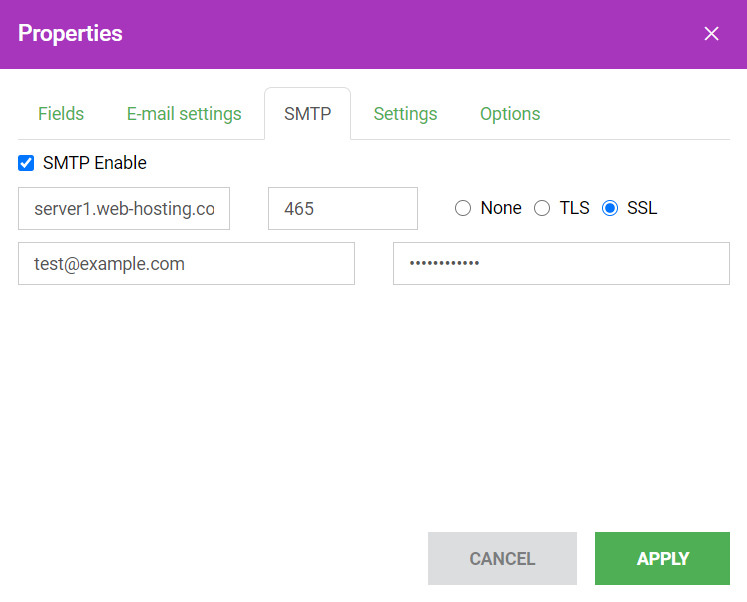
If you want to use a third-party email address in the From field (like Gmail, Private Email) or avoid ‘via cPanel user@server’ part, SMTP authentication is required. You need to tick SMTP Enable in the SMTP tab and enter SMTP details:
- SMTP Host: hostname of the SMTP server or localhost
- SMTP Port: 465 for SSL encryption and 587 for TLS option.
SMTP Username
: full email address – this should be the same address listed under ‘Form will be send from this Email’
- SMTP Password: password from this email account
You can find the example of SMTP setup below:
If you have any issues with the form, contact our support for investigation.
4. The Form menu also allows enabling Google reCAPTCHA in the Settings tab. CAPTCHAs allow you to prevent many forms of automated spam:
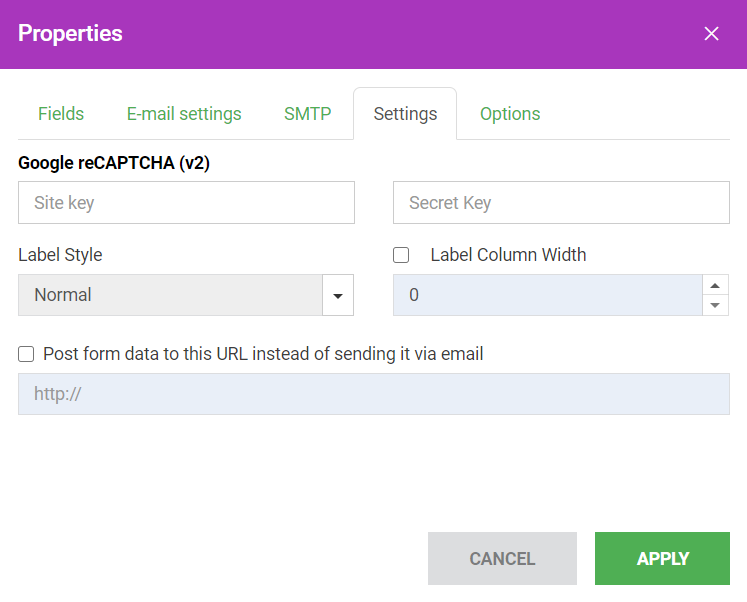
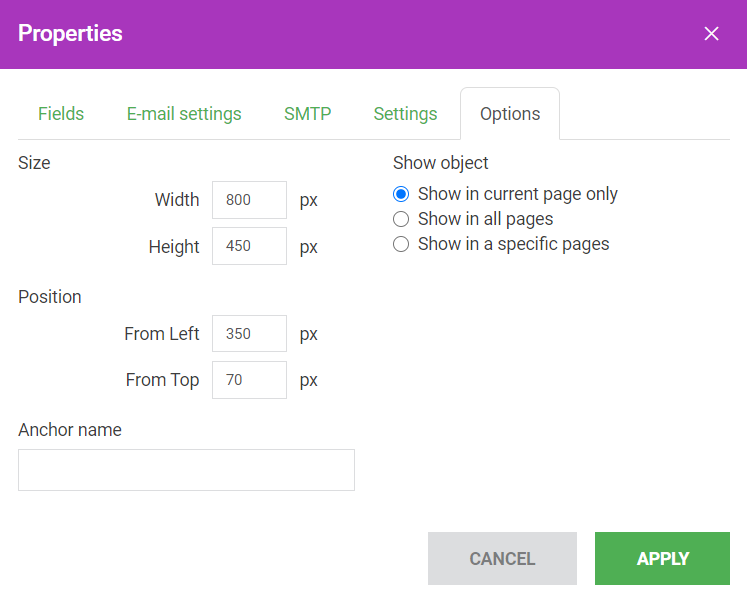
4. In the Options menu you can configure additional design-wise settings like the size of the form, its location, and adding an anchor:
The Menu feature helps you to manage existing menus and create additional ones by choosing available templates:
If the website is targeted to a multilingual audience, the Languages menu will be helpful as well. It creates menus that allow switching between languages and allows you to create several versions of the website in the same interface:
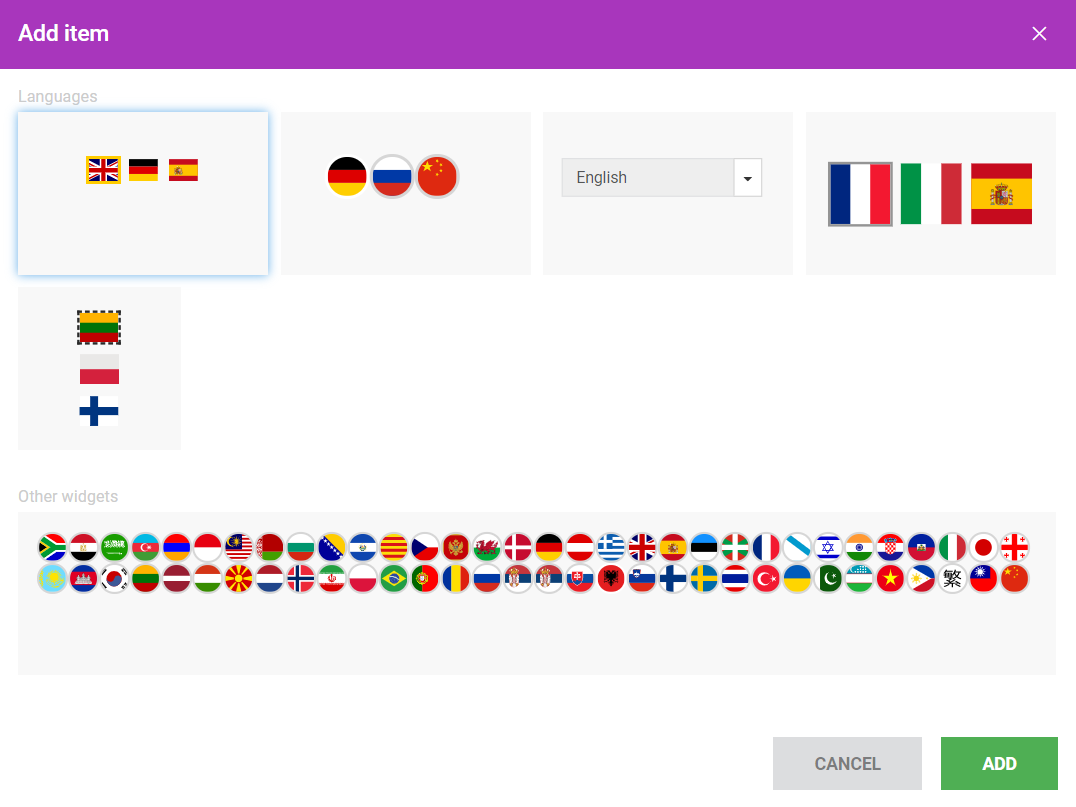
To enable it, you will need to add two or more languages and choose Language switcher. If you set the switcher to Flags, additional Flag settings will appear:

After you configure the feature and add it to your website, you can switch between the languages and start creating the multilingual website:

NOTE: You will need to translate the website content manually – the Languages option doesn’t actually perform translation on the text.
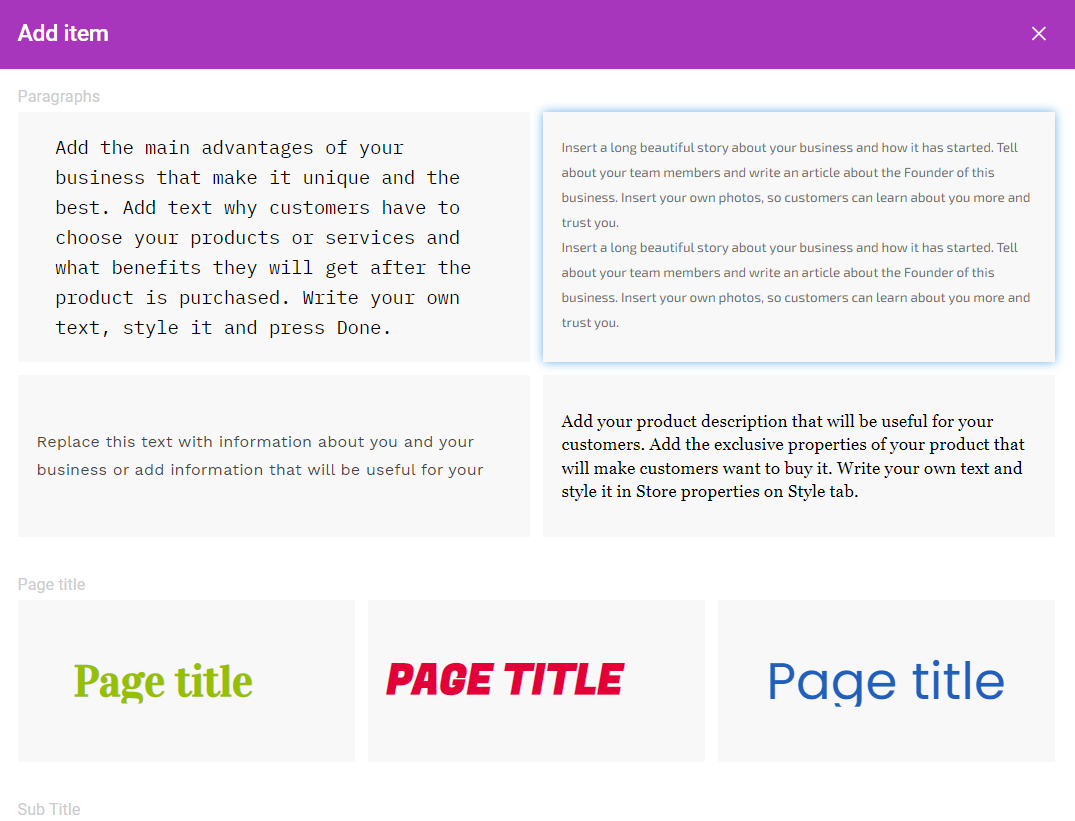
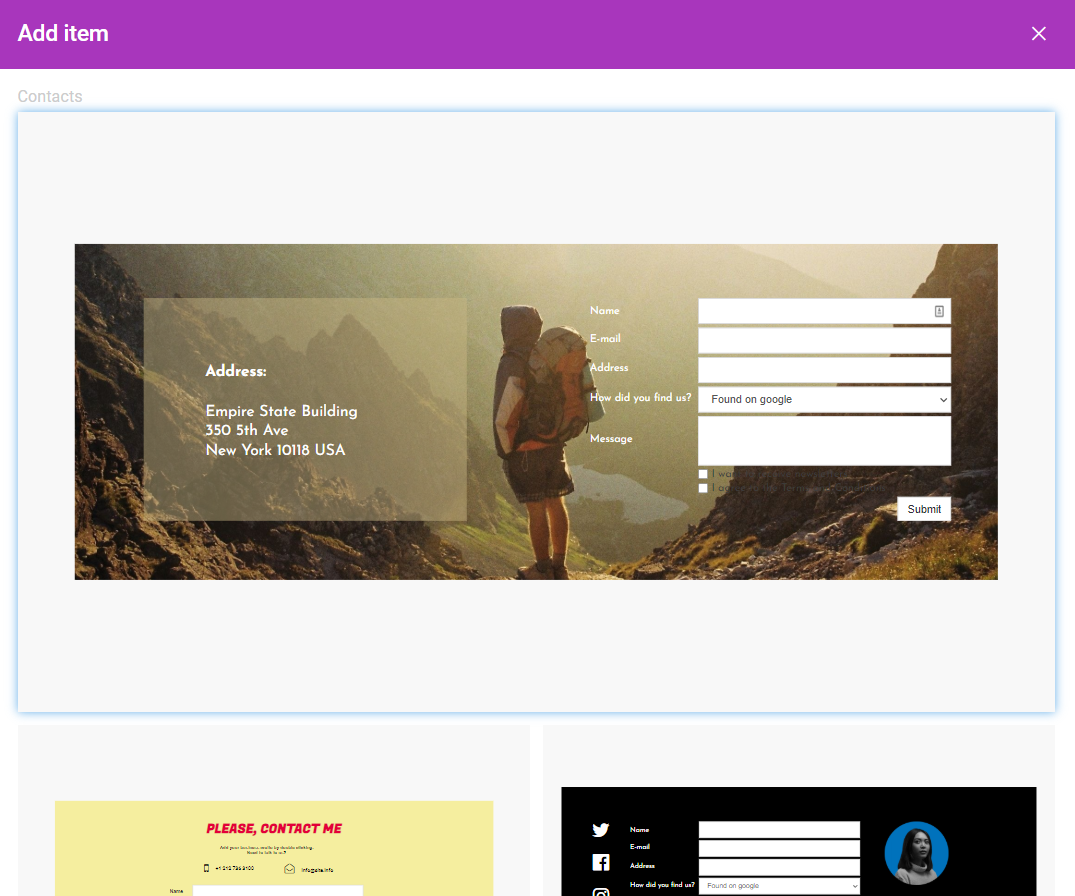
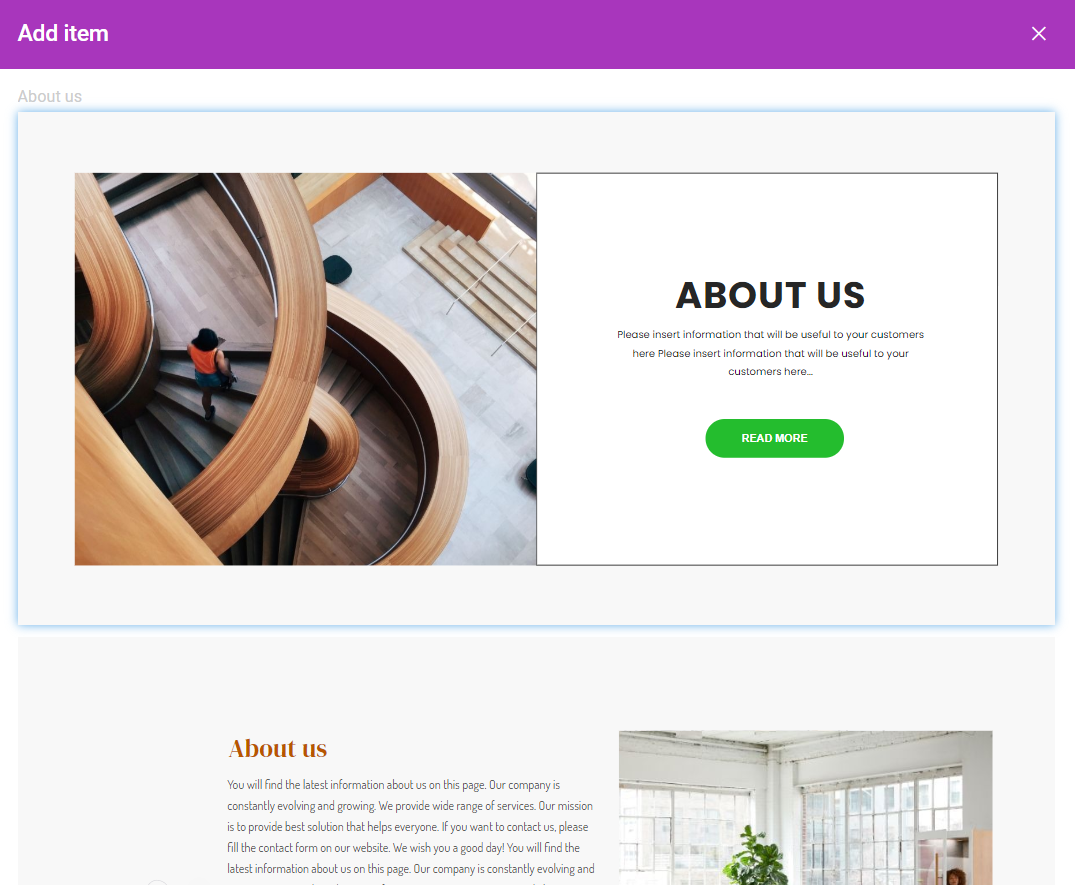
The Blocks section has already configured mockups for pages that can be used as the Contacts, About us, Media, Products, Teams sections, and so on:
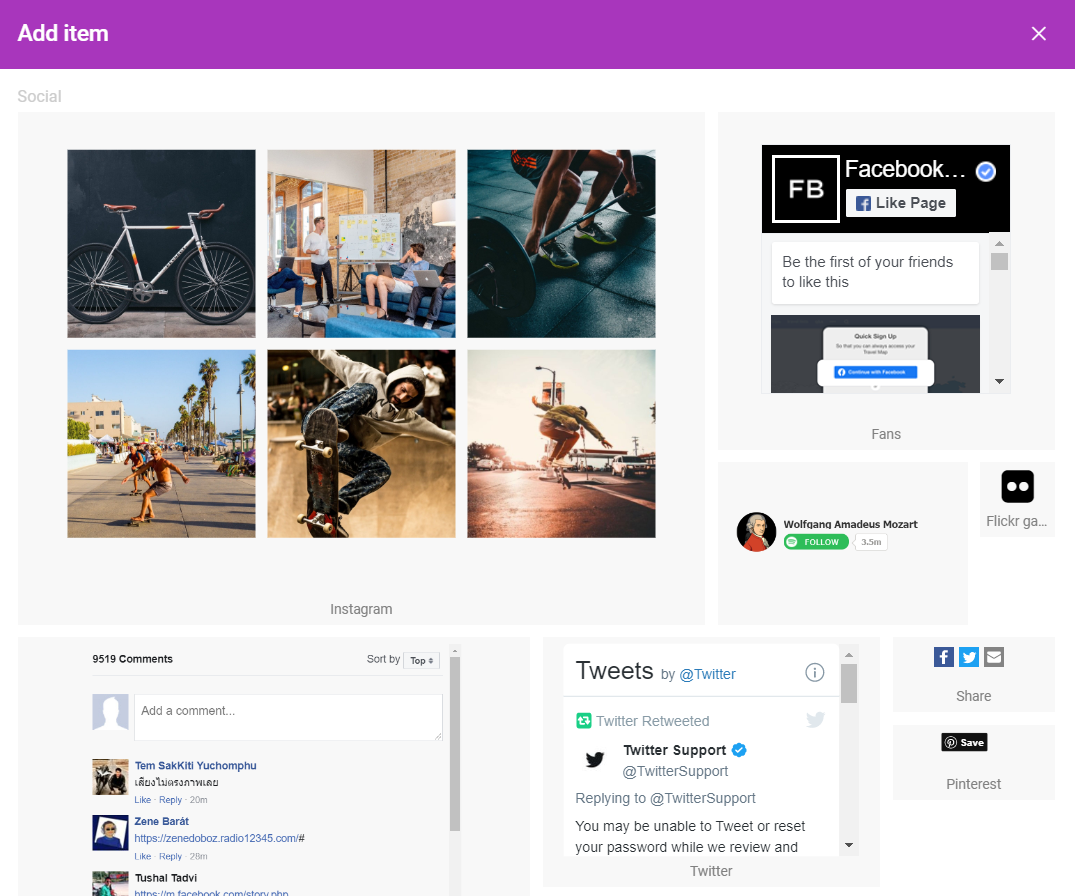
The Social tab can help you to add links to your Instagram, Facebook, Flickr, Pinterest,and Twitter social media accounts:
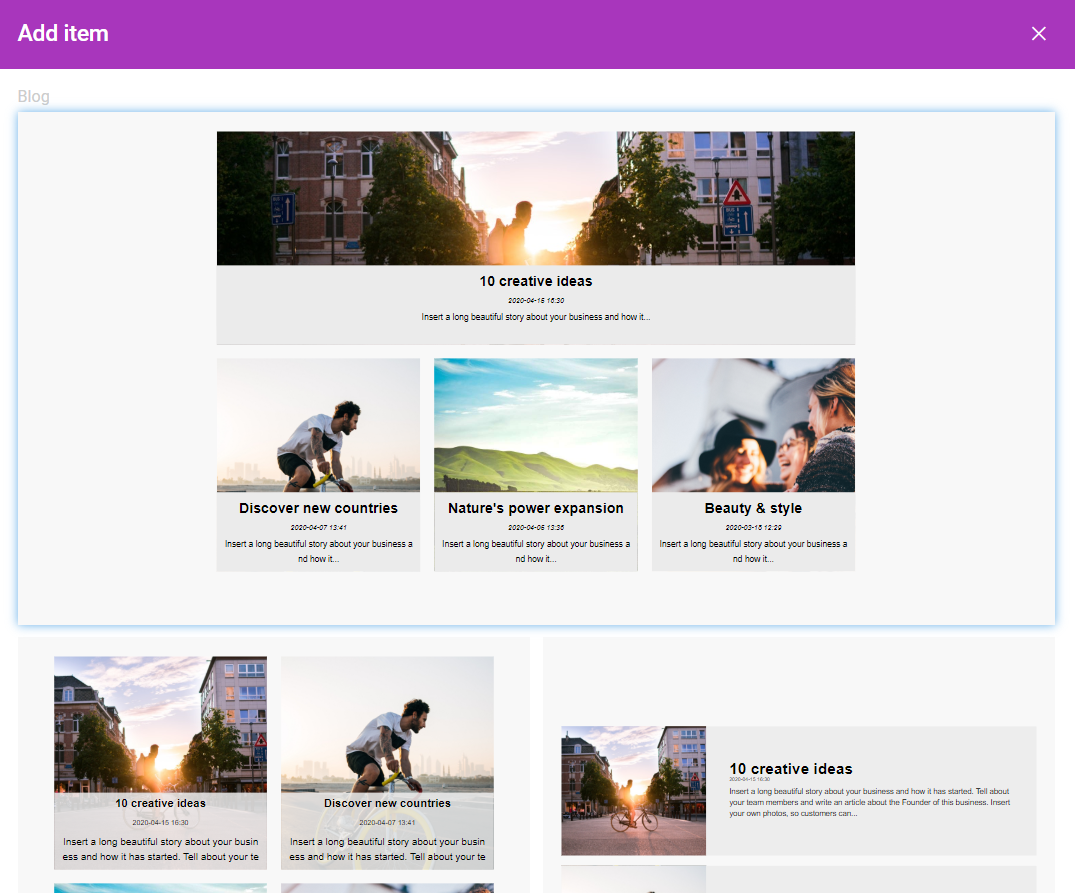
In the Blog menu you can choose available mockups for blog type of content:
The Advanced section has extended features:
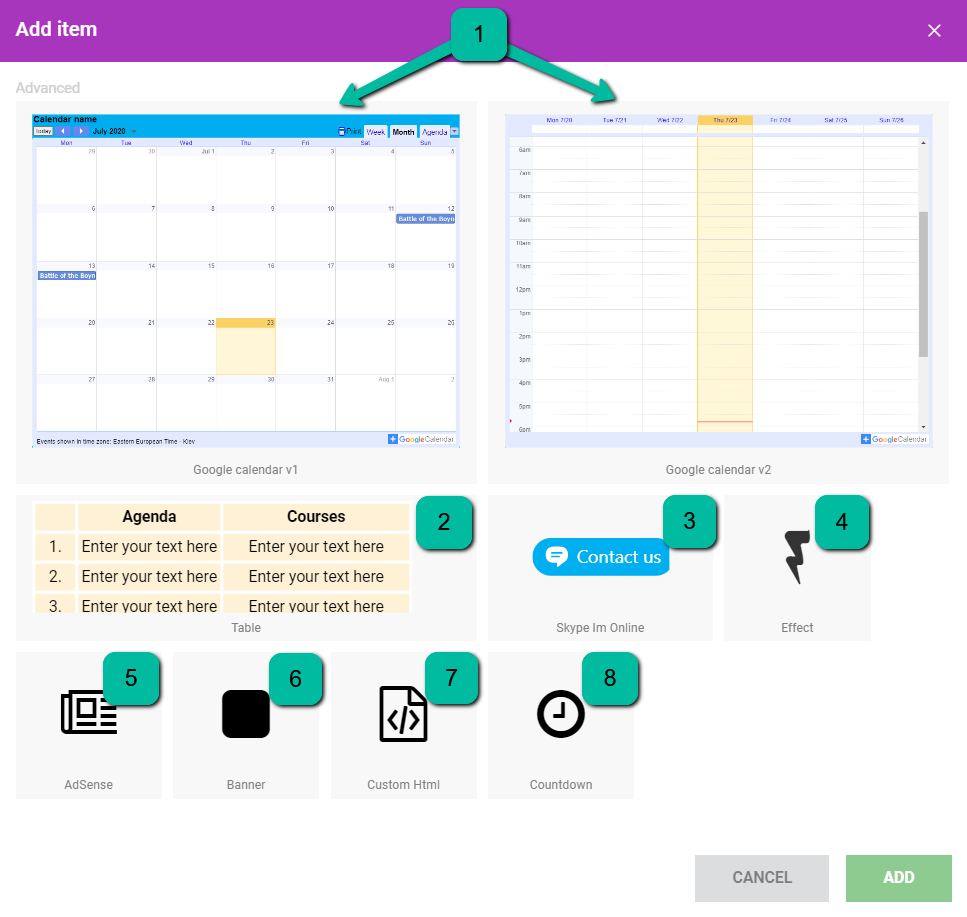
In this section you can do any of the following to your website:
- add Google Calendar using its ID. Be sure the calendar is set to be publicly viewable or it will not appear. (NOTE: It won’t be possible to change or add events to the calendar via the website);
- manage HTML Tables;
- configure a Skype call or chat with a particular user;
- try Effect – a paid tool for online blogging;
- generate an ad in your Google AdSense account and copy & paste its HTML code into AdSense;
- add advertising/flash Banners;
- insert your own HTML code to the website.
- add acountdown in case you are only preparing your website for publishing.
There are also many E-commerce tools that can be found in the Commerce section. You can add your own Store (1), Store Cart (2), or configure a payment processor to receive payments (3):
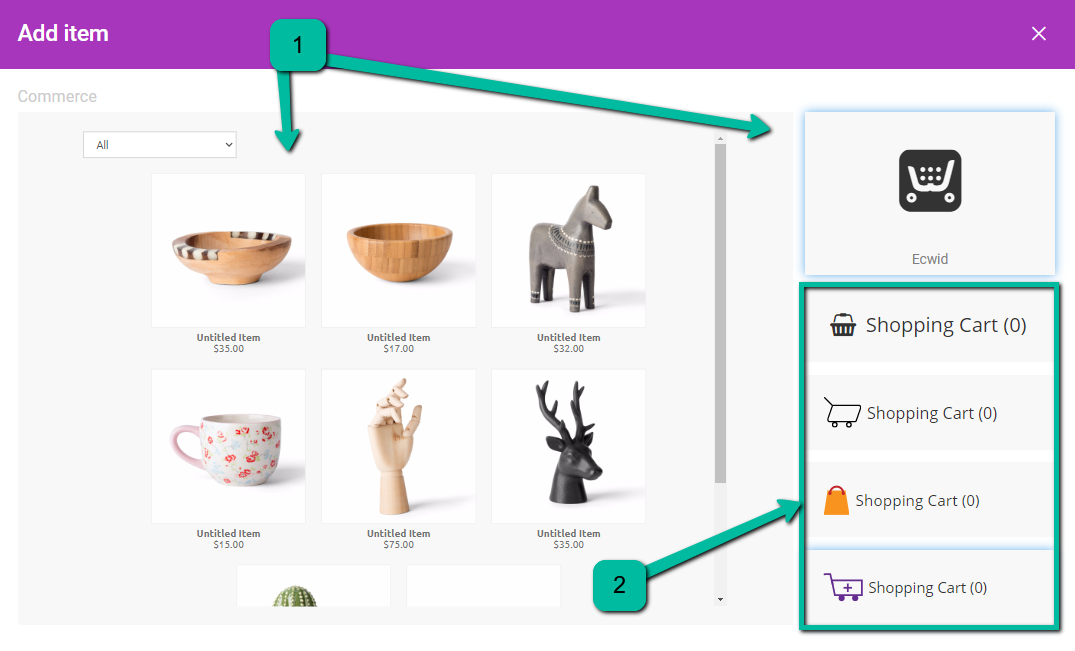
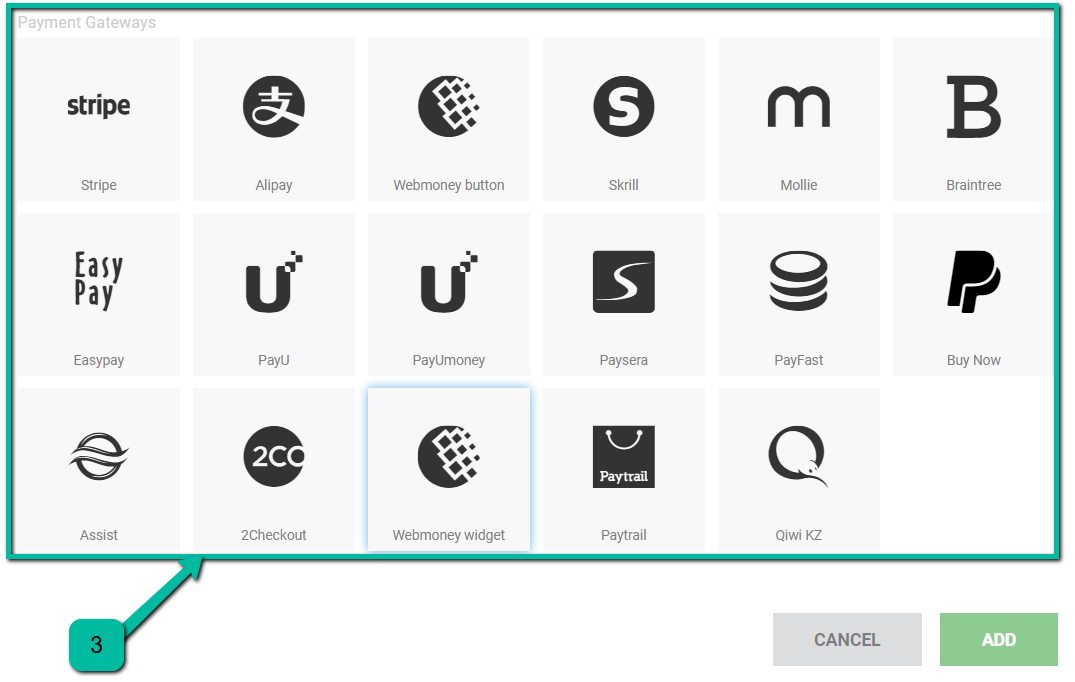
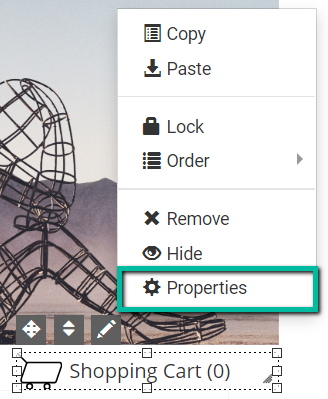
If you want to configure several payment systems, you need to add Store Cart and open Properties. Different payment gateways (payment processors) will be listed in the General tab:
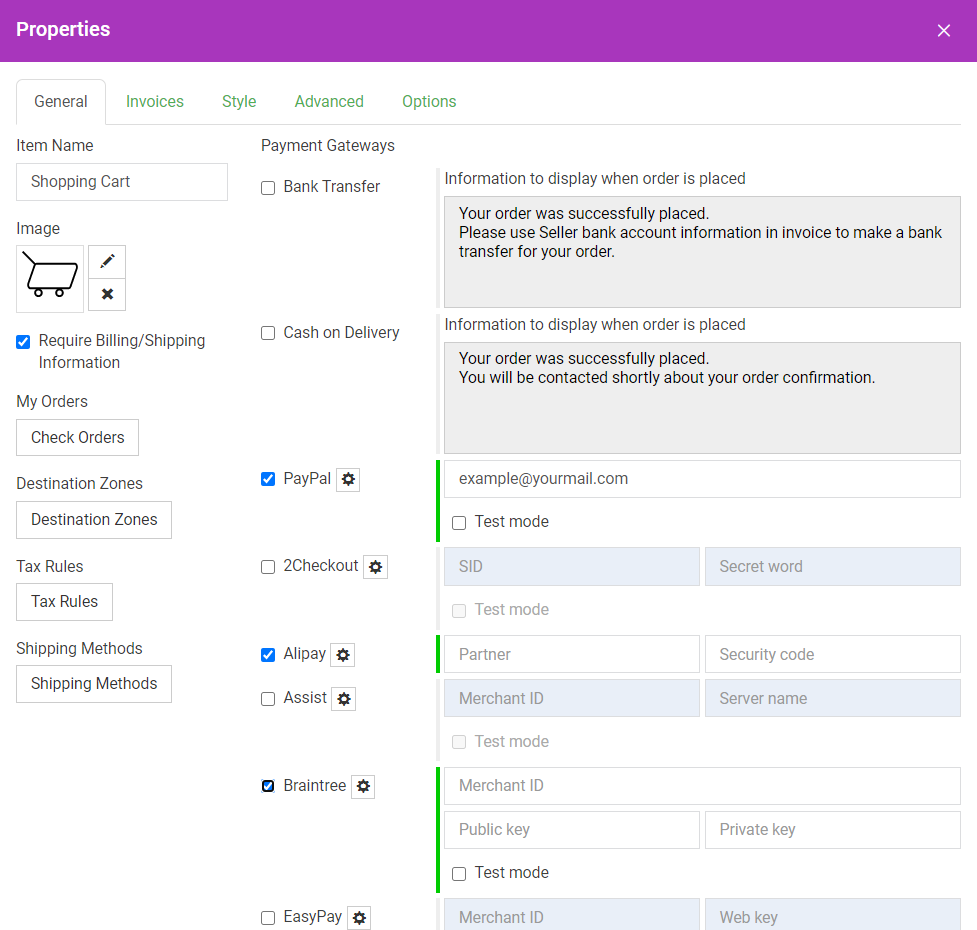
More details can be checked on the official websites of the payment processing companies.Â
PayPal requires an email address to make the payment system work. During the checkout process, your customers will have opportunity to enter their billing and shipping details, and the PayPal Buy Now button will be available in Payment methods.
However, other payment processors may need additional details to process payments. Please check with the individual companies for more information.
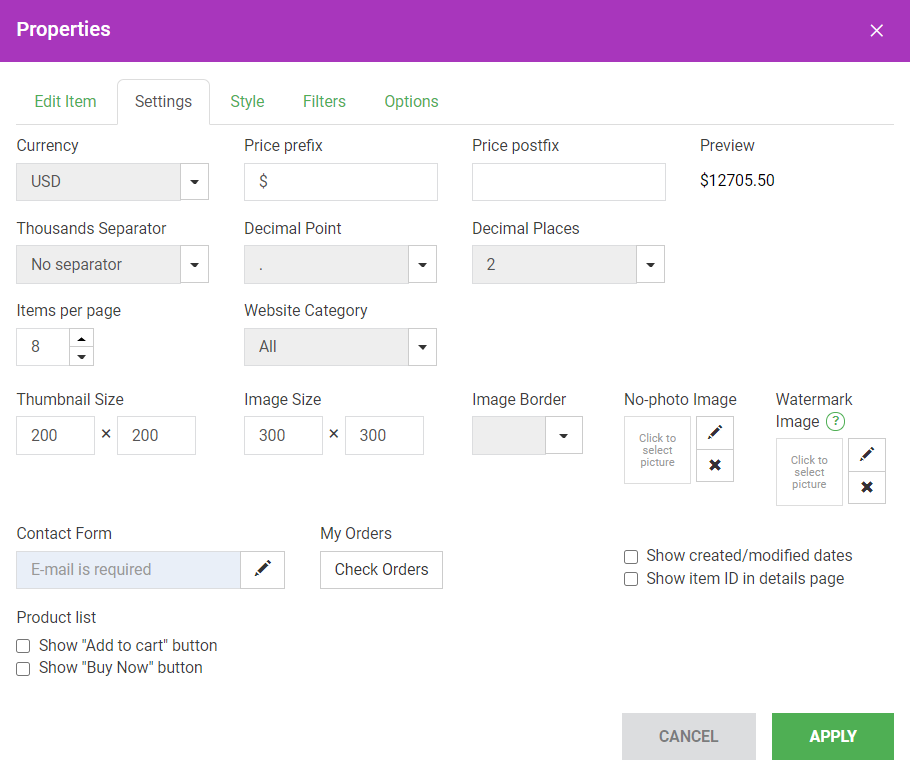
The Check orders button is available in Properties >> Settings menu with e-commerce templates:
Where Website Builder stores files
You can check your website’s files in cPanel >> Files section >> File Manager menu.
Website Builder creates a folder called /ncsitebuilder, and you can locate .htaccess, index.php, and web.config files in the root directory of the domain.
You can find more information on File Manager here.
That’s it!