SSL Certificate installation on httpd (CentOS)
- SSL Installation
- 2,437 views
- Aelswith E.

| Note: Before you begin, ensure youâ$™re all set with the prerequisites. |
| SSL installation instructions for Debian & Ubuntu |
Installation steps
- Enabling SSL/TLS support on Apache
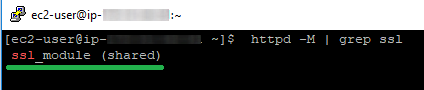
Now we need to make sure that SSL/TLS support is enabled on the webserver. For serving secure connections, the â$œmod_sslâ$ module is used. To check if it is installed on the server, use the following command:
httpd -M | grep sslIf this module is installed, the server will respond as follows:
If the server does not show any SSL modules in the output, it will be necessary to install mod_ssl.
Use â$œyumâ$ package manager to download and enable the needed component. Here is the simple command for doing this:
sudo yum install mod_ssl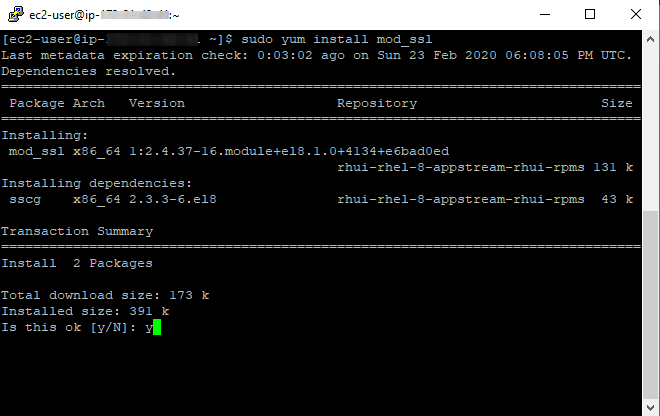
Confirm the installation by typing â$œ
yâ$ and pressing â$œEnterâ$ key.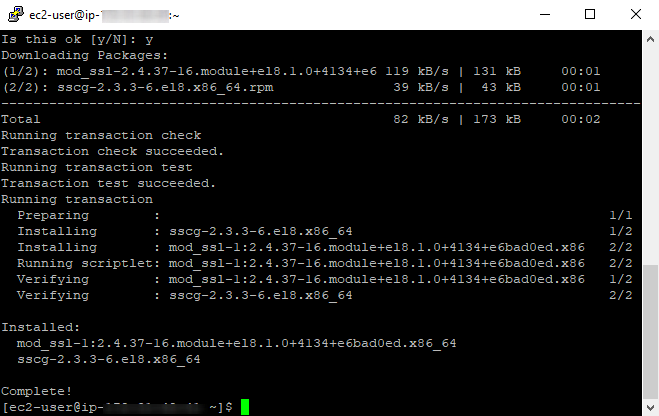
After the module is successfully installed, if there are no SSLs configured on this server yet, the command â$œ
httpd -Sâ$ may respond with an error message regarding the missing SSL certificate: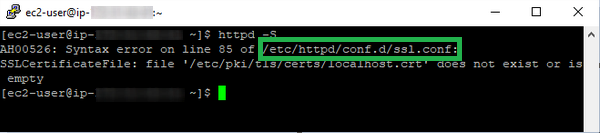
The new SSL configuration file generated automatically is marked with green. It was generated during the installation of the â$œmod_sslâ$ component.
The default location and name of the SSL configuration file is
/etc/httpd/conf.d/ssl.confIf the SSL certificate was installed before, you will see the path of the currently used configuration file near the relevant domain name in the
httpd -Soutput:
The configuration file is the file where we need to provide the path to the SSL certificate, CA Bundle file, and the Private key files.
Note: To be on the safe side, you can save the original file as a backup, so that you can safely create a new one if necessary. This can be done by running the following command:
mv /path/to/old_filename /path/to/new_filenameBy doing this, we are â$œmovingâ$ our file to its new location, which includes its final filename.
In our test case, the command will be:
mv /etc/httpd/conf.d/ssl.conf /etc/httpd/conf.d/ssl.conf.backup
The initial configuration file version will be renamed to
ssl.conf.backup, and you can start editing thessl.conffile freely without being afraid to break something, since you have the previous working configuration file backup which can be restored if needed. - Configuring the webserver
If the SSL certificate was not installed on the server before, it will be necessary to create a new SSL configuration file.
It can be done using one of the popular text editors, such as nano, vi, etc.
The command for the file creation will be nano ssl.conf or vim ssl.conf respectively.
We suggest creating the SSL configuration file in the following path:/etc/httpd/conf.d/ssl.confIf you already have the configuration file created, please open it for editing instead of creating a new file. We suggest creating a backup of the configuration file to have a working backup to revert the changes if needed. To create a backup, copy the old configuration file using the following command:
cp /path/to/ssl.conf /path/to/ssl.conf.backupAfter that, check the file content and ensure that it has all the necessary lines and values from the example configuration file for configuring the secure connection.
For a new file, please add the following lines, making sure to modify them with the exact values of your domain name, document root and paths to the SSL certificate, Private key and CA bundle.Here is the configuration file example:
Listen 443ServerName (DOMAIN NAME OF THE WEBSITE)
DocumentRoot (ROOT FOLDER OF THE WEBSITE)SSLEngine on
SSLCertificateFile (Certificate PATH)
SSLCertificateKeyFile (Private key PATH)
SSLCertificateChainFile (CA Bundle PATH)
If there are several websites being hosted on the same server, make sure to add separate
parts for the corresponding websites. However, please keep in mind thatListen 443should be present only once in the whole configuration file.In our case, the configuration file looks as follows:
Listen 443ServerName example.com
DocumentRoot /var/www/htmlSSLEngine on
SSLCertificateFile /etc/ssl/1.crt
SSLCertificateKeyFile /etc/ssl/1.key
SSLCertificateChainFile /etc/ssl/1.ca-bundle - Checking the configuration file and restarting the webserver
Now, make sure to check the file syntax by running this command:
httpd -t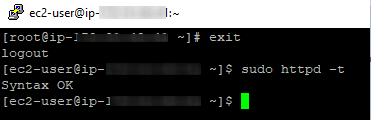
If the command responds with â$œSyntax OKâ$, you are free to reboot the Apache service. To do that, run the command:
sudo service httpd restartIf the command output shows some errors, we suggest double-checking that all installation steps were done properly. Head to the Tips and troubleshootings section of this guide for further steps.
Once restarted, the Apache server should add the newly created SSL configuration file to its settings. To check it, run the following command:
httpd -S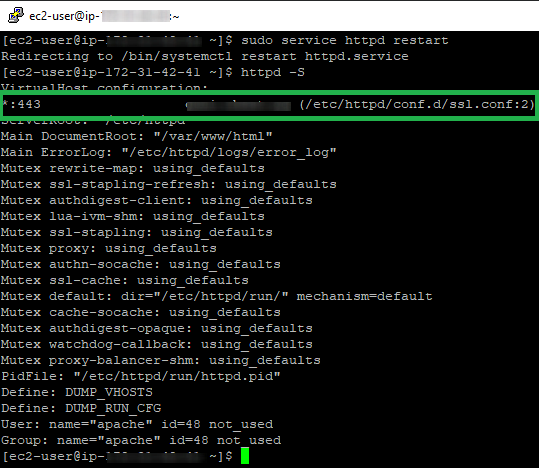
Done! The website is now secured. The installation can be checked here.
There are no further obligatory actions for securing your domain name, however, you might wish to set up a HTTPS redirect for the website to be switched to a secured version automatically without entering https:// manually into the browser address bar. For a more detailed explanation about setting up the redirect, check this page.
- Enabling SSL/TLS support on Apache
If there are issues with the installation, make sure to double-check this guide step-by-step to avoid mistakes. Be sure to check the troubleshooting section too.
Tips and troubleshooters
If you face any SSL-related issues with your Apache-based website, here is how to troubleshoot the most known errors that might occur during the restart:
- X509_check_private_key:key values mismatch
- ‘Invalid command ‘SSLEngine’ error
- Untrusted and Missing Intermediate Certificate Error
- 0906D066:PEM routines:PEM_read_bio:bad end line
Here are some more useful tips about the process:
- If you face a â$˜permission deniedâ$™ error when running a command, try adding the â$˜sudoâ$™ parameter before the command and run it once again.
For instance, if
nano ssl.confresults inPermission denied, you can try runningsudo nano ssl.confinstead.Adding sudo will grant you â$˜superuserâ$™ permissions and the ability to perform some actions that require root user access without real root access.
Please keep in mind that you may need to enter a password for the sudo user during this operation. Its symbols might not be shown when entering (for security reasons), however, the password will be accepted if entered properly. This password may have been given to you by your server admin or hosting provider support team, so if you donâ$™t know the password, we suggest contacting them for further assistance.
- If you see that the SSL has been installed without the CA bundle, it is possible to add the CA bundle without any significant changes to the configuration settings.
In this case, please find the SSL configuration file on your server by following the steps in the guide for apache2 or httpd. Locate the path to the SSLCertificateFile in the configuration file, and open the file via that path for editing. You will see one block of code there (which is the SSL itself). You can download the CA bundle file from your Namecheap account (it is downloaded in the same archive with the SSL certificate) or from this page and copy the whole .ca-bundle file contents to the opened SSLCertificateFile.
The new CA bundle codes should be entered from the new line after the SSL code which is already present there, without adding any new lines between them, like this:
