HOW TO SECURE A CENTOS 7 SERVER IN 3 SIMPLE STEPS
- Server Administration
- 4,295 views
- Kapueo I.

Once we have set up a brand new CentOS 7 VPS, the next step should always be to secure the server. This is commonly known as server hardening. Server hardening ensures restrictive usage of the server by incorporating various authentication and authorization mechanisms.
So what all are the security features that can be added to a new CentOS 7 server? Options are almost endless, but some of the most popular ones are:
- Setting max password login attempts per session
- Installing an Advanced Intrusion Detection environment
- Enabling auditd Service
- Enabling a high quality, secure password policy
- Limiting the reuse of passwords
- Pruning Idle Users
- Setting deny for failed password attempts
In today’s post we will discuss the following in detail:
- Setting max password login attempts per session
- Installing Advanced Intrusion Detection Environment
- Enabling auditd Service
SETTING MAX PASSWORD LOGIN ATTEMPTS PER SESSION
For every session, it is essential to set a max password login attempt. This helps to ensure that unauthorized users are prevented from attempting a brute force attack on the server. In most cases, you want to limit users to three attempts.
In CentOS, this can be easily set by editing the pam_pwquality.so statement present in /etc/pam.d/system-auth. You can find the system-auth file in location /etc/pam.d.
Use command cd /etc/pam.d
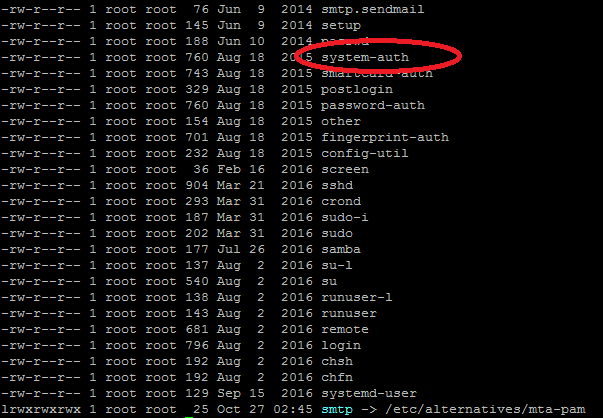
Open system-auth file using vi editor. On opening with vi editor, you can see the complete file as shown below. Edit statement pam_pwquality.so. You can change retry=3 or make it even lower.

Save the file and you have successfully finished configuring the max password login attempts per session for your CentOS 7 server.
INSTALLING AN ADVANCED INTRUSION DETECTION ENVIRONMENT – AIDE
Next, we will discuss how to install the Advanced Intrusion Detection Environment (AIDE) in CentOS 7. But first, let us understand what is AIDE.
AIDE takes a snapshot of the system, modification times, register hashes and other data related to the files defined by the administrator. This snapshot is used to build its own database which will be used to check and verify the integrity of the files. It supports message digest algorithms such as – sha1, md5, crc32, sha256, sha512, rmd160, and much more. It provides sophisticated techniques to evaluate and report any malicious change within the server.
You can install AIDE in CentOS 7 using the command – yum install aide. Press y on the command prompt to proceed with the installation.
Once the installation is complete, you can check aide version, by using command aide -v. The output will show the version and other details of AIDE as shown below.
The next thing is to generate the database. You can use the default files as provided in /etc/aide.conf or choose to change certain files. Once changes to aide.conf file have been finalized, the next step is to generate the database. To generate the database, use the command aide — init. This command will take some time to execute.
Once the database has been successfully created, you can see a message on the console as shown below-
The database is created in location /var/lib/aide/aide.db.new.gz. However, to run a check with AIDE, the database must be moved to location- /var/lib/aide/aide.db.gz. Use the move command- mv /var/lib/aide/aide.db.new.gz /var/lib/aide/aide.db.gz
Finally, you can issue the check command as- aide–check. This will take some time to execute.
If all the files match, then you will see the following message on the console:
Alternatively, you also use the below single-line command to perform all of the above steps:
yum install aide -y && /usr/sbin/aide –init && cp /var/lib/aide/aide.db.new.gz /var/lib/aide/aide.db.gz && /usr/sbin/aide –check
To automatically run AIDE checks on a schedule, you can use crontab. Use a command like the one below (the frequency can be changed, of course)-
echo “05 5 * * * root /usr/sbin/aide –check” >> /etc/crontab
This successfully completes Advanced Intrusion Detection Environment Setup for your CentOS 7 server.
ENABLING AUDITD SERVICE
The third piece of the puzzle to secure your CentOS 7 server is to enable the Auditd service. But before we start, let us understand the importance of auditd.
Auditd is a component of the Linux Auditing System. It is responsible for writing audit records to disk. You can configure audit rules, view logs and customize it based on your requirements. Auditd helps in providing valuable insights about server performance and allows you to closely monitor every activity in the server.
Audit system uses two packages: audit and audit-libs. You can check if audit is installed on your server using the command- sudo yum list audit audit-libs.
If you want to install audit, you can use the command- sudo yum install audit.
In case you want to reinstall, then use the command- sudo yum reinstall audit.
To enable auditd, use command- systemctl enable auditd.service
Once enabled, you can start the service using command- systemctl start auditd.service
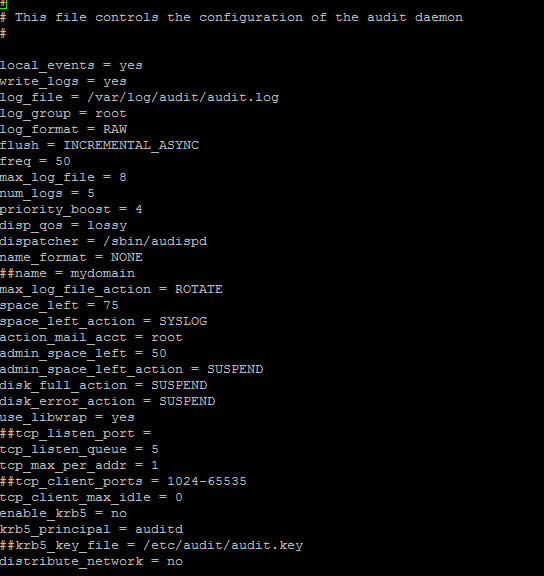
You can configure auditd-related information such as num_logs, max_log_file in the file /etc/audit/auditd.conf. The following is a sample snapshot of auditd.conf-
And that’s it! Your CentOS 7 server is now more secure than before thanks to three simple items.