How to connect to remote storage on CentOS server
- Tips and Tricks
- 1,573 views
- Aelswith E.

This guide will help you to set up offsite (remote) backup storage settings on your CentOS server.
PLEASE NOTE: This option is currently only available for a certain group of users. Please stay tuned if youâ$™re also interested in remote storage.
To start using remote storage, you need to establish a connection between your server and the storage itself.
NOTE 1: Before starting any configuration, please check that you have two configuration files, which were sent to you via secured messages.
NOTE 2: Save backups on your local computer or server. Since the remote backup storage option is currently in beta, so we cannot guarantee backup safety for the period of beta testing.
All commands should be run from the root user.
1. Install necessary package
To start, you will need to install the necessary package that works with iSCSI:
yum install iscsi-initiator-utils

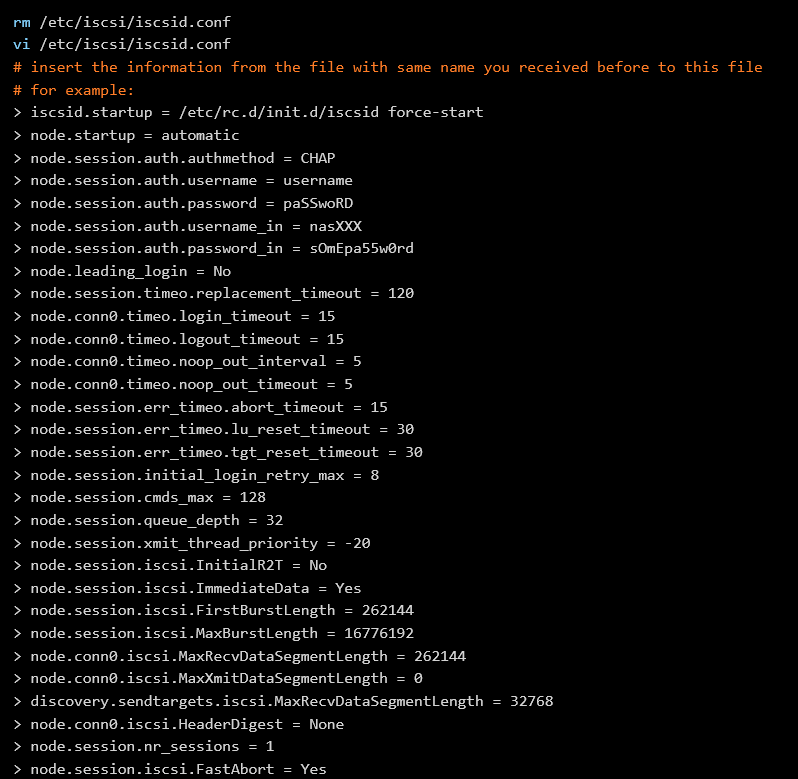
2. Edit configuration files
Now edit configuration files with your parameters in order to connect to the remote storage:
iscsid.conf
initiatorname.iscsi

Now restart the iSCSI service:
systemctl restart iscsid.service

3. Check the state of iSCSI service and connect to storage
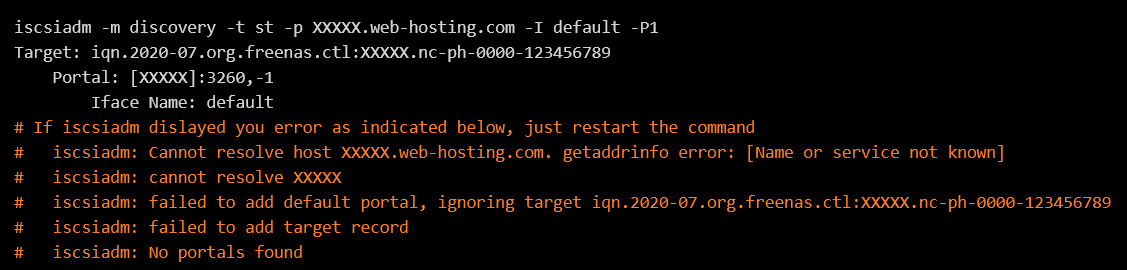
Now let’s check the connection to the storage host:
iscsiadm -m discovery -t st -p XXXXX.web-hosting.com -I default -P1
where XXXXX is variable value “node.session.auth.username_in” from file /etc/iscsi/iscsid.conf
iscsiadm -m discovery -P 1
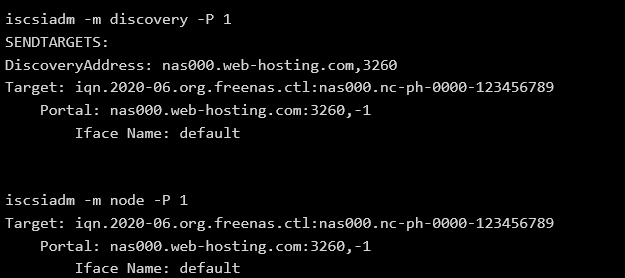
Storage was successfully discovered. Now you can connect to the storage and check the session:
iscsiadm -m node -l
iscsiadm -m session -P 3
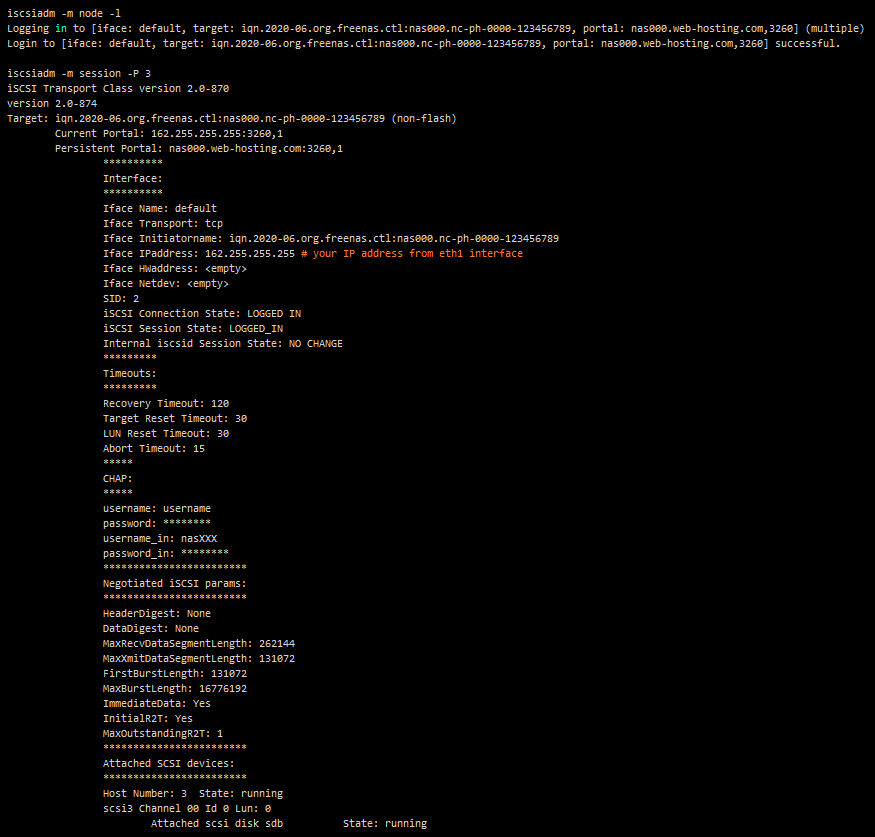
In the last string, you can see that iSCSI target was connected as a physical drive sdb.
4. Create partition and filesystem on scsi disk
If you connect to remote iSCSI storage for the first time, you need to create partition and filesystem on this disk:
parted /dev/sdX mklabel msdos

5. Mount drive and adding mount parameters to /etc/fstab
Finally, you should mount the drive and add the mount parameters to /etc/fstab for automounting in case of server reboots. In other words, you should create a folder for the disk and transfer it to this folder:
backup folder name

If you would like to configure automatic backups, feel free to follow these instructions.
Thatâ$™s it!