SSL certificate activation and installation for domain(s) hosted on Hostseo hosting servers
- SSL Installation
- 1,942 views
- Aelswith E.

If you have a single domain Domain Validation certificate and shared hosting with Namecheap, we encourage you to install your certificate using our two-click cPanel SSL Plugin. If your certificate or hosting package is not supported by our cPanel plugin, but you still wish to perform the installation yourself, you may find useful these articles for CSR (Certificate Signing Request) generation and SSL installation. In case for some reason you do not want to do the installation yourself, or you messed up, refer to the instructions below.
Note: If you have a reseller server and need to install the certificate for your customerâ$™s website, you can generate the CSR code on your side in cPanel or WHM using the option SSL/TLS manager > Generate Certificate Signing Request. You might also submit a ticket to us for CSR generation. Since Reseller hosting requires special rights to access any account, we are not able to install the certificate for you on a Reseller server in Live Chat. The CSR generation and certificate installation in this case can be done in a ticket only.
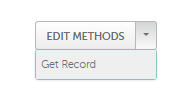
- Get a CSR code from us.
To generate a CSR, you will need to submit a ticket to our SSL department and provide us with answers to the following questions:
- Email Address the certificate will be sent to
- Domain to issue the certificate for (choose whether you want www in front of the domain or not)
- Country (2-letter abbreviation)
- State
- City
- Company Name
- Company Division (i.e., Support, IT, Sales, else)
- Purchase certificate from us. You can purchase a certificate from any other certificate provider as well. If you choose to use a certificate from another provider, you will need to contact them for assistance on activation and issuance of your certificate. After that, we will need the validated certificate in the PEM format for the installation.
- Activate the certificate. If you are going to use an SSL certificate from Namecheap, please follow the instructions below to activate it:
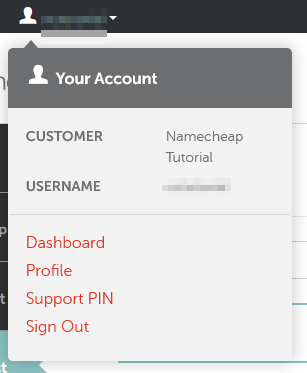
- Sign into your Namecheap account.
- Mouse over your username in the left upper corner >> Dashboard:
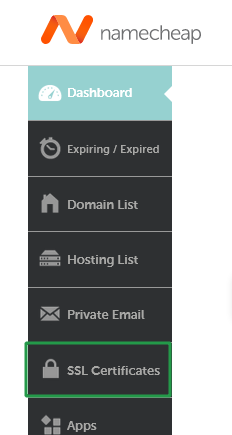
- In the Dashboard menu, open the SSL Certificates tab:
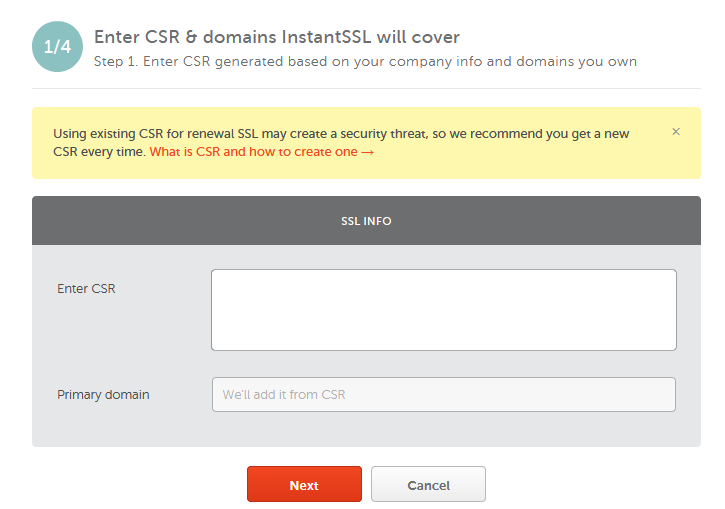
- Click on the Activate button next to the certificate you want to use:

- Paste the CSR code we provided you with in the corresponding box.
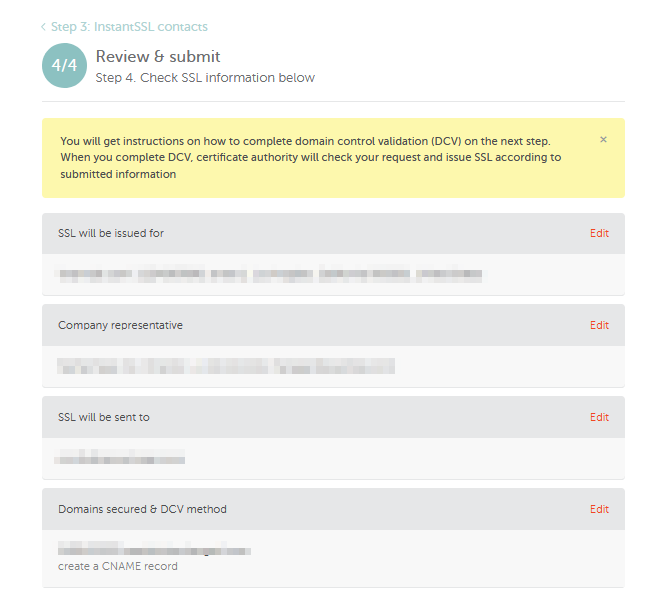
- Select the domain control validation method among CNAME, File uploading and Email-based options:
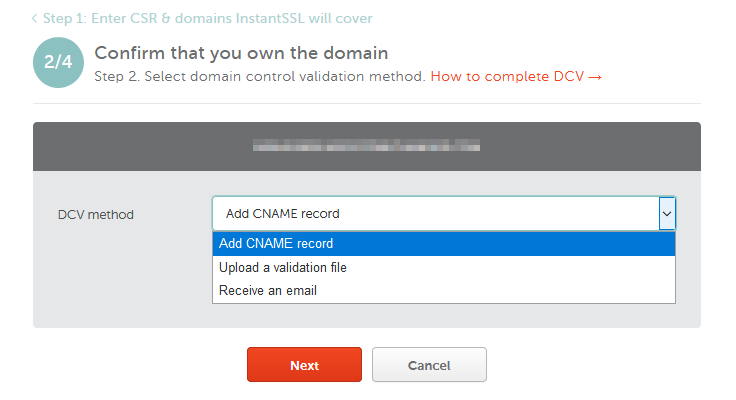
More details on each of these options can be found here. - On the next step, please put the email address we should send the certificate to and click Next.
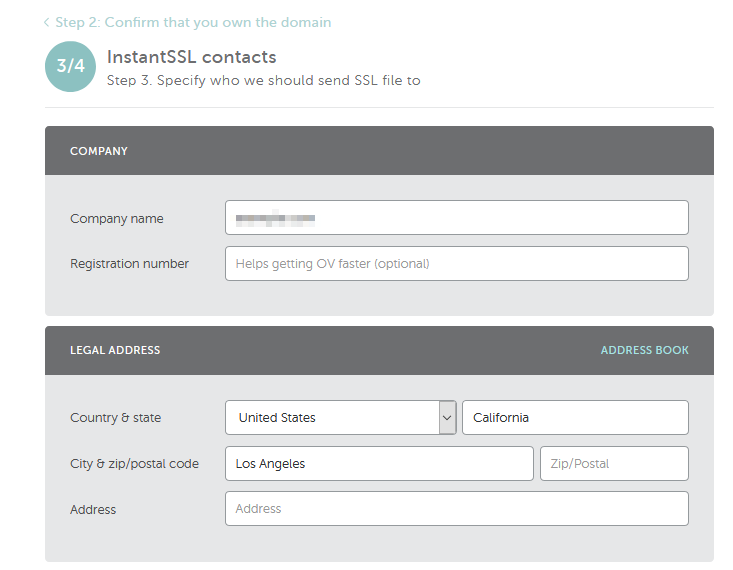
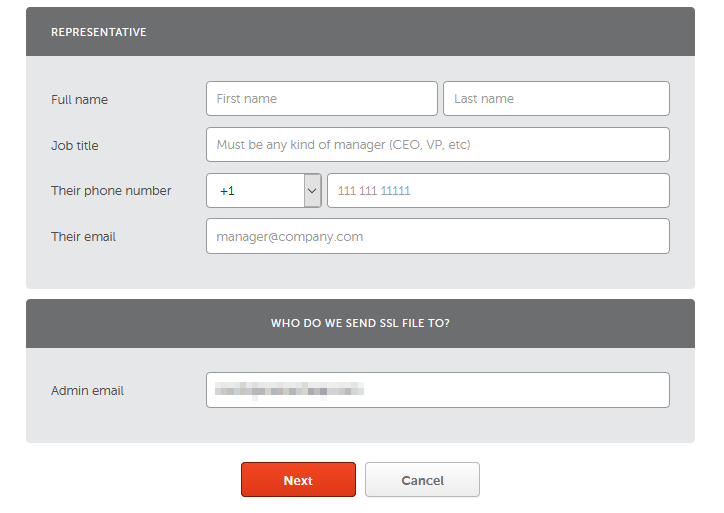
Note: If it’s the Organization validated (OV) or Extended validated (EV) certificate, you’ll be prompted to fill out your company details as well:
   Â
- Click Submit to confirm the domain control validation method and submit the order.
- Approve the certificate issuance. If you chose Email validation, an approval email is to be delivered to a chosen approval email address shortly after you finish the activation process. If you do not receive an email within 2 hours, please refer to the instructions provided in the What should I do if approval email was not delivered? article. When you confirm the issuance by following the link in the approval email, you should receive a signed certificate to the administrative email address you indicated during activation.
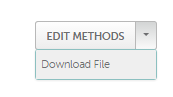
For HTTP-based validation, you need to upload a text file into into a particular directory of your website (/.well-known/pki-validation/). If the domain is the primary one in your cPanel account, the document root is usually the public_html folder. The validation file can be downloaded from the page with the certificate details after it was activated.
Note: If you have activated the certificate with domain.com or www.domain.com indicated as FQDN (Fully Qualified Domain Name) in your CSR code, please make sure that the file is available via http://domain.com/.well-known/pki-validation/file.txt . In this case, www.domain.com is considered to be under your control as well
Content of the file shouldn’t be changed in any way, as Comodo (now Sectigo) validation system is case sensitive.
Refer to this guide for instructions on how the file can be uploaded to your website.
In case of the CNAME-based validation, you need to create a certain CNAME record in the DNS Zone Editor of your cPanel account. The record can be retrieved on the certificate details page after the certificate activation.
The order processing by a Certification Authority may take about 2 hours. If the certificate is not delivered within 2 hours, please review the I have not received my SSL certificate troubleshooter for help.
- You may also want to request a dedicated IP address. You have a possibility to install your SSL certificate on a shared IP address thanks to the SNI technology available with the cPanel control panel. However, a dedicated IP address is good for the website SEO ranking, you can find more information on the matter in this article. A dedicated IP address costs $2/per month. For your convenience, the billing period for your dedicated IP address will be adjusted to the one your hosting package has, and the invoice for the prorated difference will be issued. To request a dedicated IP address, you will need to submit a ticket to our Billing/Sales Department. Our staff will send you the invoice and once paid, they will assign a dedicated IP address to your hosting account.
- Provide us with the certificate that you received or downloaded in your account and we will install it on the server via the ticket where you originally requested your CSR from us.
    Once the certificate is installed, you can securely access your website at https://www.example.com
- In order to make https:// version of the website a default one, set up an automated redirect from http:// to https://. Here is the guide on how to force https:// redirect for the website using the “.htaccess” file in File manager section in cPanel.