Installing an SSL certificate on SonicWall
- Category : SSL Installation
- Posted on : Feb 20, 2020
- Views : 1,333
- By : HostSEO

Once the certificate is issued, it needs to be installed on your appliance. First, you need to download your issued SSL certificate. To download your newly issued certificate from your Namecheap account, refer to this step-by-step instructions and rename it to server.crt.
Note: Due to the peculiarity of the server, it is needed to use default file names. The router will identify the file without any issues:
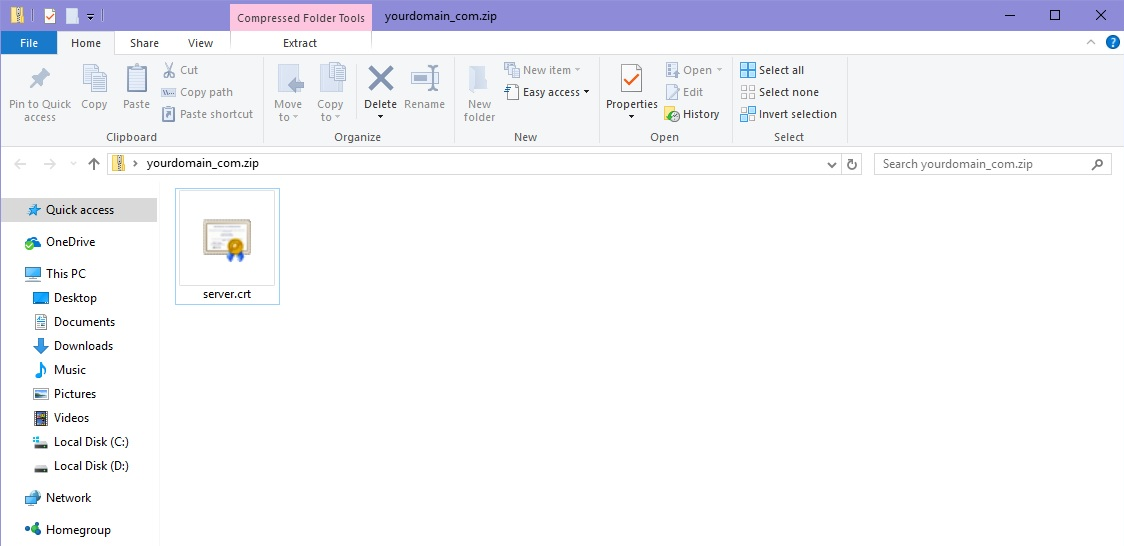
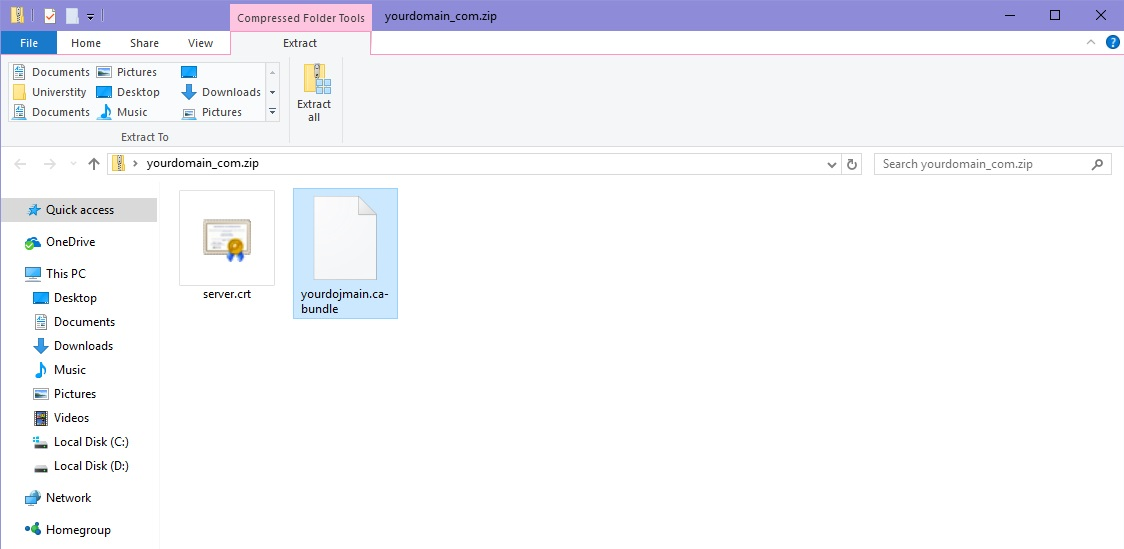
- Create a .zip file with two files. Please take the .crt downloaded from the Namecheap Account panel and also, use server.key generated during CSR creation on your SSL-VPN appliance.
The easiest way to create a zip file is to copy both files into a specific folder, select these files, right-click on them, and then click Send to >> Compressed Folder.
- Log into the SonicWALL SSL-VPN appliance portal.
- After that, expand the System menu and click Certificates.
- Then it is needed to install CA certificates in order to make your website compatible in browsers.
- On the System >> Certificates page, in the Additional CA Certificates section, click Import CA Certificate:
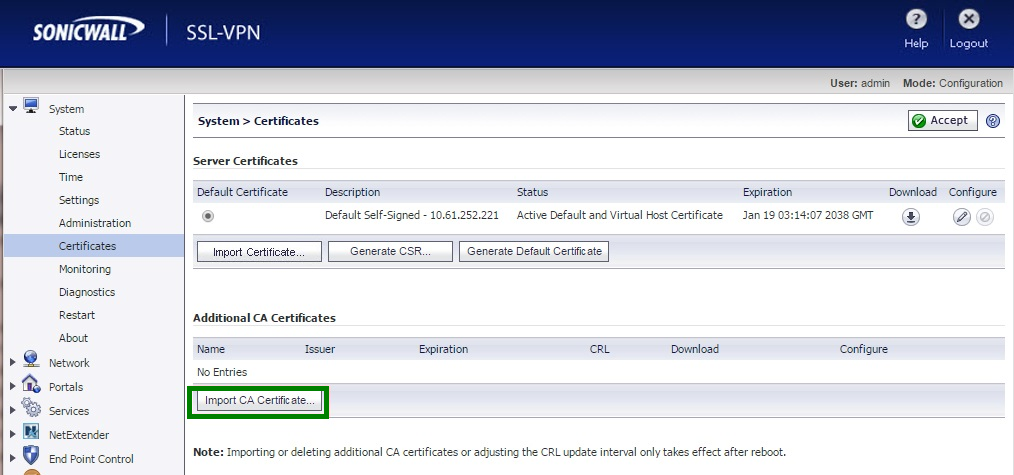
Please upload the file downloaded from the Namecheap Account Panel with the .ca-bundle extension.
- In the Server Certificates section, click Import Certificate.
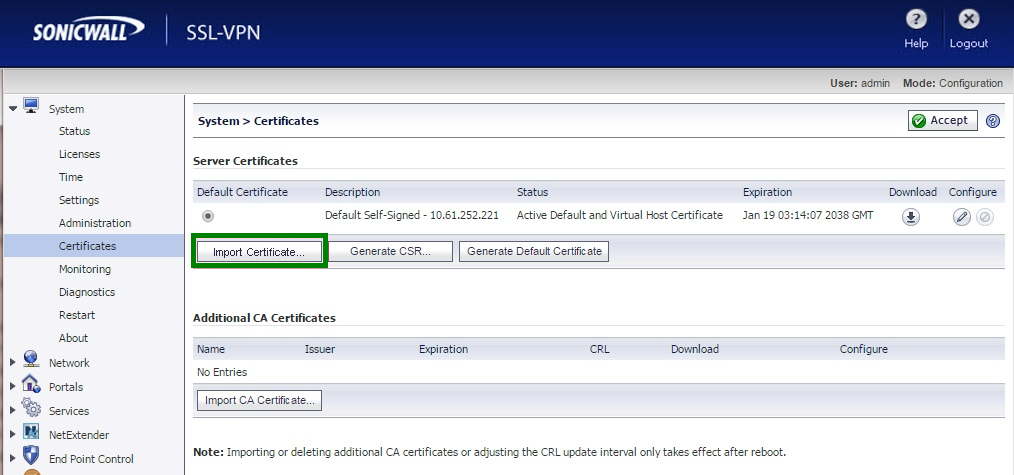
- In the opened Import Certificate window, click Browse, locate and open the .zip file that you created.
- Click Upload:
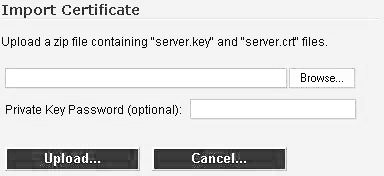
Once it is imported, the certificate will appear in the Server Certificates list on the System Certificates page.
- And now you need to configure your SSL Certificate:
- On the System >> Certificates page, in the Server Certificates section right near your SSL Certificate with the pending request, click the Configure icon.
- At the next step, specify the password created during CSR generation.
- Click Submit.
- Now it is needed to implement the changes:
- In the System >> Certificates section, in the Server Certificates section, select the corresponding certificate.
- On the top right of this page, click Apply.
- If you are not prompted to restart your SonicWALL SSL-VPN appliance, restart it manually.
- In order to restart the appliance, expand the System menu and then click Restart:
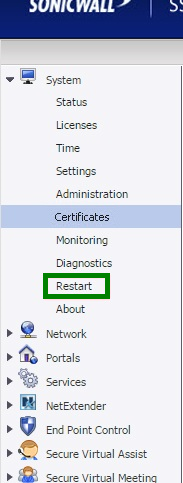
- The SSL Certificate has been successfully installed.
After the certificate is installed, you can check if itâ$™s accurately installed using this tool.
Categories
- cPanel Question 47
- cPanel Software Management 29
- cPanel Tutorials 13
- Development 29
- Domain 13
- General 19
- Linux Helpline (Easy Guide) 156
- Marketing 47
- MySQL Question 13
- News 2
- PHP Configuration 14
- SEO 4
- SEO 42
- Server Administration 84
- SSL Installation 54
- Tips and Tricks 24
- VPS 3
- Web Hosting 44
- Website Security 22
- WHM questions 13
- WordPress 148
Subscribe Now
10,000 successful online businessmen like to have our content directly delivered to their inbox. Subscribe to our newsletter!Archive Calendar
| Sat | Sun | Mon | Tue | Wed | Thu | Fri |
|---|---|---|---|---|---|---|
| 1 | 2 | 3 | 4 | 5 | 6 | |
| 7 | 8 | 9 | 10 | 11 | 12 | 13 |
| 14 | 15 | 16 | 17 | 18 | 19 | 20 |
| 21 | 22 | 23 | 24 | 25 | 26 | 27 |
| 28 | ||||||
Recent Articles
-

Posted on : Sep 17
-

Posted on : Sep 10
-

Posted on : Aug 04
-

Posted on : Apr 01
Tags
- ts
- myisam
- vpn
- sql
- process
- kill
- tweak
- server load
- attack
- ddos mitigation
- Knowledge
- layer 7
- ddos
- webmail
- DMARC
- Development
- nginx
- seo vpn
- Hosting Security
- wireguard
- innodb
- exim
- smtp relay
- smtp
- VPS Hosting
- cpulimit
- Plesk
- Comparison
- cpu
- encryption
- WHM
- xampp
- sysstat
- optimize
- cheap vpn
- php-fpm
- mariadb
- apache
- Small Business
- Error
- Networking
- VPS
- SSD Hosting
- Link Building
- centos
- DNS
- optimization
- ubuntu


