How to – PHP Loaders
- Category : PHP Configuration
- Posted on : Nov 21, 2021
- Views : 1,804
- By : HostSEO

What are PHP Loaders and what is their role?
As you may know, PHP files are plain text files that are not encrypted in any way, which basically means that if someone gains access to a PHP-based application or website, all the inner code structure will be available for modification. To prevent this, encoders were specifically designed to transform the human-readable code into unreadable sophisticated bytecode protected from unwanted interference and changes.
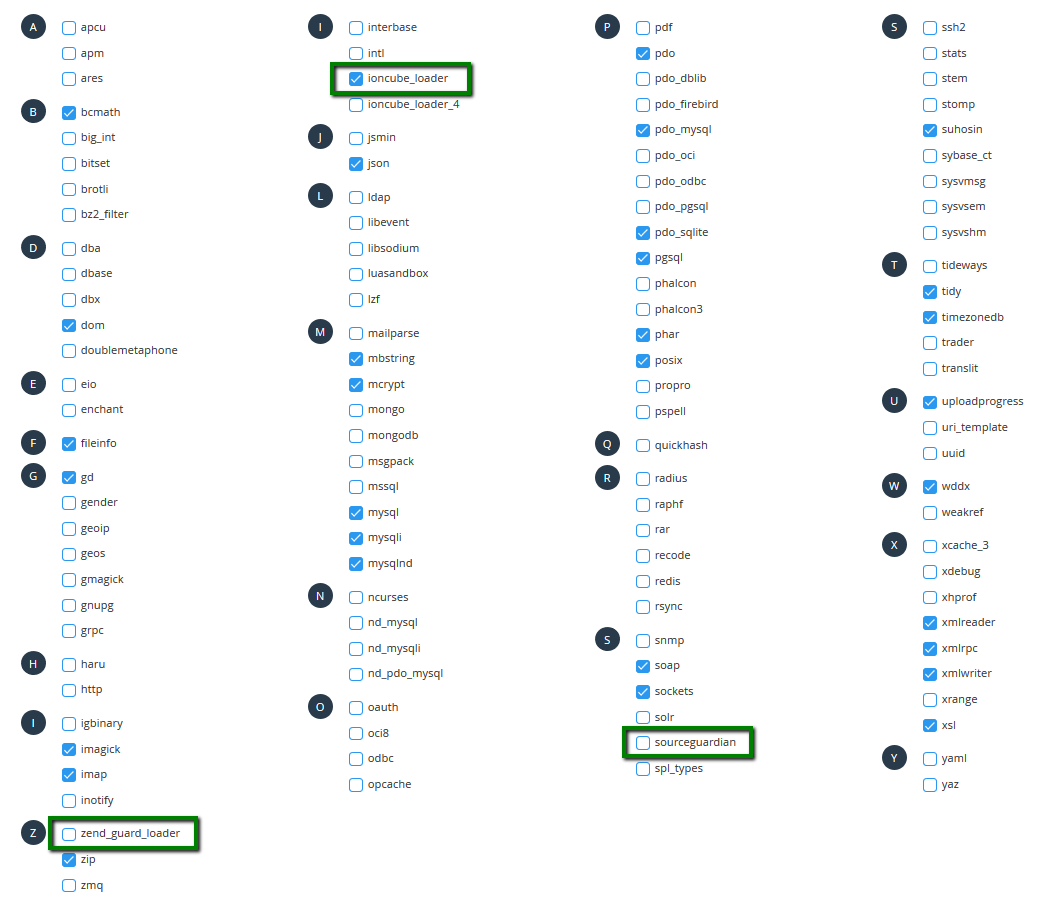
At the same time, PHP Loaders were designed to perform decryption of such secured files directly on the server, performing additional optimization during the deployment process. In simple words, PHP Loader is a PHP extension responsible for reading and executing PHP files encoded with a corresponding encoding product. A simplified presentation of the working principle of such products can be found below:

Currently, we provide three most popular PHP Loaders to decrypt protected applications on our shared servers: IonCube Loader, Zend Guard Loader and Source Guardian.
NOTE: Depending on the encoder used to encrypt the files, a corresponding PHP Loader should be chosen in order to run applications smoothly on our servers and prevent any incompatibility issues during the deployment process.
How can I enable PHP loaders:
for cPanel Basic theme
for cPanel Retro theme
for cPanel Basic theme:
If you have a Regular Shared Hosting account with us, follow the steps below:
1. Log into the cPanel.
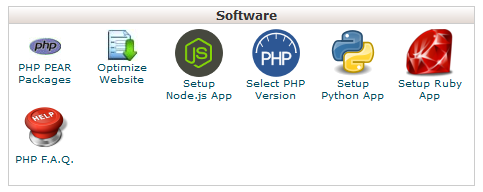
2. Go to the Software section >> the Select PHP Version menu:

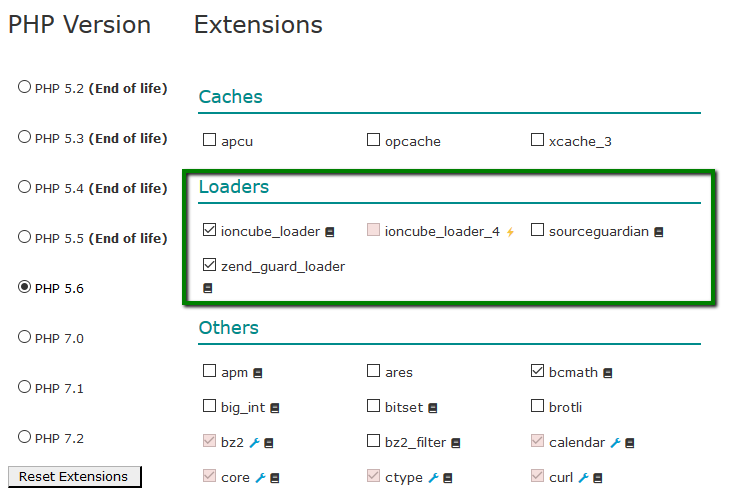
3. Enable the required loaders - the changes will be saved automatically:

If you have a Business Shared Hosting account, you will need to do the following:
1. Log into the cPanel.
2. Click on the PHP Tweaks menu in the Exclusive for Namecheap Customers section:

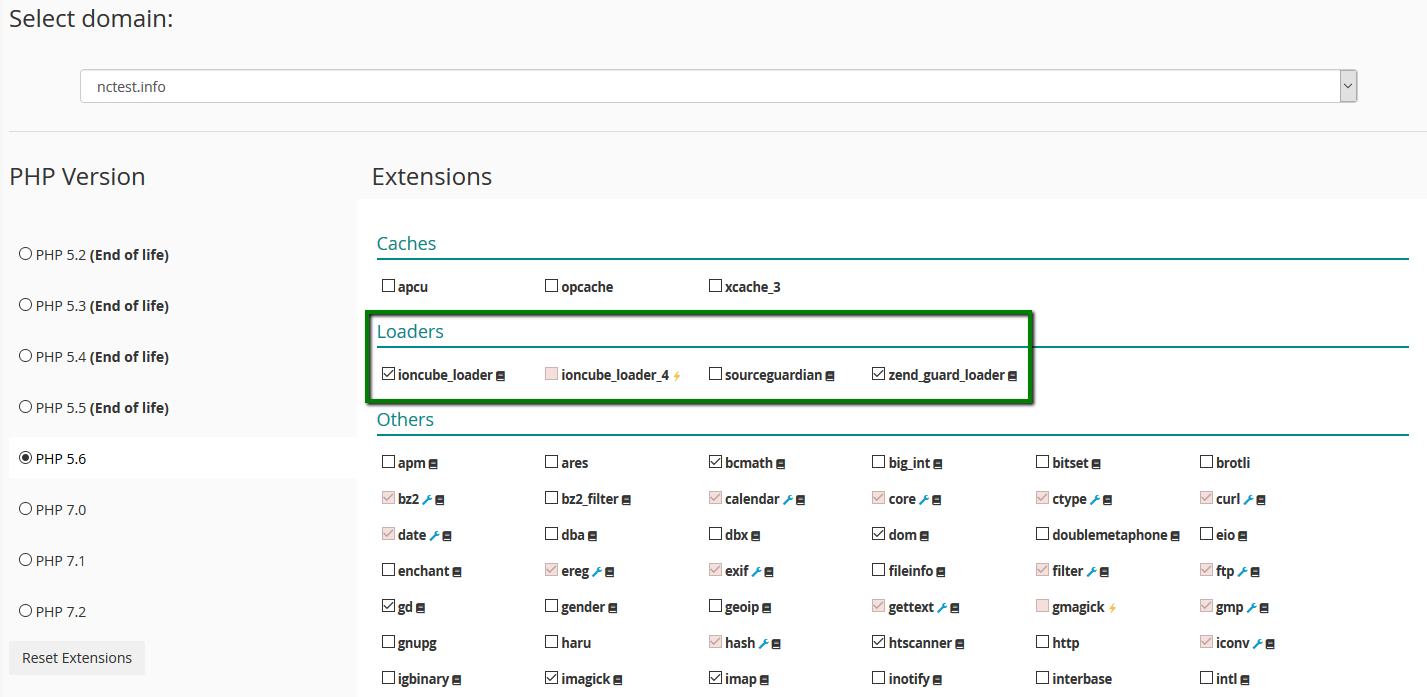
3. Choose the domain to perform changes for in the Select domain drop-down menu and enable the required PHP Loader in Loaders:

for cPanel Retro theme:
If you have a Regular Shared Hosting account with us, follow the steps below:
1. Log into cPanel.
2. Go to the Software section >> the Select PHP Version menu:

3. Enable the required loaders - the changes will be saved automatically:

If you have a Business Shared Hosting account, you will need to do the following:
1. Log into the cPanel.
2. Click on the PHP Tweaks menu in the Exclusive for Namecheap Customers section:

3. Choose the domain to perform changes for in the Select domain section and select the required PHP Loader in Loaders:

That's it!
      Need any help? Contact our Helpdesk
Â
Categories
- cPanel Question 47
- cPanel Software Management 29
- cPanel Tutorials 13
- Development 29
- Domain 13
- General 19
- Linux Helpline (Easy Guide) 156
- Marketing 47
- MySQL Question 13
- News 2
- PHP Configuration 14
- SEO 4
- SEO 42
- Server Administration 84
- SSL Installation 54
- Tips and Tricks 24
- VPS 3
- Web Hosting 44
- Website Security 22
- WHM questions 13
- WordPress 148
Subscribe Now
10,000 successful online businessmen like to have our content directly delivered to their inbox. Subscribe to our newsletter!Archive Calendar
| Sat | Sun | Mon | Tue | Wed | Thu | Fri |
|---|---|---|---|---|---|---|
| 1 | 2 | 3 | 4 | 5 | 6 | |
| 7 | 8 | 9 | 10 | 11 | 12 | 13 |
| 14 | 15 | 16 | 17 | 18 | 19 | 20 |
| 21 | 22 | 23 | 24 | 25 | 26 | 27 |
| 28 | ||||||
Recent Articles
-

Posted on : Sep 17
-

Posted on : Sep 10
-

Posted on : Aug 04
-

Posted on : Apr 01
Tags
- ts
- myisam
- vpn
- sql
- process
- kill
- tweak
- server load
- attack
- ddos mitigation
- Knowledge
- layer 7
- ddos
- webmail
- DMARC
- Development
- nginx
- seo vpn
- Hosting Security
- wireguard
- innodb
- exim
- smtp relay
- smtp
- VPS Hosting
- cpulimit
- Plesk
- Comparison
- cpu
- encryption
- WHM
- xampp
- sysstat
- optimize
- cheap vpn
- php-fpm
- mariadb
- apache
- Small Business
- Error
- Networking
- VPS
- SSD Hosting
- Link Building
- centos
- DNS
- optimization
- ubuntu


