How to configure a dedicated IP address to show the website
- Tips and Tricks
- 2,628 views
- Aelswith E.

If you wish to have your website accessed via the IP address-based link, the first thing you need is a dedicated IP address.
On our Shared packages one main server IP address is used by different cPanel accounts on it, thus, it is not possible to assign your domain to it. In such cases, you can purchase a dedicated IP address that allows having a unique server IP address for your account on Shared server.
PLEASE NOTE: due to certain technical restrictions, it is possible to assign only one dedicated IP address to a single cPanel account on Shared server.
There are two main ways to set the IP address as a website link: via WordPress admin dashboard and via website database.
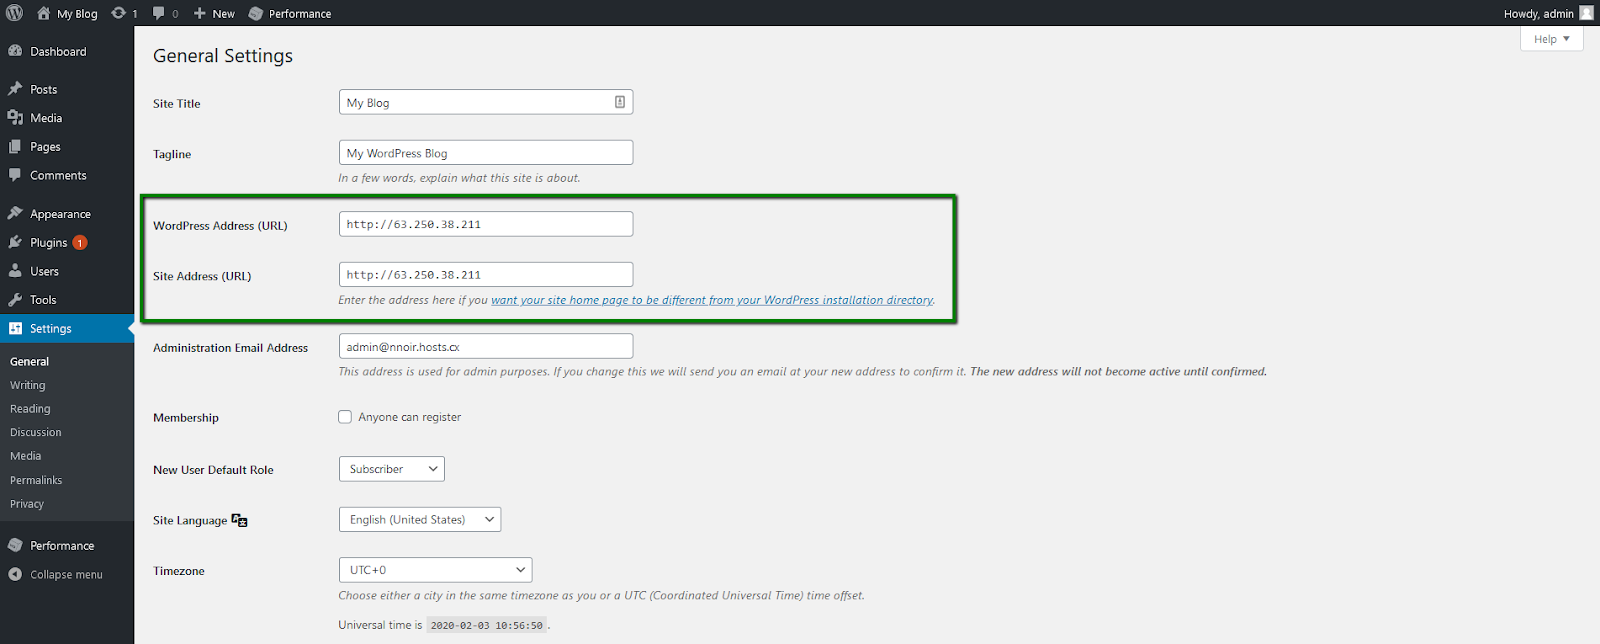
To change the website URL in your WordPress admin dashboard, please follow these steps:
1. Log in to the WordPress admin panel >> go to the Settings menu >> General.
2. Update WordPress Address (URL) line and Site Address (URL) lines and save the changes:
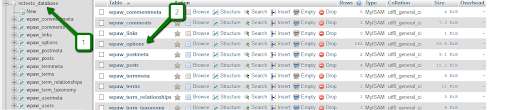
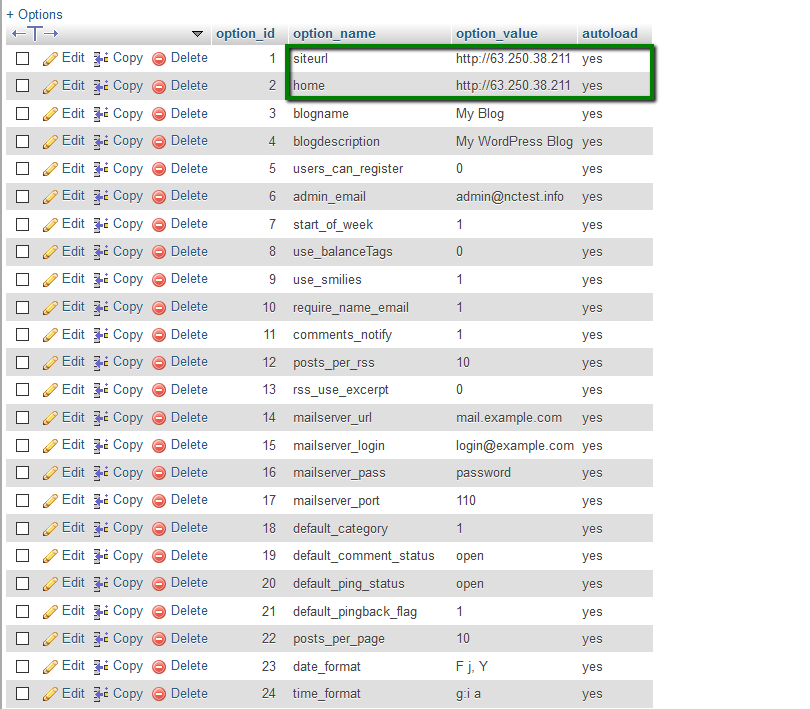
To change the website URL in your website database, please follow these steps:
1. Locate the database name in wp-config.php file.

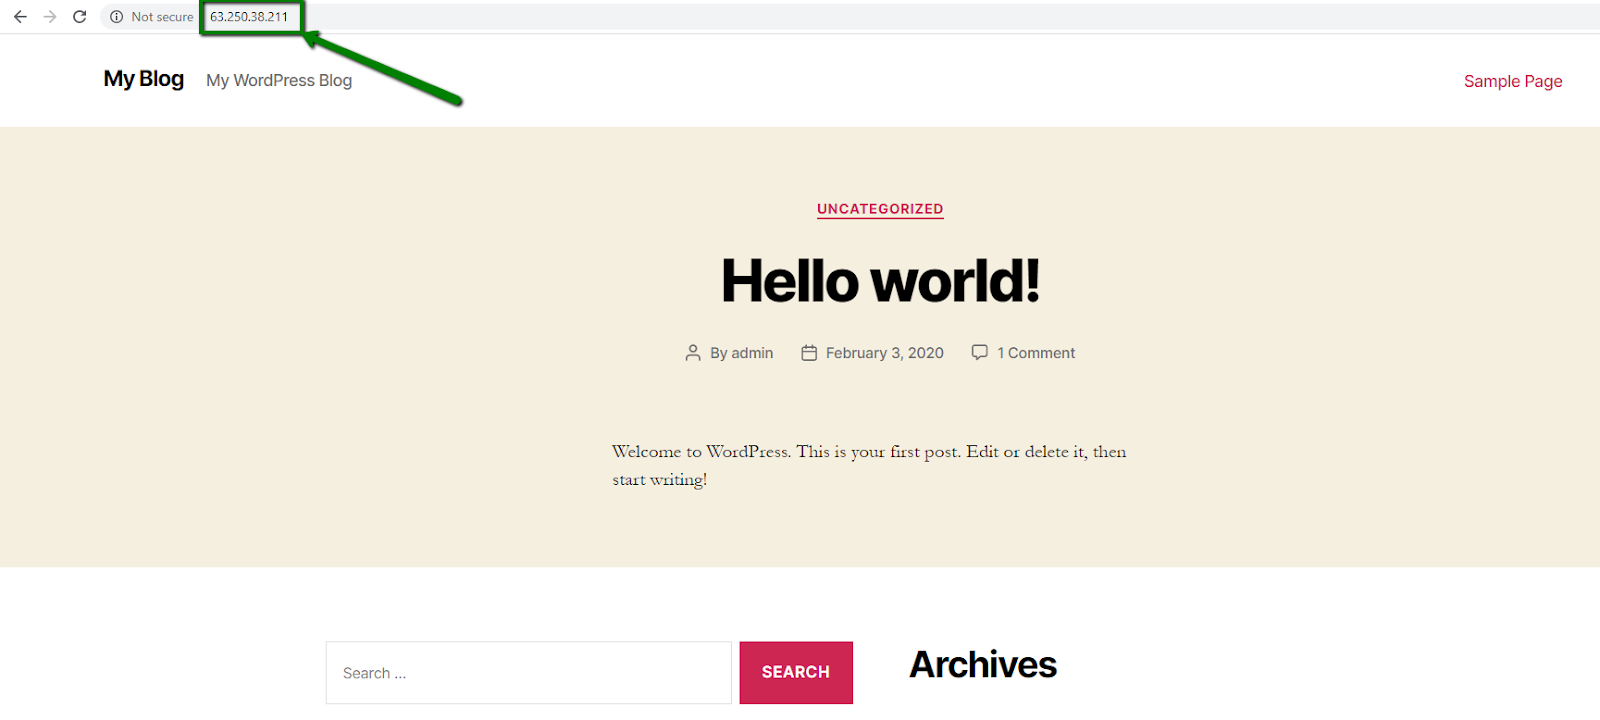
In case the account contains multiple websites hosted in it, the IP address gets assigned to a random domain by default.
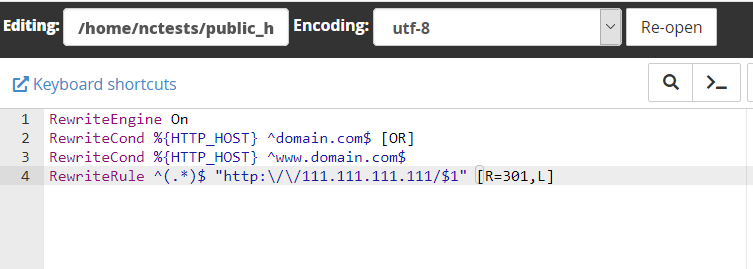
If you wish to have a certain domain to a dedicated IP address redirected in your account, please follow these steps:
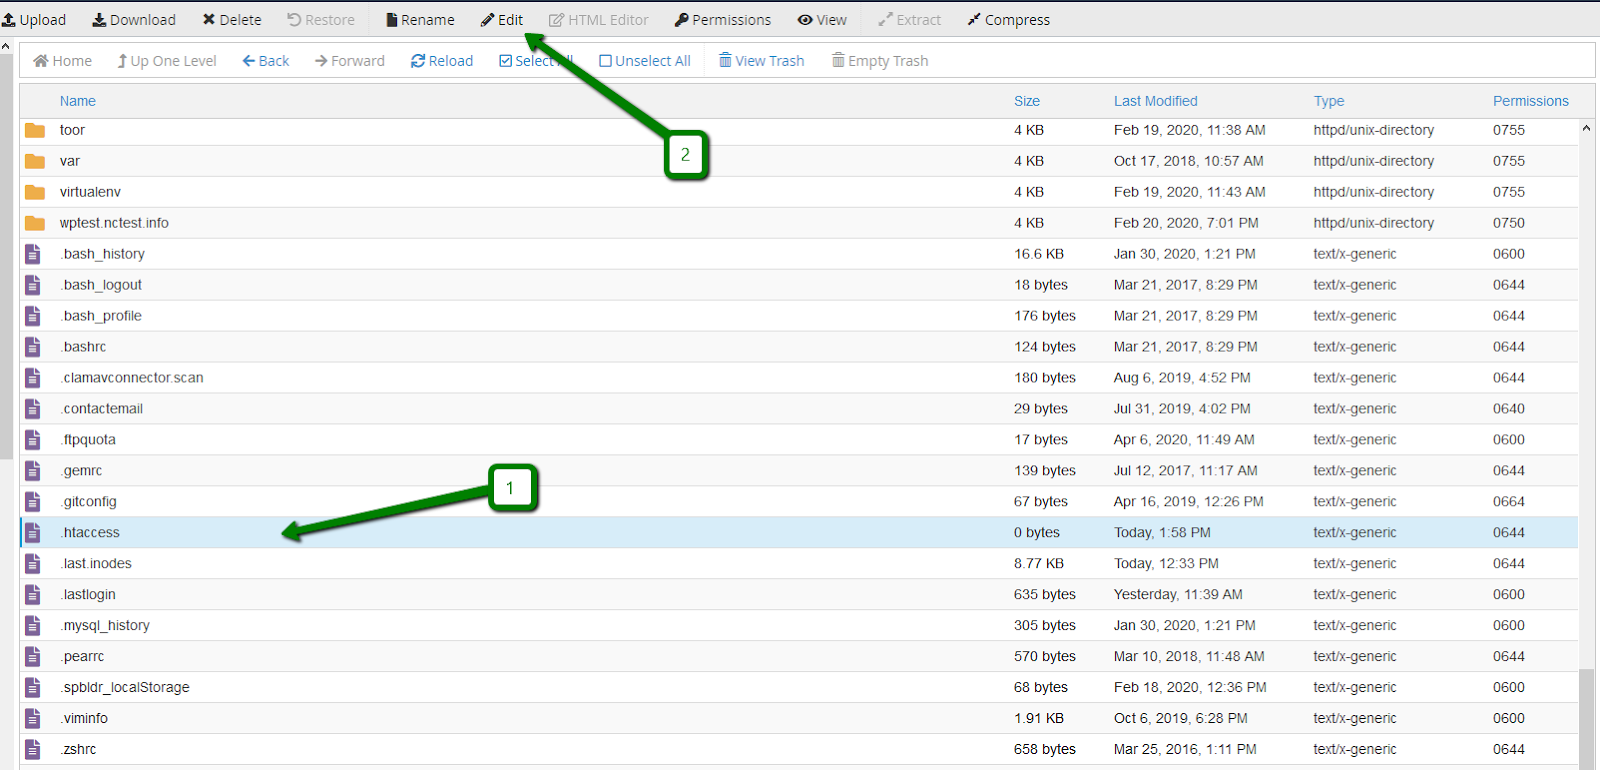
1. Locate the .htaccess file of your domain`s root directory in cPanel >> File Manager menu. If there is no such, you can create it using this tutorial.
2. Click on the file and choose Edit at the top bar:
RewriteEngine On
RewriteCond %{HTTP_HOST} ^domain.com$ [OR]
RewriteCond %{HTTP_HOST} ^www.domain.com$
RewriteRule ^(.*)$ "http:\/\/111.111.111.111/$1" [R=301,L]