Google Site Verification: 7 Ways to Verify With Search Console
- SEO
- 4,322 views
- Barton S.

You want to add your site to Google Search Console. But before Google will start letting you control your site, view your analytics, or submit your sitemap, it’s asking you to verify your site, right?
Essentially, Google site verification is about proving that you actually own the site you’re trying to add. Google doesn’t want to give those powers above to just anyone, so Google requires webmasters to complete the Google Search Console verification process before they can manage their sites.
Thankfully, this process is pretty simple, and there are a variety of ways in which you can verify your website with Google Search Console.
In this post, we’re going to cover 7 different Google site verification methods in two categories:
- Manual methods to verify your site with Google. These methods work for all websites, including WordPress sites.
- WordPress plugins to help with Google site verification. Many SEO plugins offer site verification functionality, so that’s a great option for most WordPress users.
You can click above to jump straight to one of the sections. Otherwise, we’ll get started with the manual methods.
Five Manual Methods for Google Site Verification
If you’d prefer to use a WordPress plugin to verify your site with Google, click here to jump to that section.
1. HTML Verification File
With this method, you just need to upload an HTML file to the root directory of your website. It’s simple, but the downside is that you will need access to your server to upload the file, either via FTP or something like cPanel File Manager.
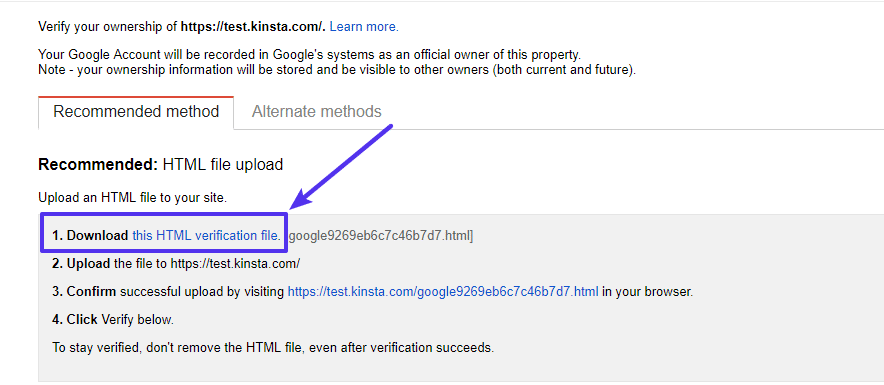
Step 1: Download Verification File
After you add your site to Google Search Console, you should see an option to download an HTML verification file in the Recommended method tab. Download this file to your computer:
Step 2: Upload File Via SFTP
Next, you’ll need to connect to your website via SFTP. Here are instructions for how to use SFTP at Host SEO.
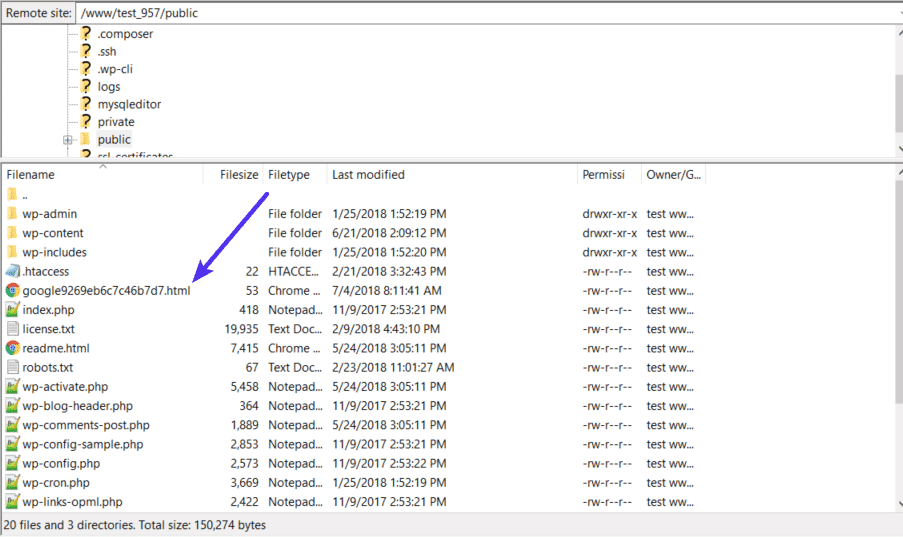
Once you’ve successfully connected, upload the file that you downloaded from Google to the root folder of your site (this is the folder that contains the wp-content folder, wp-config.php, etc.) At Host SEO, this folder is named public.
After uploading the file, it should look something like this:
Step 3: Click Verify Button At Google Search Console
Once you’ve uploaded the file to your site, go back to Google Search Console and click on the Verify button to complete the process:

You can also use this method to verify the Host SEO CDN with Google Search Console.
2. HTML Tag
With the HTML Tag method, you need to add a simple meta tag to your site’s <head> section. If you’re using WordPress, you can do this by:
- Adding the tag directly to your child theme’s header.php file
- Using a plugin to inject it into the header
We’ll show you how to do it using the plugin method – but it’s also fine to add it directly to your theme as long as you’re using a child theme (if you don’t use a child theme, you’ll lose your Google site verification every time you update your theme).
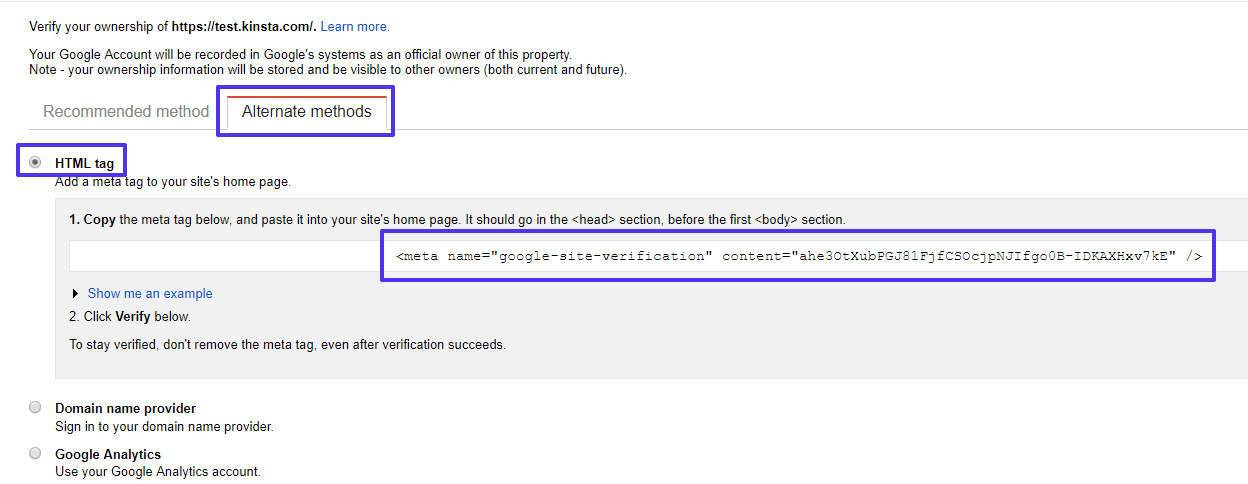
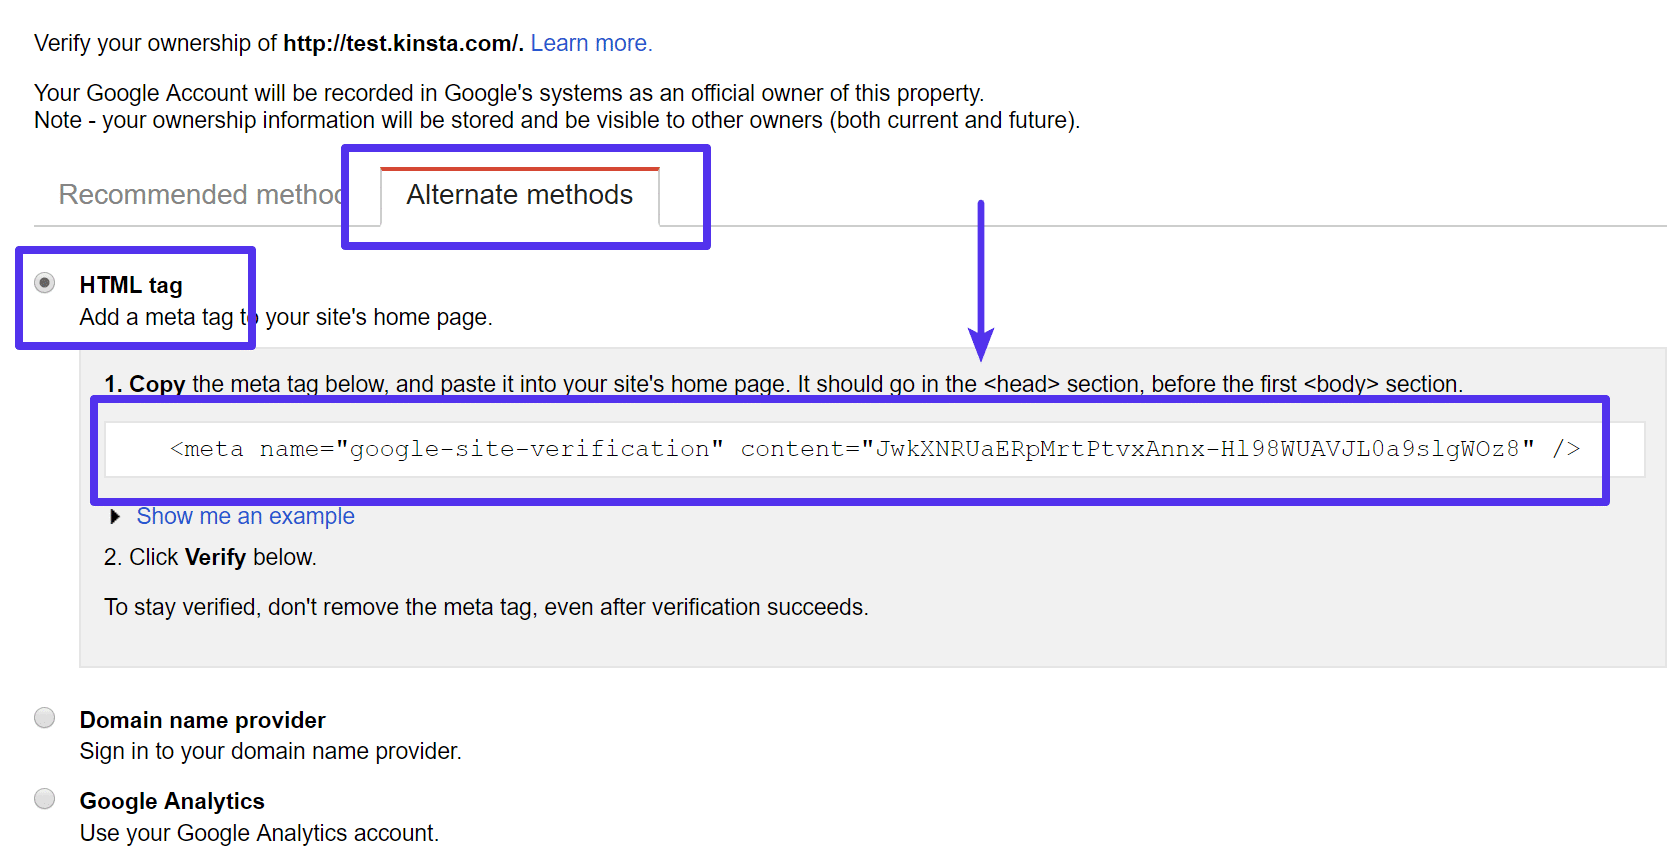
Step 1: Copy Google Site Verification Meta Tag
To find the meta tag, go to the Alternate methods tab in the Google Search Console interface. Select HTML tag and copy the value in the box:
Step 2: Add Meta Tag Using Insert Headers And Footers
Next, install the free Insert Headers and Footers plugin at your site. Then, go to Settings → Insert Headers and Footers and paste the meta tag in the Scripts in Header box:
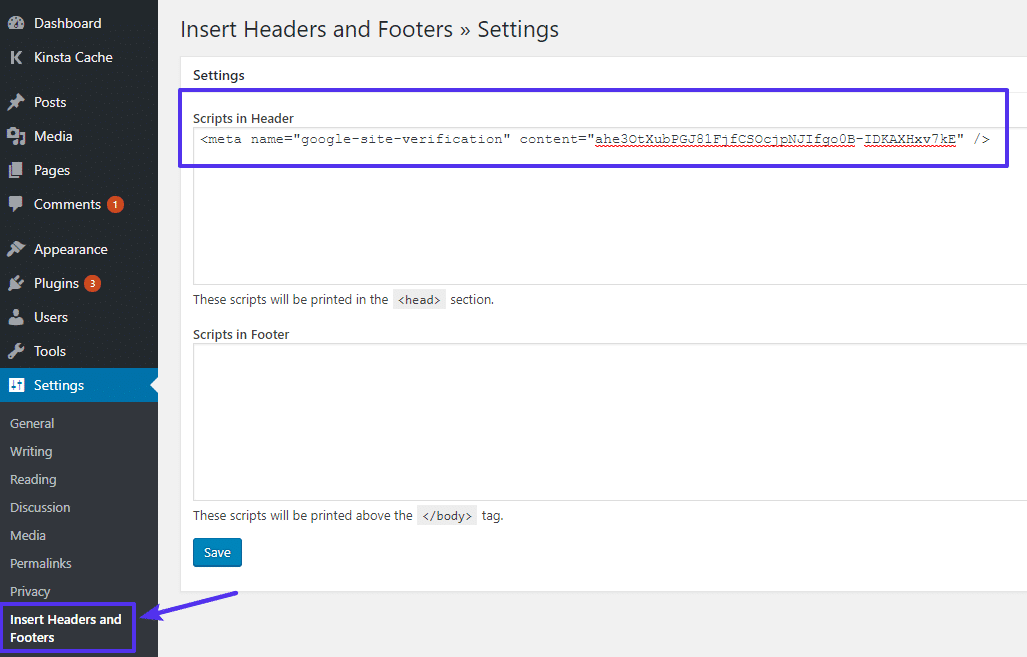
Click Save.
There are also some alternative ways in our in-depth post on how to add code to your WordPress header and footer.
Step 3: Click Verify Button At Google Search Console
To finish the process, go back to the Google Search Console interface and click Verify:

3. DNS TXT Record
With this method, you’ll add a TXT record at your DNS provider instead of needing to add any code to your site. Because there’s no code involved, this is the best method from a pure performance perspective.
Sure – the other Google site verification methods only add a few lines of code – but every bit counts when it comes to performance, right? So if you’re a performance optimization fanatic, this is the method that you should use. Learn more about DNS site verification.
Step 1: Get TXT Record
To get the DNS TXT record that you need, go to the Alternate methods tab in Google Search Console and select Domain name provider.
You can then select your domain provider from the drop-down (if applicable). If you don’t see your domain name provider, you can choose Other:
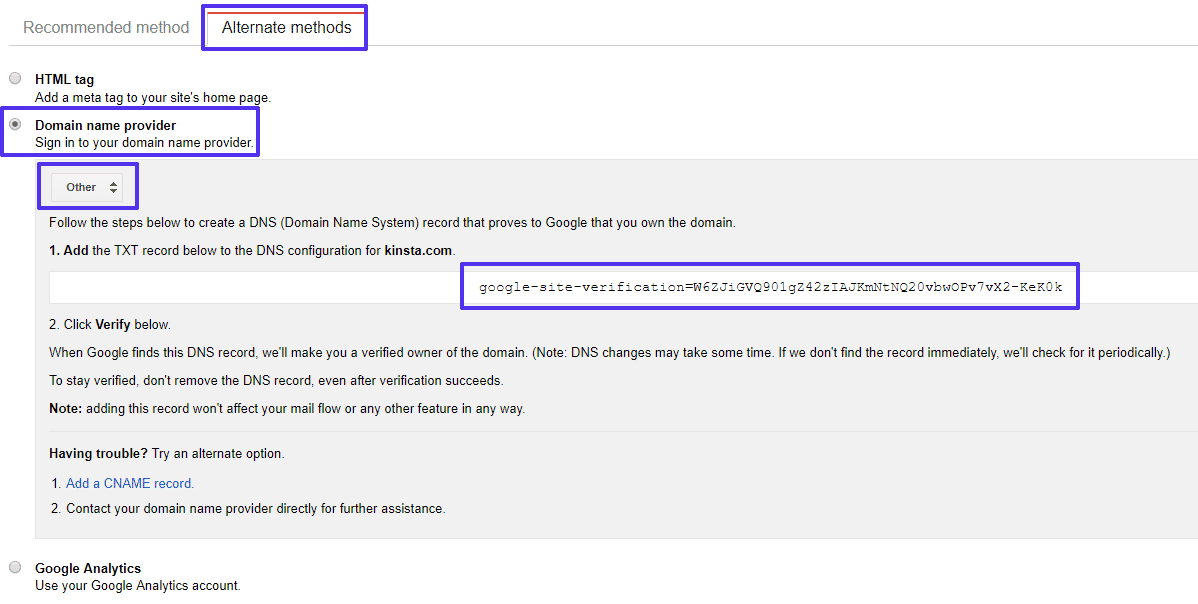
Step 2: Add TXT Record At DNS Provider
Next, you need to add that TXT record at your domain registrar or DNS provider. You should be able to find specific instructions from your provider.
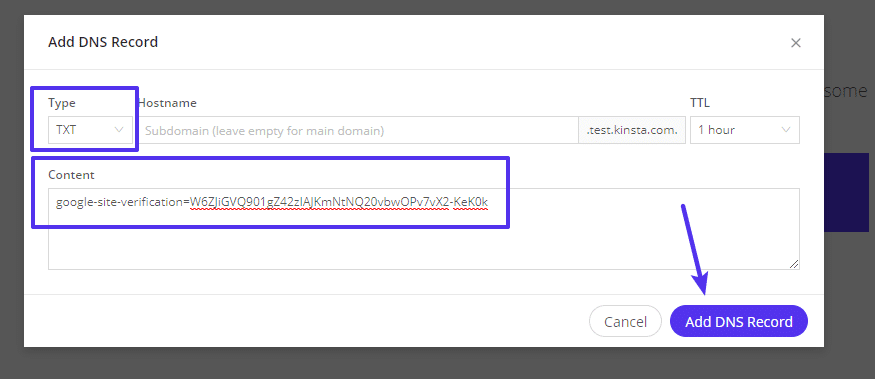
If you’re using Host SEO DNS, you can add this TXT record directly from your Host SEO dashboard.
First, click on the Host SEO DNS option. Then, click Manage for the site that you want to verify with Google Search Console:
Then, add the DNS record. Make sure to select TXT from the Type drop-down:
Step 3: Click Verify Button At Google Search Console
To finish the process, go back to the Google Search Console interface and click Verify:

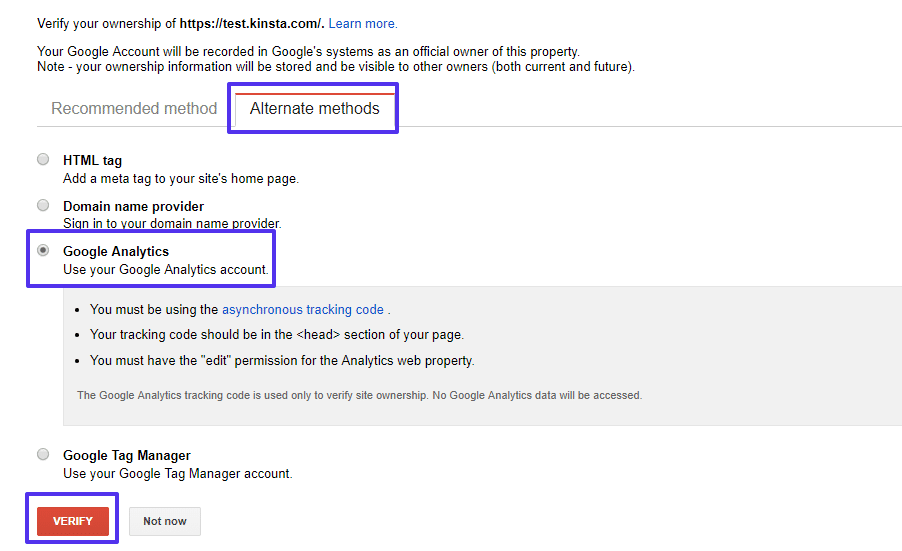
4. Google Analytics
If you already have the Google Analytics asynchronous tracking code installed at your site, you can easily verify your site using Google Analytics.
There’s no detailed step-by-step for this one. Just:
- Go to the Alternate methods tab
- Select the Google Analytics radio button
- Click Verify
5. Google Tag Manager
Just like Google Analytics, if you’re already using Google Tag Manager, you can verify your site with just a single click as long as you have the Google Tag Manager container snippet active on your site.
Again, there’s no detailed step-by-step necessary. Just:
- Go to the Alternate methods tab
- Select the Google Tag Manager radio button
- Click Verify

Two WordPress Plugins to Help With Google Site Verification
Don’t like the manual methods above?
If you’re using a WordPress SEO plugin, there’s a good chance that your plugin of choice offers an easy tool to help with Google site verification. We’ll show you how to do it with the two most popular plugins – Yoast SEO and All in One SEO Pack.
6. Yoast SEO
To complete the Google Search Console verification process with Yoast SEO, go to SEO → General in your WordPress dashboard and select the Webmaster Tools tab.
All you need to do is paste your Google verification code into the box:
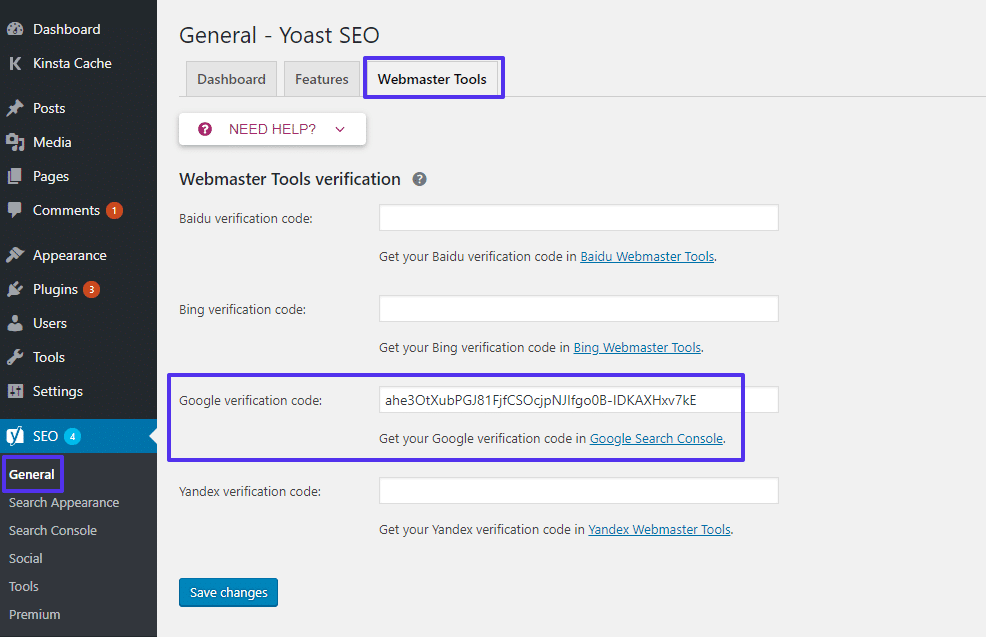
To find your Google verification code:
- Go to the Alternate methods tab in the Google Search Console interface
- Select the HTML tag option
- You can copy the entire tag, the Yoast SEO plugin will automatically strip out the extra, leaving just the code.

Make sure to click Save changes in the Yoast SEO interface when you’re done.
2. All in One SEO Pack
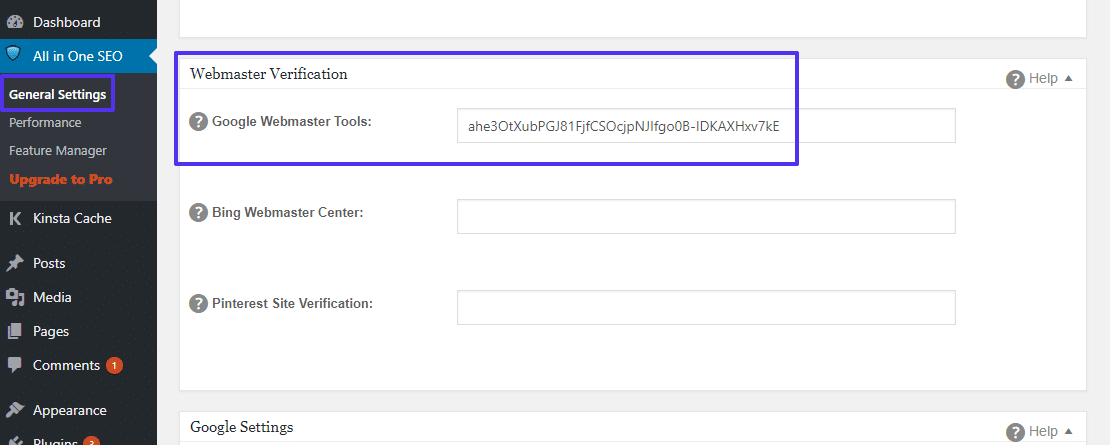
To verify your site in Google Search Console with All in One SEO Pack, go to All in One SEO → General Settings in your WordPress dashboard.
You should see a long list of settings. Scroll down to the Webmaster Verification section and paste your Google verification code into the Google Webmaster Tools box:
To find your Google verification code:
- Go to the Alternate methods tab in the Google Search Console interface
- Select the HTML tag option
- You can copy the entire tag, the All in One SEO Pack plugin will automatically strip out the extra, leaving just the code.
Make sure to click Update Options in the All in One SEO Pack interface when you’re finished.
Which Method Should You Use?
For the absolute best approach for performance, we recommend using the DNS TXT record method because it doesn’t require you to add any code to your site.
Beyond that, there’s not any functional difference between the other methods, so you should pick the method that feels easiest to you.
Just remember – Google will periodically check on your site’s verification. So no matter which method you choose, it’s important to leave that method in place – you cannot remove it after verification.
Do you have any other questions about the Google Search Console verification process? Leave a comment and we’ll try to help!